Wednesday 30 April 2008

WTSIM... Breakfast... And I think it's a Zebra!

I don't usually blog breakfast - mostly because it's usually fruit and yoghurt... but also because it's my least adventurous meal of the day - even when I do cook! A cooked breakfast is bacon and egg muffins, smoked salmon bagels or mushroom & tomato toast. Now, when I saw these zebra tomatoes for sale yesterday I had to have them and as I have dinner plans for the next few days, I decided to do some mid-week brekkie cooking!

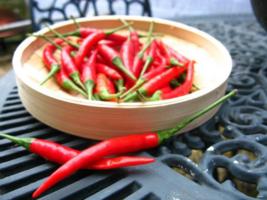
Zebra Tomatoes - how pretty!

Excuse the rubbishness of my photos in this post - it was pouring with rain outside, which was giving off that horrible light which is too dark for taking naturally lit shots, but makes the flash seem... well... a bit odd really! (Can you tell I'm not a photographer?? ;)

Anyway, while catching up on my blog reading I saw that Waiter... There's Something In My... event is breakfasts this month. It must be fate - the only time I've had breakfast food waiting to be blogged about!

Now, this isn't the most exciting recipe in the world - but it is super tasty - and good for you too. I use quite a bit of garlic - so maybe not one to try if you have a lunchtime date ;)

Tomatoes and Mushrooms on Toast

Quantities are approximate and per person!

  • 6 cherry tomatoes
  • 6-9 decent sized chestnut mushrooms, sliced
  • 1 clove of garlic, crushed (!)
  • 1/2 tsp of mixed italian herbs or oregano
  • 1 thick slice of bread - granary or chewy brown are always my favourite - I'd skip white bread for this one!
  • Olive oil
  • Loads of freshly ground black pepper
  • sea salt
Prepare the garlic...
Smoosh up the garlic with a good pinch of sea salt per person, a glug of olive oil and a bit of black pepper.

Prepare the tomatoes...
Cut out the eye of each tomato and place onto grill rack (I used a top heat grill - alternatively, you could roast them!)
Push a little bit of the garlic mixture into each tomato - you should probably have about half the garlic mixture left.

Place under a medium grill for at least 15 minutes.

Prepare the mushrooms...
Heat a glug of olive oil to a low heat in a frying pan. Add the sliced mushrooms and cook slowly until they start to release their juices (probably 10-15 minutes). Add the rest of the garlic mixture, the Italian herbs, a decent pinch of salt, and a load of freshly ground black pepper. Turn up the heat and sauté until the liquid has gone.
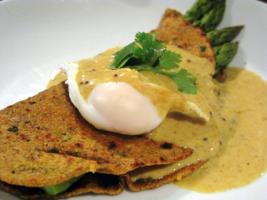
Put it together!
Toast and butter your slice of bread, then gently scoop up the tomatoes and place along side. Top with the mushroom, a drizzle of olive oil and some parsley if you have it (I didn't this time).

Enjoy with a strong mug of coffee - didn't you know coffee helps garlic breath??

Spicy Crunchy Chana Dal

I went to my local Asian food store a couple of days ago to satiate an urge for some spicy bombay mix. But, for the first time ever... there was none! I walked down to the next store... and again, disappointment. What was I to do - I was starving hungry and my curry wasn't going to be ready for another hour...

I returned to the first store in the hope that my eyes had deceived me, and whilst I didn't find bombay mix, I did find a large bag of fried spiced chana dahl. The lovely gent at the counter asked me if I planned on eating them (confused? What else??!) When I confirmed I was indeed planning on munching my way through the lentilly goodness he warned me they may be rather dry and offered me this recipe instead.

I have made a couple of alterations - using lime instead of lemon (it's what I had in!) and adding some chilli (I was still suffering from underactive taste buds at this point).

I'm so glad they were out of bombay mix!

Spicy Crunchy Chana Dahl


  • 1.5 cups fried chana dhal (I'm going to try making this myself soon - watch this space for a recipe!)
  • 2 red chillis (or to taste)
  • 1 red onion, finely chopped
  • 1/2 clove of garlic
  • A little bit of grated ginger
  • Teeny bit of oil
  • 1 lime

Heat the oil in a frying pan. Add the chilli, garlic, and ginger and fry until soft.

Add the red onion and dhal and fry for a minute or so - keep it moving - you're basically just heating it up right now :)

Serve with the lime on the side, to be squeezed over to taste!

Tuesday 29 April 2008

Store Cupboard Chronicles: week 3

Just a quick note to let you know how the store cupboard challenge is going!

...and the answer is pretty good actually!

I had a funny week last week - being off sick with work meant I was able to cook a lot more...but then I had my folks down for the weekend, which meant we ended up eating out a lot. I have to say the week ended better than it started!!

My stocks are definitely getting much lower - I actually had to buy rice to go with a curry - when I started I had about 7 packs of rice of varying fullnesses! I have a few things I still want to make from my store cupboard, so I have decided I'm going to do one more week - to make it a whole month of store cupboard cooking!


Store Cupboard Chronicles Week 3


Monday, Day 16

  • lunch - Left over Spicy Bulgar Wheat Salad
  • dinner -Left over Roast Beef Panini & Spicy Tuna fish cakes (recipes to follow!)
Tuesday, Day 17
Wednesday, Day 18
  • lunch - Garlic and Chilli Fried Gnocchi (somewhat disastrous recipe to follow!)
  • dinner - Beef and Caramelised Onion Pasta (recipe to follow!) with Garlick'd Focaccia!
Thursday, Day 19
  • lunch - Grilled Halloumi salad
  • dinner - Fish and King Prawn Curry (recipe to follow!)
Friday, Day 20
  • lunch - Ate out - falafel pita
  • dinner - Take away - chicken kebab
Saturday, Day 21
Sunday, Day 22
  • lunch - Eggs on toast
  • dinner - Ate out

Monday 28 April 2008

Vietnamese Crab Noodle Salad

Mmmm... I made this salad last week when I was ill with the cold - I figured I needed something with pretty strong flavours just so I could taste it! And it definitely hit the spot!!

I'm back at work now - feeling loads better. Luckily the cold didn't impact my appetite at all - even though I had days when I couldn't taste anything at all... Y'know - it's really hard to cook when you can't taste or smell!! I made a curry for my mum and dad on Thursday. I was using some new dried habenero chillies - and was really disappointed by how bland they were. Until my mum tried it... after the 2nd glass of water it became apparent that they weren't so bland after all!

But despite the cold and lack of taste, in the end I did manage to do some cooking - I just wasn't up to posting! And not being able to leave the house too much definitely helped me stick to my store cupboard challenge!

I'm sending this over to Ruth at Once Upon A Feast for Presto Pasta Night. I'm so glad you're feeling better now Ruth!

Vietnamese Crab Noodle Salad

Per person, multiply at will!

For the salad:
  • rice vermicelli noodles, soaked according to packet, rinsed in cold water
  • 1 scallion, shredded
  • 1/2 medium carrot, grated
  • 5 radishes, grated
  • 1/4 cucumber, seeds removed, and chopped into chunks
  • white crab meat (mine was from a tin!)

For the dressing:
  • 2 tbsp fish sauce
  • Juice of half a lime
  • 1 Thai red chilli, finely chopped
  • 1 clove garlic, crushed
  • 1" piece ginger, finely grated
  • 2 tbsp sugar
  • 1 tsp rice vinegar (optional!)
Garnish:
  • handful of raw peanuts, roasted and roughly chopped
  • rough chopped cilantro

To make the dressing...
Put all the ingredients in a bowl, and mix until the sugar is dissolved

Put the salad together...
Pour half of the dressing over the drained noodles and mix well. Mix the salad veg together with the remaining dressing.
Put the noodles in the serving bowl and top with the veg, then the white crab meat.

Top with the peanuts and cilantro... and enjoy!

Friday 25 April 2008

Think Spice: Spiced Peach Cobbler

My submission to this month's Think Spice, which is being hosted this month over at Canela and Comino. The first time I ever entered Think Spice (ok, ok, so this is only the second time!) it was Think Spice, Think Garlic - and an easy one for me - I go through bulbs of the stuff every month. But this month it is Think Cloves - a much trickier theme!

In keeping with my store cupboard challenge, I decided to make a spiced fruit cobbleresque pudding to use up the tins of mango, peaches and apricots I had in my cupboard... It was not to be however... two out of three of my tins were out of date. (One by over a year... oops... I didn't even realise tinned fruit went out of date!!) So instead this became a mini-cobbler (cobblerini?) spicy with cloves and red chilli, with a crunchy, not-too-sweet topping!

Spiced Peach Cobbler(ini)


This made one small cobbler - enough for two. But there wasn't enough fruit in it for me, so I would add a lot more!!

For the filling:
  • 1 tin peaches in light syrup
  • 1 red chilli, cut in half
  • 3 cloves
  • Zest of 1 lime
For the topping
  • 1/4 cup brown sugar
  • 1/4 cup rolled porridge oats
  • 1/4 cup wholewheat flour
  • 1/4 cup almonds, roughly chopped
  • 1/2 tsp baking powder
  • 50g butter, very cold, cut into cubes
  • 1 egg
  • a splash of milk
  • 1/2 tsp cinnamon
To make the filling...
Strain the peaches from the syrup, and place the syrup into a saucepan. Add the chilli and cloves, bring to the boil and leave to simmer for 15 minutes. Add the peaches and lime zest and simmer for another 5 minutes.

Remove the peaches and place into a large ramekin, then spoon over some of the syrup - making sure not to add any of the cloves or chilli!!

Prepare the topping...
In a food processor, blitz all the ingredients together until the butter is in small pieces.

Spoon this mixture over the peach filling.
Make it up!
Place ramekin into a preheated oven (180c) for 40-45 minutes - until a skewers comes out clean from the middle.

Serve with custard!


Tuesday 22 April 2008

Taste & Create: Focaccia

This is my entry for this month's Taste and Create, which is hosted by the lovely Nicole over at For The Love of Food! This month I have been matched with KJ over at A Cracking Good Egg. I spent a fun couple of hours looking through her archives, and eventually narrowed my choices down to the luscious Flourless Chocolate Cake, her take on French Onion Soup, homemade crumpets, or Fantastic Focaccia. Due to serious overindulgence at the weekend, I've had to forgo the chocolate cake, I couldn't find my crumpet rings (I'm sure I had something like this before!), then arbitrarily decided on Focaccia between the last two! I'm definitely keeping these other recipes in my to-make list!

(I've got a rotten head cold just now - which seems to be adversely affecting my writing ability. Apart from the fact that I need to retype every other word due to misspelling (do colds cause the hapless victim's fingers to swell??) I also can't think of anything remotely interesting to say! I'm off work and watching daytime telly - right now, I'm watching a 6ft tall nanny being transformed into SJP. Oh dear, has it really come to this - I'm regaling you with what I'm watching on TV??? I should probably delete it, but bet I probably don't ;)

Ok, ok, stream of consciousness typing ends here!

Focaccia


This recipe was really easy to use. I had to make a couple of alterations - I used 1.5 tsp of active dry yeast, activated in the tepid water with 1.5 tsp of sugar instead of the fresh yeast.

I also let it rise slighty differently - I placed the runny dough into the greased baking tin before a first prove for 40 minutes or so. I then used an oiled spoon handle to push down the dough and create indents in which the olive oil would run. I then recovered it and left it for another half hour. Just before baking I drizzled some extra virgin olive oil over the surface and sprinkled with maldon sea salt.

The resulting bread was really tasty - with a lovely open springy texture - I'm looking forward to trying it again with some different toppings!


Monday 21 April 2008

Store Cupboard Chronicles: week 2

Yay - this week's store cupboard eating was somewhat more of a success! I've run down loads of my tins and grains... even though I did cheat yesterday and buy a beef joint for roasting... Well, it was incredibly well priced sirloin joint - 2.2 kilos for £10!!! How could a girl say no! So this week, expect to see at least a few recipes featuring roast beef leftovers...

My other main challenge for the last week has been trying to sort my blog template out. It's been a mission, and yesterday I noticed that my existing template has become corrupted by my attempts. So I'm going to have to bite the bullet and set to work - if you visit over the next couple of days, be prepared for random widgets appearing and disappearing! But hopefully by next week I'll be sorted :)

Store Cupboard Chronicles Week 2

Monday, Day 9

Tuesday, Day 10
Wednesday, Day 11
Thursday, Day 12
Friday, Day 13
Saturday, Day 14
  • lunch - Pita bread with hummus
  • dinner - Had dinner with friends - chili con carne - yum!
Sunday, Day 15

Sunday 20 April 2008

No Croutons Required: Spicy Mushroom Bulgar Salad

Hello and Happy Sunday!

This will be a short post - I'm about to go out and mow the lawn... in a vain attempt to restore order to the jungle before my parents come to visit on Thursday! But on the positive side, it is gorgeous outside - I even managed to get my pics taken outside!

But I just realised that today is the deadline for No Croutons Required, jointly hosted by Lisa and Hollers. It's the third one - and a great event. This month the theme is mushroom soup or salad - I couldn't miss it!

So without further ado - I present...

Spicy Mushroom Bulgar Salad


  • 1 cup bulgar wheat
  • hot vegetable stock (approx 250ml - enough to cover the bulgar wheat by a cm or so!
  • 1 red chilli, finely chopped
  • 1 clove garlic, crushed
  • Approx. 500g mixed mushrooms - I used 2 portabellos, and equal amounts of oyster and chestnut!
  • 12 sun dried tomatoes, roughly chopped
  • Small handful of pinenuts, lightly toasted
  • 2 tbsp balsamic vinegar
  • 5 tbsp extra virgin olive oil
  • 1 tsp dried chilli flakes
  • maldon sea salt (or normal!)
  • rocket leaves
Make the Bulgar What...
In a dry frying pan, toast the bulgar wheat for a few minutes until it turns golden. Transfer to a bowl and cover with the stock. Cover and leave for 10 minutes. Check that it is cooked through and all the stock is absorbed - you may need to add more water and leave for a bit longer. Once cooked, fluff up well and cover.

Make the dressing...
Chuck the oil, vinegar, a couple pinches of salt and the chilli flakes into a jar and shake til emulsified. Or whisk it. It's really up to you!

** As soon as both the dressing and the bulgar wheat is ready, pour 1/2 the dressing into the bulgar wheat and mix well. Cover again and set aside.

Frying the mushrooms...
Prepare the mushrooms by peeling those that need peeled, cleaning those that need cleaned, and chopping into decent sized bits. Heat frying pan to a low to medium heat, add a glug of olive oil, then add the mushrooms. Fry slowly, stirring frequently. Once the water starts to come out of the mushrooms, add the garlic, chilli and a good pinch of maldon salt. Fry for another couple of minutes, then add to the bulgar wheat mix.

Putting it all together...
Add the sun-dried tomatoes and most of the pinenuts to the bulgar wheat and mix well. Use the remaining dressing to dress the rocket leaves. Put a handful on each plate. On top of that add the bulgar mix, and garnish with a few of the remaining pinenuts.


Right, got to go and make the most of this sunshine... by gardening!

Friday 18 April 2008

Thai Green Curry with Chicken and Peppers!

Well, here we go - that ubiquitous favourite, popular in restaurants, gastropubs and even my local Chinese takeaway...

Ladies and Gentlemen, won't you please pick up your cutlery for...

Thai. Green. Chicken. Cuuuurrrrrrrrry!!!!!!!!!

But seriously - this is one of those dishes where there is a reason why it is so popular. It is gorgeous, a perfect fit for the four fundamentals of Thai cuisine: hot, salty, sweet and sour.

And ever so easy to make (especially with the help of my old friend Mae Ploy!) With a food processor, making curry paste is one of the easiest and quickest things in the world. However, it can also get expensive if you have to buy all the ingredients from scratch, and many pre-made Thai curry pastes are excellent, quick and cheap! (I'm starting to feel like Delia now... must shut up!) Anyway, enough of the self-justification for buying something that isn't completely 'from scratch' ;)

Thai Green Curry with Chicken and Peppers!


Serves 4-6 depending on portion size!
  • 4 chicken breasts, diced
  • 1 red pepper
  • 1/2 courgette, cut into chunks and fried over a very hot heat for a few minutes
  • 1/2 aubergine, cut into chunks and fried over a very hot heat for a few minutes
  • 3 lime leaves, shredded
  • 1 clove garlic, crushed
  • 1" piece ginger, grated
  • 3 tbsp curry paste
  • 1 400ml tin coconut milk, or two small ones
  • Oil to fry
Heat oil in a hot wok, add 2 tablespoons of curry paste and fry for about 30 seconds. Add the chicken and fry until opaque. At this point add the ginger, garlic, lime leaves, any solids from the coconut milk and the remaining paste. Fry for another couple of minutes.

Stir in the remaining coconut milk and the red peppers, then turn to a simmer. Allow to simmer uncovered for about 6 minutes - until the peppers are slightly softened, but still have a good 'bite'.

Add the aubergine and courgette, simmer for another couple of minutes and serve over steamed rice.

How easy was that!


Malaysian Vegetable Curry

It seems like ages since I've posted here! I've spent quite a bit of time this week trying to force my blog into a 3 column layout, and slowly pulling my hair out... Hence my earlier rant post!

I have also been sticking to my store cupboard challenge pretty well - I've limited eating out to a minimum, and even had four friends round for curry on Wednesday to help me out! However, a lot of the time, eating from my store cupboard seems to mean there is very little of interest to tell you about!

On Wednesday I invited the girls round for dinner - and there was only going to be two options... either pasta (to use up the kilos of the stuff I have discovered lurking in my cupboard) or curry (to use up the rice & tins of coconut milk) For either option, my kitchen was full of possibilities - frozen chicken or beef, lentils and other legumes, tinned tomatoes, a million spices and pastes so I knew I'd work out something. I was also ready for some vegetables and healthiness, so when I finally chose curry I decided that one of them would vegetarian - and here it is!

Malaysian Vegetable Curry

This makes loads! You could probably feed 6 as a main, or more as a side.
  • 2 cups lentils - washed (I used a mixture of red and yellow, if you use any other type note that it will probably affect the cooking time.)
  • 1 onion, thinkly sliced or chopped - it's up to you!
  • 3 cloves garlic, crushed
  • 1" piece ginger, grated
  • 3 thai red chillies - stalk removed, and halved lengthways
  • half head of cauliflower, cut into bite sized pieces
  • handful of green beans, washed and cut in two
  • 1/2 courgette, cut into chunks and fried over a very hot heat for a few minutes
  • 1/2 aubergine, cut into chunks and fried over a very hot heat for a few minutes
  • 1 tin coconut milk
  • 1 tin chopped tomatoes
  • 1 tbsp madras curry powder (Not what I would usually use, but I was using stuff up!)
  • 1 tsp tumeric powder
  • 1 tsp chilli powder
  • 1 tsp ground cumin
  • 1 tsp black mustard seeds
  • 1" piece of stick cinnamon
  • Either coconut oil/ ghee/ normal oil for frying - in that order of preference!
  • Fish sauce(opt!), salt and soy sauce to taste
In a large saucepan (this is a biiiiiiggg curry!) heat the grease of your choice over a medium heat. Add the mustard seeds * and keep moving until they start to pop, then add the onions and fry until soft. Add the ginger and garlic and cook for another couple of minutes.

* if you have them, chuck in a few curry leaves here - I thought I had some, but I had run out!

Add the lentils, chillies and chopped tomatoes and stir well. Add the rest of the spices and mix thoroughly.

Next mix in a little bit of water - just enough to make it properly wet. Hmmm.... I realise how rubbish that instruction is - but basically we're going to cook the lentils for a few minutes and they need water to expand into! I think I added about a cup overall. It doesn't really matter too much :)

Bring to the boil, turn to a simmer, and leave to cook for 10 minutes. (If you are using other types of lentils - extend the cooking time as appropriate here)

Add the cauliflower and the tin of coconut milk, again bring to the boil, turn to a simmer, cover and leave for 10 minutes.

Almost there!

I would fish out the cinnamon stick here - but feel free to leave it in if you want a more cinnamony flavour.

Add in the rest of the vegetables, taste and adjust seasoning with fish sauce, soy sauce and salt.

Simmer uncovered for another 5/6 minutes - or until the lentils and vegetables are cooked to your liking.

Serve with steamed rice and/or rotis.


Tuesday 15 April 2008

A Rant....

Right, so I have been trying to redesign my blog for the last week or two.

And it is driving me batty!

I finally worked out that if I create a test blog I can play around with layouts etc without affecting anything important. I got it looking pretty close... then when I tested it with my real blog all the widgets were in the wrong place. Or had the wrong content. Or just weren't there at all!!!

I don't understand, it's driving me up the wall, and I think KITK might just have to stay the way it is.

Humph.

< end rant >

Tried, Tested and True: Tomato and Rice Soup with Asparagus

Oh no!

I'm late!

:(

Basically I put the wrong date for Tried, Tested and True into my calendar - I thought I had until Thursday... Ooops... Well, here is my submission anyway - Giz and Psychgrad - I'm sorry it's late!

Tried, Tested and True
is a new blog event which is being hosted by Giz and Psychgrad from Equal Opportunities Kitchen. If you haven't checked out their blog, do so. NOW! They are a mother/daughter duo, with cracking writing styles and lovely food. The aim of this event is to showcase the guaranteed crowd pleasers - the dishes that are always appreciated by friends or family.

This month I was at a bit of a loss on what to enter. As I am living off my store cupboard, my choices were limited. Then at the weekend it hit me... SOUP! I love soup - I eat a lot of it - and am used to massive bowls of steaming broth up on Scotland. I have a couple of favourites - one being my thick and hearty garlic and spinach soup. I'm also a huge fan of spicy lentil soup... and of course Scotch broth! But for this round up I decided to post Tomato and Rice Soup with Asparagus. It is a healthy, warming soup, which can be thinned down for summer months, or made almost as thick as a risotto for the winter! As it is coming into Spring, I opted for somewhere in the middle.

The asparagus isn't a constant - but I do usually try to add some extra veg for the vitamins. This was my first purchase of British asparagus this year - how amazing does this look?!


Gorgeous!

No matter what vegetable I use though, my soup is always a hit. Healthy, warming and cheap - I remember the first time I made it at university halls - feeding about 12 of us about 20p each! Ever since then it's always been my standby, my fallback. What I make when I'm feeling ill, or when I'm stressed and really busy. Unexpected visitors? All the ingredients are in the cupboard - and this soup can be ready inside half an hour! Fussy eaters? Everyone like tomato and rice! (Well, just about. And if they don't, there's a chippie on the corner!)

Perfect!

Tomato and Rice Soup with Asparagus


  • 1 cup brown rice, soaked for 1 hour in hot water then drained and rinsed.
  • 10 thick stalks of asparagus
  • 500ml stock - I used turkey stock that had been frozen from Christmas... it even had lovely chunks of turkey meat in it... yum!
  • 500g passata
  • 2 cloves garlic
  • 1 tsp ground coriander
  • 1/2 tsp cayenne pepper
  • 1 tsp smoked paprika
  • Salt and freshly ground black pepper to taste
Put the stock and the passata into a large saucepan and bring to the boil. Add the drained rice, the paprika, cayenne and coriander, cover and turn to a low simmer.

Meanwhile, snap off the woody part of the asparagus stem and gently peel from below the tip. Chop the stem into rounds - each about 3/4 mm thick - and set aside the tips.

In a frying pan heat a glug of olive oil and fry the asparagus rounds - adding the garlic and some black pepper after a couple of minutes. Fry for another couple of minutes. Roughly chop the turkey meat from the stock and add it to the pan, along with the asparagus tips. Turn the heat off and set aside.

Once the rice is cooked, taste the broth and adjust the seasoning. Add the asparagus/turkey mixture and heat until the tips are al dente.

Serve with hunks of granary bread!

Monday 14 April 2008

Store Cupboard Chronicles: week 1

Well, I'm not sure if last week's store cupboard eating was a success or not! I managed not to buy any ingredients (except a bunch of spinach and fruit...) but have barely made a dent in my stocks. At this rate I will be store cupboard eating for weeks. In the event of nuclear warfare, everyone to mine - I will be able to support the rebuilding of the human race.

Now, the real reason I have not made much of a reduction in my stocks is because I ate out most days last week. So I have decided that this week I am going to try to eat dinner at home every day, and to take lunch to work with me. Apart from Thursday as I am going to a gig in London and have to leave straight from work...

Wish me luck!

Store Cupboard Chronicles

Sunday, Day 1
Monday, Day 2
  • lunch - ramen soup
  • dinner - Kraft mac n' cheese (Don't judge me - I'd just got home from the pub! And it was fab ;))
Tuesday, Day 3
Wednesday, Day 4
Thursday, Day 5
  • lunch - ramen soup
  • dinner - ate out at Circus Circus (Chicken Pad Phet Chu Chi and steamed rice!)
Friday, Day 6
  • lunch - ate out at Las Iguanas (shared a selection of tapas with a friend)
  • dinner - A friend cooked dinner for me (Stuffed chicken breasts with salad and potatoes)
Saturday, Day 7
  • lunch - beans on toast
  • dinner - pasta and pesto
Sunday, Day 8

Thursday 10 April 2008

Simple Storecupboard Pitas!

No story, no real recipe - I'm just chronicling my store-cupboard adventures! (This is a delayed post from day 1 btw!)

Pita stuffed with stuff!


Take one pita bread and lightly toast.
Stuff with whatever ingredients you fancy from fridge or store-cupboard!
In this case:
  • hummus
  • rocket
  • kalamata olives, quartered
  • roasted red pepper

Porcini Pappardelle with Chorizo, Feta & Roasted Red Peppers

I went to the cinema last night to watch In Bruges - I managed to get hold of advance screening tickets - yay! After the movies (which I really enjoyed - it was funny... though very, very dark humour!) I met a friend for a couple of drinks at the pub... so by the time I got home at half 10 I was really glad that I had left over pasta to throw together!

It ain't going to win any prizes - but it definitely did the trick!

Porcini Pappardelle with Chorizo, Feta & Roasted Red Peppers


When I made the porcini ravioli a couple of days ago, I had some dough left over, which I made into (very rustic!) pappardelle and dried overnight.

So when I got home, I dry roasted some pinenuts for a couple of minutes then chopped up a piece of chorizo and flash fried it with a couple of glug of olive oil to get a crispy edge. Then I added 1/2 a clove of garlic, 3 sun-dried tomatoes and 1 roasted red pepper. Meanwhile I had chucked the kettle on, and cooked the pasta for 2 minutes in boiling salted water.

Still with me? Hang on in there - I know it's complicated...

So... chuck the cooked pasta into the chorizo pan and stir to mix through. Oh yes, add some of the pasta cooking water here to loosen it off. Crumble a chunk of feta over and mix through until it becomes part of the sauce. Put in a bowl, throw the pinenuts over the top, take a picture for posterity, and there we go - within 12 minutes of arriving home my dinner is on the table! (Or at least my lap - a dining table is a luxury I can only dream of!)

Tuesday 8 April 2008

Chilli Lime Mango!

I found this post by Kavs at The Girl Next Door yesterday, and was immediately interested!

Chilli... for desert!?? That's my kinda dish! And yay - I had all the ingredients to hand!

Mango with a Chilli Lime Kick!

I've departed slightly from the recipe - my mango was pretty ripe - so I diced it and squeezed a bit of lime juice of the pieces.

Then I mulched up half of a deseeded, finely chopped chilli with the zets of a lime and a tbsp of brown sugar.

Sprinkled it over the top, gave it a quick mix - bish bash bosh, job's a good un!

Ravioli with Walnut, Spinach and Porcini

So on my first proper cooking day of my Store Cupboard Challenge (I didn't think that Kraft mac n' cheese last night counted ;) I decided it was time to use up the block of white stilton that I had picked up at the weekend. I had never cooked with it before - but as it was only 30p from the deli counter, so figured I would work out a use for it!

I was going to make cheesecake with it, but my biscuits for the base had gone stale. So I set my mind to a savoury plan... What I really fancied was gnocchi, but I didn't have any potatoes. Eventually I hit on ravioli - but other than white Stilton, I couldn't think what to put in it! I wanted to keep it quite soft and rich - most of my available ingredients were too demanding for this!

The combination of porcini, spinach and walnut wasn't one I'd tried before - but the flavours worked well together. Though I think it was a little rich for a main - I think in future I would serve two or three as an appetiser.

Also, I had never made stuffed pasta before - but I'm happy to report it was fairly event-free!

On a completely separate aside, I went to bed fairly soon after eating this, and it did cross my mind to be concerned about cheese-induced nightmares... But that was not to be - I had very bizarre dreams, which were exceptionally vivid - but not bad at all! Today I found this article comparing the effects of eating British cheese on dreams - and according to the study 85% of females who eat Stilton before bed have very vivid and crazy dreams... So go on gals - knock yourselves out!

Ravioli with Walnut, Spinach and Porcini


I'm sending this over to Ruth at Once Upon A Feast for Presto Pasta Night - though I think she has put me to shame with her proper ravioli making equipment!
  • 250g white stilton
  • 50g dried porcini
  • 2 egg yolks
  • 1 large bunch spinach
  • 2 cloves garlic
  • 1 banana shallot
  • 1 small handful shelled walnuts, roughly chopped
  • 1 handful shelled walnuts, blitzed to crumbs!
  • 1 tsp corn flour, dissolved in a couple of tbsps water
  • 200g tipo 00 flour
  • 2 eggs
  • semolina flour for dusting
Pour a cup of boiling water over the porcini and leave to soak for 30 minutes, or until rehydrated. Strain, reserving soaking liquor.

Making the pasta!

In a blender, blitz half of the mushrooms to a puree. Heat some olive oil and fry the puree for a couple of minutes.

In the blender, mix the flour, mushroom puree and 2 eggs to make a dough - adding a little of the mushroom liquor if required. Remove from the blender, knead for 2/3 minutes until elastic, wrap in film and refridgerate for at least 30 minutes.

Take a look at my post on roasted garlic pasta for more details on making and rolling pasta - I won't write out the details again here!

The filling!

While the pasta is resting, use your blender (yes again! I can't imagine life without my kenwood! ;) to mix 200g of the white stilton and two egg yolks until fluffy.

Chop the shallot, crush one of the garlic cloves and finely chop the remaining porcini. Over a medium heat, fry these for a few minutes until soft. Add to the stilton mix.

Wilt the spinach for a couple of minutes until soft. Strain and squeeze to remove excess water. Add 3/4 of the spinach to the stilton mix reserving the other quarter for the sauce.

Blitz the mix a few times to combine the ingredients, then add the handful of roughly chopped walnuts.

Season well with salt and black pepper!

Make the Ravioli!
Roll out the pasta to the 3rd thinnest setting (See how to roll here!). Cut sheets into manageable sizes! Lay one sheet of pasta out, and place teaspoons of mixture onto it, leaving enough space round the edges to seal it.


Brush the edges with water, and lay another sheet of pasta on top. Starting from one end of the sheet, use a cupped hand to seal the stuffing inside the pasta - making sure there is no air pockets. Cut the raviolis out, trimming the edges as required.

The Sauce!
Dead easy - do this just before serving! Heat a glug of olive oil, crush the remaining garlic clove and fry gently for a minute. Add the remaining spinach, the strained mushroom soaking liquor and the cornflour mix. Stir in the rest of the walnuts, and bring to the boil, then crumble in the remaining stilton. Remove from the heat and stir to melt the cheese into the sauce.

Finishing the Dish!
Cook the ravioli in plenty of boiling salted water for about 3 minutes. Place into a warm dish and drizzle with some olive oil and some of the walnut sauce. Note that the walnut sauce is pretty rich - you don't need much!


Snow! And A Mini-Mission Statement!

Look what we got at the weekend!


Snow in April! Snow in the South East of England is rare enough ;) There was a lot more than this photo portrays - I didn't make it outside early enough to get a decent picture of the good stuff - and my back garden is pretty sheltered! People were making snowmen on the beach and everything! But it only lasted a day - by evening most of it had melted away...

Oh, hang on, I took one out of my window too! Just using my phone camera though, so excuse the quality!

Like my garden? Or the bit you can see from my bedroom anyway!


Anyway, less about the snow - and more about my mini-mission statement!

I generally cook every day - and almost always decide what to cook at work, go to the fishmongers/butchers/greengrocers on the way home or at lunch and buy what I need. This is very different from when I was a commuter and didn't live in a place where I could get my hands on fresh produce quite so easily. I got into the habit of doing a big shop every week or two - and just stopping to buy some veg, bread and milk occasionally to keep us going! Unfortunately I haven't quite shaken the habit of buying more than I need - but it seldom gets used, because I now shop daily.

So my mini-mission is to use up all the stuff in my freezer and cupboards. Currently I don't have space in my freezer to store leftovers - because it's taken up by stuff that I never get round to using! And my cupboards are overflowing - my kitchen isn't big enough to hold so much surplus!

So I have taken an inventory of my kitchen contents, and I now plan to see how long I can last on my store cupboard supplies.

I have decided on some exceptions:
  • I am not going to include breakfast in this as I pretty much always have fruit and yogurt - which is generally better fresh ;)
  • And I will buy fresh fruit and veg if I need it- I would prefer to avoid scurvy!
  • This won't stop me eating out!
  • And finally if I need one or two items to make up a recipe, I won't be militant - just so long as the bulk of the meal is from my list!
So wish me luck, and check back soon to see my store cupboard meals!

Any suggestions appreciated :)

Looking forward to a decluttered kitchen!

Monday 7 April 2008

Hummus Bi Tahina and a Discourse

I love hummus! I've tried a couple of times to make it at home - but it hasn't been as good as the stuff I can get from the wee Turkish shop round the corner. Until now!

Some random titbits about hummus for you...

It is also spelt hamos, houmous, hommos, hommus, hummos, hummous, chumus or humus. The most common Turkish spelling is humus - but as that means 'compost' in English, we generally stick to 'hummus'!

'Humus' is the word for chickpea! So if you make a hummus type dip with another legume - you really shouldn't call it hummus...

I got the above from a great post about hummus from Desert Candy. Check out the rest of the blog too - it's fab!

Traditionally hummus should be made with either tahine or olive oil - but not both! You should drizzle olive oil on the top of either when serving though. (Notice I actually did add a little bit of olive oil to mine !)

Someone has written a food blog - all about hummus!!

I think hummus is better the second day - when the flavours have had time to meld. Warning though - the hummus will probably thicken overnight - add some water to loosen before serving!

Hummus will keep for up to a week in the fridge.

Hummus is best made with freshly cooked chickpeas, but canned will work well too!

Hummus bi Tahina


  • 3 cups cooked chickpeas
  • 2 cloves garlic, crushed
  • juice of 1.5 lemons
  • 3 tbsp tahine
  • 2 tbsp olive oil (plus more for drizzling)
  • 1 tsp salt
  • paprika or cumin for serving
In a food processor, blend the garlic, tahine and salt, then add the lemon juice. Blitz til well mixed, then add the chickpeas. With the blender on medium, blend for 3/4 minutes. After the first minute or so, slowly drizzle in the 2 tablespoonfuls of olive oil. You want it to be light and fluffy, and creamy in colour. Add a little bit of water to loosen if required.

Serve drizzled with olive oil, a dusting of paprika or cumin, and pita breads. Though not necessarily the pitas I made that day!!


Hummus, served with one of my few successful pita breads!

The Intrepid Baker Continues... Pita Breads!

Hmm...

Good start to a post?? Maybes not.

Hmmmm... Ok, so it appears this is how my post wants to start!

Well, following the success of my naan bread and berber pizza crust, I do believe I was starting to get, well, a bit cocky really! And following a craving for home-made hummus, I decided to go the whole hog and make the pitas from scratch too!

I checked out a few recipes, then decided on the amalgamation of recipes I was going to use to bake my pitas. (Hmmm... the Intrepid Baker suddenly realises that her inability to follow any recipe as it stands may be at least partially to blame for baking related issues!)

I got my huge tub of yeast from the fridge and activated it as I had before. I decided on a mixture of whole-wheat and white flour - attempting to be healthy? I did read somewhere that there is nothing special about pita bread recipes - it is the manner of baking that causes them to puff and swell in that fabulous way.

So the yeast was activated; the flour sieved; dough kneaded for 12 minutes (!!!), and left to double. So far so good! Once dough was doubled, I rolled them into thin oblongs, covered with a damp cloth and left to rise for another 15 minutes.

It all seemed to be going according to plan... until it came to the baking of the breads. They are supposed to be cooked in a very hot oven, on hot baking sheets (I think a oven stone would be ideal - but I don't have one...)

So the oven was smoking hot, when I realised I had already put the breads onto the cold baking tray. Doh. No worries, I had used parchment paper, so lifted them off, heated the trays before putting thim into the oven. However, hot oven, hot trays, small kitchen and no available work-surface resulted in several burns to the wrists... Note to self, get bigger kitchen. Or oven gloves.

I popped them in and left them for a few minutes. I could hear a really strange noise... The pitas were stuck to the parchment paper... eek! and as they puffed, the paper curled round the pita, the paper was touching the exceedingly hot back of the oven, and burning up!

They all had to go in the bin...

That was two-thirds of my dough, gone in 4 minutes ;) I only had four pitas left to attempt to create something edible!

I'm happy to report, that I did manage to get four, fairly successful pita breads in the end. They puffed up, and tasted good - but I maybe baked them for a minute or two too long, so they were a wee bit brittle at the edges.


This has been a bit of a stream of conscious post, so I won't bother posting the recipe I used. I don't think I have successfully tested it ;) But I test it again, and with some tweaks, hopefully be able to present you with some fabulous pita bread soon!

See, it did puff up in the end!

Wednesday 2 April 2008

Squid & Chorizo Linguine... and a helluva lot of it!

Yesterday marked another foodie first for me...

...I cooked with fresh squid!

This time last year I could barely even eat it - until I tried the most amazing Indonesian squid starter... and became slightly hooked. So when I saw squid yesterday in my fishmongers, I knew it was time...

I got him to clean it for me - I wasn't quite that brave yet. And it was a Tuesday night - why not avoid effort where you can! Then I wandered back to work, stored the squid in my work fridge (!) and set about deciding on a context for my purchase. The sun was streaming in through the window (which made me believe that Spring was maybe just a little bit more here than it actually was) and I decided that a salad would be perfect. With thanks to Peter for his suggestions, I wandered off home to get the rest of my ingredients for his Prawn and Grilled Calamari Salad.

But then real-life got in the way... as it so frequently does. In this instance, in the shape of a beer-garden with a patch of sunlight - and two G&Ts! By the time the sun went in, and resumed my journey home, I was absolutely FREEZING!

The salad no longer seemed so appealing, and instead I started craving pasta - and a lot of it. So I give you instead...

Spicy Squid & Chorizo Linguine

Makes two HUGE servings!

I still nicked some of Peter's flavours - spot the difference ;) And, as this is the first pasta I've cooked for weeks, I'm going to send this over to Ruth at Once Upon a Feast for this week's Presto Pasta Night!

  • 1 large squid, cleaned
  • 100g chorizo, cubed
  • couple of big handfuls of rocket
  • 1 red chilli, finely chopped
  • 2 cloves garlic, crushed, but kept separate
  • 6 sundried tomatoes, very finely chopped
  • 1/3 cup balsamic vinegar
  • 1/2 tsp sugar
  • 1/2 tsp dried red chilli flakes
  • a punnet of cherry tomatoes
  • olive oil for frying
  • linguine to serve
Turn on the oven to 180c. Wash the cherry tomatoes, and place in a baking tray. Roast until further notice!

Prepare the squid by butterflying it, then cutting into two halves lengthways. Using a serrated knife, score the squid in both directions to create diamonds. Score quite deeply - but don't but through! Slice the squid body into strips and place in a bowl with the tentacles, a glug of olive oil, 1 crushed clove of garlic and the fresh red chilli. Mix well - make sure the squid is well covered, then set aside.

In a heavy based frying pan, fry the chorizo over a high heat to colour the edges. Remove from the pan with a slotted spoon and set aside. (Now's probably a good time to put the pasta on!) Add a wee bit more olive oil to the pan if required, and add the other clove of garlic, and the dried chilli. After about 30 seconds, add the balsamic vinegar and the sugar, and allow to reduce for 2/3 minutes. Add the sun-dried tomatoes and chorizo cook for a further minute or so then set aside.

Once the pasta has just about cooked, drain - reserving about a cup of the cooking liquor. Return the pasta to the saucepan, with the cooking liquor, the rockets and the chorizo mix. Get the roasted cherry tomatoes out of the oven and chuck them in too! Stir well and set aside while the squid is cooked.

In the same hot pan used for the chorizo mix, throw in the squid. Allow to cook for 2/3 minutes, keeping it moving all the time.

Dish up the pasta mix into a couple of bowl, then place half of the squid on top of each.

Enjoy! Btw... see the photo below? I ate that whole bowl of pasta. In one sitting. And then ate the leftover fish kebabs from the night before. Then half an Easter egg.

So maybe I should have salad tonight!

Help - food blog OD!

Ok, just relax... breathe into the brown paper (deli) bag...

...in through the nose... out through the mouth...

Breathe in......

...... and out......

(I think I can smell coconut based curry... and chocolate... eek, it's all in my head... olfactory hallucinations!)

...... and in......

...... and out......

Ok, ok, I'm starting to feel a little more composed.

I came online to put up a post (I cooked shrimp for the very first time last night... no I didn't... I mean squid - I think I'm having a foodie meltdown! Anyway, the post can wait!) But I got a little distracted by the Royal Foodie Joust Entries. I decided to load them all into tabs and have a proper read of them all - a big task, there are over 30 listed!

And that was when my problems began. Many of the blogs I hadn't visited much (if at all) and I began getting twisted into a web of food posts. My stomach was rumbling, my mouth watering. I was simultaneously craving chocolate truffles, shrimp and empanadas... My google reader was starting to bulge... I was already way behind with my subscriptions... which were expanding at an alarming rate...

So much fabulous food to find out about... I consider myself lucky to have have to chance to read about it - even if I have to accept there aren't enough mealtimes in a lifetime to try to cook everything I want to! But with so much information and amazing ideas, isn't it great to know you need never cook the same meal twice!

So, I just remembered I took some flowery pics from my garden over the weekend, so thought I'd post them here as a calming measure! And to remember that Spring is most definitely here! The Clocks have changed now - it's daylight well into the evening. Hopefully soon I'll be able to start taking my blog pics by natural light - woo hoo!


A type of heliboris... hmmm fairly sure it isn't spelt like that!

It's an... erm... I have no memory for garden things... except herbs!!

Anyway, it's back to work for me for a bit... then I'll be back to post about squid!

Tuesday 1 April 2008

My First Daring Bakers Challenge: Peter Reinhart's Pizzas!

My first Daring Bakers challenge - and what a week for it to be in! I've been hectic trying to sort out my itinerary and organising work stuff. So I'm a day late in getting this posted - apologies Rosa!

Rosa of Rosa's Yummy Yums is the host of Daring Bakers this month, which is to make Reinhart's Basic Pizza dough with our own toppings. This idea was originally from Sher who tragically died earlier this year. She was supposed to be co-hosting with Rosa for this October challenge. Rosa honoured Sher by using her idea, and hosting the challenge alone.

I have completed the challenge - and, wow, I did love it. The crispiest pizza crust imaginable, with just enough of a chew. And so easy to make - a bit of prep the night before, a couple of hours rest, then only minutes to prep and cook each pizza at the very top of my oven.

The tossing took a bit of practice. I would say probably more practice than I've given it so far. I draped it over my fists, and did a few tentative moves... by which point it was basically ready! Paper-thin in the middle, but with no tears. The edges were a fair bit thicker - I evened this out by picking up the edges and gently shaking the dough towards the middle. Scientific? Maybe not... but it was successful! I loved this dough - it was as good as any pizza I've paid money for. And substantially better than my last attempt - which was about an inch thick when it came out the oven!!

I had a mini-pizza party with a few friends, and decided to go down the traditional route. A slow cooked tomato sauce, made with smoked garlic and passatta, a touch of dry herbs for depth, and a dab of sugar for balance. Soft jamon serrano, crisped up at the exposed edges; spicy salami against the crunch of sweet red peppers; caramelised red onions, finished with a dash of balsamic truffle syrup; and herby roasted chicken thighs, crispy skins sneaked into hungry mouths before the dough was ready. A mix and match of pizza toppings, each pizza different from the last.

Five pizzas, several beers and a couple of bottles of wine later - satiated and full, we fell asleep on the sofa. A success, methinks!

Spicy Salami with Sweet Red Pepper


Roast Chicken with Caramelised Onions and Mushrooms


Jamon Serrano with Mushrooms, Rocket & Slow Roast Tomatoes


BASIC PIZZA DOUGH
From The Bread Baker’s Apprentice by Peter Reinhart Makes 6 (25cm) pizza crusts

I couldn't find my instant yeast, so I improvised by activating dried yeast before chilling.
  • 4 1/2 cups of flour, chilled
  • 1 3/4 teaspoons of salt
  • 1 teaspoon of dried yeast
  • 1/4 cup of olive oil
  • 1 cup of ice water
  • 3/4 cup tepid water
  • 1 tablespoon of sugar
  • cornmeal for dusting
DAY ONE
1. Mix together the yeast, tepid water and sugar, and leave for 10 minutes until foaming. Pop in the fridge until cold. Mix together the flour, and salt in a big bowl. Add the oil and cold water and mix well in order to form a sticky ball of dough. On a clean surface, knead for about 5-7 minutes, until the dough is smooth and the ingredients are distributed. Cut the dough into 6 equal pieces. Sprinkle some flour over the dough. Make sure your hands are dry and then flour them. Gently roll each piece into a ball.

2. Transfer the dough balls to the lined jelly pan lined with parchment paper and coated with cooking spray and mist the tops generously with cooking spray. Cover with plastic. Put the pan into the refrigerator and let the dough rest overnight or for up to three days.

DAY TWO
3. Remove the desired number of dough balls from the refrigerator. Place the dough balls on a floured surface and sprinkle them with flour. Dust your hands with flour and delicately press the dough into disks about 1.3cm thick and 12.7cm in diameter. Sprinkle with flour and mist with oil. Loosely cover the dough rounds with plastic wrap and then allow them to rest for 2 hours.

4. At least 45 minutes before making the pizza, preheat the oven as hot as possible (500F/260C).

5. Generously sprinkle the back of a jelly pan with cornmeal. Flour your hands. Take 1 piece of dough by lifting it with a pastry scraper. Lay the dough across your fists in a very delicate way and carefully stretch it by bouncing it in a circular motion on your hands, and by giving it a little stretch with each bounce. Once the dough has expanded outward, move to a full toss until it reaches the shape you want (about 9-12 inches/23-30 cm in diameter) place it on the back of the prepared jelly pan.

6. Lightly top it with the toppings of your choice. Slide the garnished pizza into the oven and bake for about 5-8 minutes.

7. Once the crust is cooked and the cheese is browned, take the pizza out of the oven and transfer it to a cutting board or your plate. Allow them to cool 3-5 minutes before slicing or serving.

Tossing!

Oh yes! And we were supposed to get some pics of us tossing the dough. Well. I've never seen so many awful photographs of me in my life...


Tossing the dough? Or dropping it... It's an action shot one way or t'other ;)

As you can see, I'm communing with my dough in a big way.... Mmmmmmm.... I luuurve my pizza...........

Hey, who cares - they tasted fab!

Thanks to the awooga man for being photographer extraordinaire - and hi to the awooga man's mum - thanks for reading!