Thursday 31 January 2008

Sri Lankan Workshop

At the weekend I attended a Sri Lankan cookery workshop - run at the same place where I take my Italian cookery lessons. (Which I know I have yet to blog about - but don't worry, it will happen, this week we're making Osso Buco!)

The tutor was Martyn Grover, Head of Department at a nearby College, and it is his recipes I have recreated here.

The whole morning was very enjoyable (despite the fact I almost didn't make it following a slight overindulgence the night before at a dinner party...) The pace was laid back, and there were lots of opportunities to chat with fellow foodies, and to hear stories from when Martyn lived in Sri Lanka. The dishes were all very simple, and straightforward to prepare... but the flavours certainly packed a punch!

We got to make 3 dishes:


I loved them all, and could hardly wait to go home and scoff it all! Rather bizarrely, coconut falls into Boyfriend's cream&cheese loathing, so I got to eat it all to myself! :)

Unfortunately I have to cancel my Lebanese course with Martyn, but I will definitely be signing up for some more. Watch this space!

Sri Lankan Workshop: Coconut Rotis

To accompany the spicy, piquant tomato sambal and creamily delicious paripoo, we made some coconut rotis.

I'm not usually a fan of coconut meat (although I adore coconut milk and coconut based curries!) but these were really good - and complimented the two sauces very well.

The biggest challenge is trying not to eat them as they come out of the pan ;)

Coconut Rotis


225g plain flour
1/2 tsp salt
180g freshly grated coconut (use a processor for this if you can - otherwise it'd be a lot of hard work!)
30g softened butter (optional)
2/3 green chilies - finely chopped (optional)
2 tbsp finely chopped onions
Coconut oil for frying

In a bowl, mix together the flour, coconut and salt, then add just enough water to form a dough. If you have any of coconut milk left you could use some of that here (either from the paripoo, or the real stuff from cracking the coconut open!). The tutor used some 'real' coconut milk, with some coconut milk from a tin, mixed in with a bit of water.

You want the mixture to be very soft, but not so sticky that it sticks to the work surface.

Work in the onions, butter, and chilies (if using). You may need to add a bit more flour now if the mixture is too wet.

Knead for 5 minutes, them leave to rest for about 20 minutes.

Divide the mixture into 10 balls.

Heat a heavy-based frying pan until very hot, and add some coconut oil. If you don't have any oil, then you could use ghee instead. As you do each ball, only add oil if required, you probably shouldn't need to for each one.

For each ball:
  1. Roll out until about 5mm thick. The way we did this in class was to place a ball between two sheets of greaseproof paper, then used our fingers to spread it out.
  2. Peel the roti from the paper and place in the centre of the pan.
  3. Cook for 1 minute
  4. Turn with the spatula and cook for a further minute on the other side.

Serve with a Sri Lankan curry (or curries!) of your choice!

Sri Lankan Workshop: Paripoo

At the Sri Lankan Cookery workshop I recently attended I fell madly in love with this simple, easy and gorgeous curry! It was sooo good - creamy, spicy, comforting, and above all, packed with flavour.

My pictures just don't do justice to the vibrant colour of this dish (although thanks to some great feedback from Jill over at Simple Daily Recipes, I will hopefully be getting more real light to them soon! Thanks Jill!)


Paripoo - Sri Lankan Dhal!


  • 90g red lentils
  • 1/2 tsp turmeric
  • 2 dried red chilies, left whole.
  • 8 curry leaves
  • 1/2 tsp salt
  • 3 cloves of garlic, thinly sliced
  • 1 onion, finely chopped
  • 100 ml water
  • 1/2 tin coconut milk
Ok, so how simple is this???

Are you ready?

Put all the ingredients into a pan, except the coconut milk.
Simmer for 15 minutes (stirring frequently to prevent the lentils sticking)
Add the coconut milk
Cover and simmer for another 15 minutes.

There you go - a gorgeous curry, made from scratch in half an hour!

Sri Lankan Workshop: Tomato Sambal

This was the first dish we made in the Sri Lankan workshop I attended recently. I got to use an ingredient I hadn't seen before - coconut oil. Apparently coconut is widely used in Sri Lanka and neighbouring counties - it isn't until you go further north that the use of coconut oil begins to be replaced with ghee.

It is lovely stuff - and not too difficult to find! I managed to buy a bottle of it from the first wholefood store I went to. Check out the link above to read about other uses it has!

Tomato Sambal


  • 3 large ripe tomatoes (approx 225g)
  • 1 tsp salt
  • 1 tsp chili powder - adjust according to taste and strength
  • 4 cloves of garlic
  • 5cm cinnamon stick
  • 2 tbsp coconut oil
  • 1 onion
  • juice and zest of one lime
  • 1 tsp sugar
Slice the tomatoes and arrange them on a plate. Sprinkle with the chili powder and salt and leave to marinate while you prepare the rest of the ingredients.

Slice the garlic and finely chop the onions.

Heat the coconut oil in a saucepan to medium. Once hot add the sliced garlic and fry until starting to change colour. Add the cinnamon and continue to fry until the garlic has turned golden brown. Don't let it burn though, or it will turn bitter!

Add the onions and continue to fry until soft.

Now add the marinaded tomatoes and gently simmer for 15 minutes.

Remove from the heat, allow to cool slightly then add the lime juice, zest and sugar. Boiling the lime juice will lose a lot of its punch, so only add after cooking.

Serve as part of a Sri Lankan meal - usually alongside curry.


Tuesday 29 January 2008

11-a-Day Roast Veggie Stew!

I've no idea if this is in fact a stew, or a thick soup, or a chunky sauce.

What I can tell you is it is healthy, filling, versatile and tasty!

Every couple of weeks I get an urge to eat a huge portion of vegetables. Usually on a Monday, and usually after a particularly unhealthy weekend! This generally takes one of two routes - go to local greengrocers and buy lots of gorgeous veg and make a mammoth stirfry... or go to local greengrocers and buy lots of gorgeous veg and roast them all into a sloppy, tasty mess! Admittedly the first option is healthier - but the second is much more comforting! I use olive oil spray to cut down the amount of oil I use.

So I wandered home from work on Monday night fully intending to make a spanish fish stew (which will just have wait!) but got sidetracked by the idea of veg and instead ended up with...

... My 11 a Day Roast Veggie Stew


You can use any veg you want in whatever quantities you want - just pick what you enjoy/have available. There are lots of additions - I often fry up some chorizo (at the same step I fry the mushrooms here), or add some type of legumes to pad it out.

Veg I roasted:
  • 2 large tomatoes
  • 3 parsnips
  • 2 red onions
  • 1 red bell pepper
  • 1 yellow bell pepper
  • 3 red turkish chilis
  • 1 mild green turkish chili
  • 2 carrots
  • 2 courgettes (zuccinis!)
  • 1 head of garlic

Veg I pan cooked:
  • 2 large tomatoes, roughtly diced
  • 150g chestnut mushrooms, halved
  • 1 scotch bonnet chili, finely chopped

Other:
  • 3 tbsp balsamic vinegar
  • 1 tsp sugar
  • 1 tbsp tomato paste
  • salt/pepper,dried chili flakes
  • 150 ml vegetable stock

Lightly spray two oven trays with olive oil. (Or you could do three if you have three shelves in your oven!)

Decide what veg you want to roast - then cut it into pieces such that it will all become ready at the same time. As the greengrocers had another good deal on garlic, I also used this opportunity to roast up 6 heads of garlic. Alternatively, chuck a crushed clove or two in with the mushrooms!


Lay the veg out on the greased trays, the mist in olive oil again. Season and spice as required! This time I used white pepper, salt and red chili flakes, either singularly or all, depending on the veg (i.e. I don't salt carrots or peppers, but other veg can take a lot of seasoning.)


Put in the oven at about 200c for about 40 minute. Turn or shake the veg as appropriate during cooking!

Meanwhile, spray a little oil into a medium hot pan, and toss in the halved mushrooms. Fry for a few minutes until cooked through. Add the other pan veg and tomato paste and allow to cook for a few minutes.

Add the balsamic vinegar and sugar and allow to reduce slightly, then add the stock. allow to simmer for a further 5 minutes. Take off the heat until the other veg are roasted.

Once the oven veg is ready, tip it all into the pan and stir to mix. Heat through, and adjust seasoning if required (remember the roast veg were well seasoned, so don't season sauce until this stage!)

You can serve this as it is - with lots of crusty bread.

You could also blend it up and add more stock to make a nourishing soup.

Or split in half, blend one half, and mix back together to make a lovely roast veg sauce!

Whatever you do with it - enjoy!

Baked spicy saffron macaroni!

I can't believe I've got yet another pasta dish for Ruth's Presto Pasta Night over at Once Upon A Feast! I'm sure I've cooked more pasta this month than usual :) But it tastes so good, and is so comforting on a cold January evening!

Anyway, as a variation on a theme, this week I've prepared a spicy pasta bake. It was based on an episode of Come Dine With Me (one of the best Sunday afternoon reality/cookery shows EVER! If you haven't seen it, you're missing out...!) I think the woman decribed it as a baked pasta paella!

Oven baked spicy macaroni


  • 500g cherry tomatoes
  • 1 red onion, halved and sliced
  • 2 cloves of garlic - crushed
  • 2 tablespoons olive oil
  • 11 oz small macaroni
  • 4 boneless, skinless chicken thighs, quartered
  • 6 merguez sausages (original recipe specified chorizo - but when I saw these in my local sausage shop, I had to have them!)
  • Small handful fresh chopped rosemary (I got mine from my garden - yay!)
  • 300ml chicken stock
  • Pinch of saffron
  • 200g cooked prawns - the original recipe used large raw prawns - but these were what I had!
  • Handful of basil leaves, torn, ready to serve
  • Salt and pepper

Put the cherry tomatoes into a casserole dish and sprinkle with olive oil. Roast in a preheated oven at 220c for 15 minutes. Then add the garlic and red onions, and place the sausages on top then cook until the tomatoes are soft.


Remove from the oven. Take out the sausages, and cut into chunks. Add the macaroni, chicken, and sausage pieces rosemary, stock, saffron, salt and pepper. Mix well and return it to the oven to bake for 30 minutes.

Add the prawns, stir and allow the prawns to warm through for 3/4 minutes. You don't want to put it back in the oven at this point or the prawns may go tough.

Sprinkle with basil and serve.

My Ultimate Chili Con Carne!

This is one of the dishes of my life!

I remember when I was young I used to be excited when my mum was away for the night - because it would mean that Dad would cook his Chili Con Carne for me and my sister. Mum wasn't a fan, so this was a rare treat! Fast forward a few years, and it became one of my student day staples - either to cook up a vat of it and freeze in single portions - or to cook up a vat and feed a group of starving students for about £5 (I bought food, they brought beer - good deal!)

Though I don't cook it as much now, it is still one of my ultimate comfort foods - spicy, tasty and soft - easy to make and easy to eat! So I am throwing it over to Meeta's Monthly Mingle at the lovely What's for Lunch, Honey?.

I do like it pretty spicy, and add different types of heat to give a more interesting burn! Please feel free to adjust the chili and spice quantities to suit!

Apologies for the lack of pictures - the only one I have is from during the cooking time - I forgot to take more when serving up!

My Ultimate Chili Con Carne!


  • 500g lean beef mince
  • 4 chicken thighs - trimmed and small diced, should be about the same size as a kidney bean!
  • 2 medium onions, medium chopped
  • 4 cloves of garlic, crushed
  • 1 beef oxo cube
  • 3 Thai red chilies, finely chopped - I leave the seeds in ;)
  • 1 heaped tbsp smoked paprika
  • 1 tsp chili powder
  • 1/2 tsp cayenne pepper
  • 1 heaped tsp ground cumin
  • 1 heaped tsp ground coriander
  • Good shake of tabasco sauce
  • 2 400g tins of peeled plum tomatoes (I sometimes replace one of these tins with a carton of sieved tomatoes)
  • 1 large tbsp tomato puree
  • 1 tsp sugar
  • 1 tsp salt
  • 1 400g tin of kidney beans, drained and rinsed
  • 200ml water
  • oil for frying
Begin by frying the onions in a little oil over a medium heat until starting to go soft, then add the garlic and Thai chilies. Fry for a further couple of minutes, then remove from pan and set to one side.

Turn up the heat, add a spot more oil to the pan and add the minced beef and diced chicken. Fry til browned.

Add the paprika, chili powder, cayenne, cumin, coriander, crushed oxo cube and fry for another minute. Put the onions back in and fry for yet another minute!

Add both tins of tomatoes, the tomato puree, tabasco, sugar, salt and water. Stir.

Leave this simmering away for a couple of hours, adding the kidney beans 10 minutes before the end of cooking. It will be ready enough to eat after about 45 minutes, but tastes even better with a long cook. It is also really good to make a day in advance, then let the flavours develop overnight!

I usually serve mine with plain steamed long grain rice, and toasted pita breads. also good with the usual suspects - baked potato, tortilla chips, potato wedges...

This time I actually served mine as a chili bake. The day after I cooked it, I heated it in a casserole dish, added about 500g rice and a pint of boiling water. I then covered it and cooked it in the oven at about 200°c for about 25 minutes. Make sure you check it frequently to ensure it doesn't dry out - and to adjust seasoning if required. Once it was ready, I smoothed the top of the bake and covered it with finely sliced tomatoes, scattered over a mix of slightly crushed tortilla chips, cheddar cheese and pecorino. Whacked it under the grill for 5 minutes til the top was bubbling and gorgeous then served... yum yum yum!

chili, chile or chilli...? Another question?!

Writing this food blog has made me consider the spelling of various foodie words, that I don't usually write down! One of the ones that I was surprised to find I had to think about was Chili! I finally decided to track it down last night after making a hot and HUGE chile con carne!

  • The chili pepper, chilli pepper, or more simply just chili, is the fruit of the plants from the genus Capsicum, which are members of the nightshade family, Solanaceae... The name, which is spelled differently in many regions (chili, chile or chilli), comes from Nahuatl via the Spanish word chile. The term chili in most of the world refers exclusively to the smaller, hot types of capsicum. The mild larger types are called bell pepper in the USA, simply pepper in Britain, Canada and Ireland, capsicum in India and Australasia and paprika in many European countries.

I'm starting to think I might be a bit of a food geek - but I do feel happier for knowing!

Monday 28 January 2008

This amused me... Apple pie!

In order to make an apple pie from scratch, you must first create the universe.

- Carl Sagan


Happy Monday everyone!


.........

Wow - three posts in one day - that's a first for me! Fair enough this one is little more than drivel though ;)

Did you know... Coriander or Cilantro?

I had a delivery on Friday... 7 shiny new food-related books, ordered from The Book People January Sales! This, of course, is an occasion for great excitement - all these ideas and recipes waiting to be divulged. The way I use cook books is seldom to follow a recipe step by step - I much prefer to read them, be it on the bus, in bed, curled up on the sofa or even occasionally in the bath... I then let the ideas and titbits wash around in my head until I land on menus and recipes that give me that warm fuzzy feeling!

The one I chose to take to work to me today (I have a meeting in London, which gives me about 3 hours travel time!) is The Curry Companion by Sonja Patel. It's lovely - not so much a cook book as a book about food, with history, interestingly random facts and trivia thrown in with some recipes.

I bought a cook book on a visit to the States quite a few years ago - and was confused by one of the ingredients: cilantro. This was before I had Internet easy access, and it took me quite a bit of digging - and a phone call to a Canadian relative - to discover that cilantro was actually what us Brits refer to as coriander!

Now - about 15 years on, I have found out the true relationship between coriander and cilantro. Apparently coriander 'officially' only refers to the seed of the plant - the spice; whereas cilantro refers to the leafy stems - the herb! Ok, so perhaps not the most groundbreaking discovery - but a new bit of knowledge I was happy to have!


Cilantro...


Coriander seeds!

Of course, it could well be that this is common knowledge - and just something I have missed all those years... but at least I know now!

Wednesday 23 January 2008

Date and Walnut Loaf

For my Italian cookery course last week I had to take in walnut bread. I looked in various delis, but couldn't find any walnut bread - so decided to take a chance and bake some myself! Now I am not a baker - the only other time I've tried to make bread 'from scratch' resulting in the whole house stinking like a brewery! (although I do use a bread machine from time to time... with ok-ish results)

For these reasons I decided to have a practice go, two nights before my course. I looked up a few recipes, but eventually went for an amalgamation of various things I had read - the key thing I took from the recipes was the ratio of yeast/flour and liquid. I wanted to try using spelt flour - as I think it has an amazing flavour. Due to the fragile gluten structure of spelt, I initially used half spelt with half strong white flour, though in the second attempt I increased the proportion of white flour - you definitely could still taste the spelt!

The second attempt got a second rise too - and definitely was a lot more risen than the first one which I only let rise once.

In both cases, the bread was fairly dense - but very very tasty! In my cookery class I cut it into thin slices and made plum crostini with it. It was utterly gorgeous, and the density worked very well. I will post up the recipe at some time - I have 2 weeks worth of lessons which I haven't even started on yet!

Date and Walnut Loaf


  • 100g walnut pieces
  • 100g dates, destoned and roughly chopped
  • 100g spelt flour
  • 300g plain flour, plus some extra for dusting
  • 200ml warm water
  • 1 rounded teaspoon salt
  • 1 rounded teaspoon quick dried yeast
  • 1 tbsp clear honey
  • 1 tsn roasted sesame oil
Start off preparing the dry mix and the wet mix separately: mix together the flours, yeast and salt in a mixing bowl; whisk the honey and the sesame oil into the warm water.

Pour the liquid into the flour and mix to form a soft dough. You can add more water or white flour as required if it is too stiff or sticky!

Turn the dough out on to a lightly floured work surface and knead for 5 minutes – until the dough becomes smooth and more springy. Try not to overwork the dough - spelt flour has a fragile gluten structure, and will turn too heavy if over-kneaded.

Using your hands, spread the dough out until it is about 2cm thick. Sprinkle with the dates and walnut pieces, then roll up the dough into a 'swiss roll'. Knead for a minute or so to ensure it is all mixed in, evenly distributed, and the the dates and walnuts are all covered in the dough!

Lightly oil the bottom of a mixing bowl, roll the dough into a ball, then turn the dough into it. Cover with a lightly oiled bit of clingfilm and leave to rise for an hour or so - until it has doubled in size.

I read somewhere that dough shouldn't be punched down - that we want to encourage more gas to be produced - not to knock out all the gas we have already managed to get into it. So for the second loaf I made, I turned it out and folded it into an oblong before leaving it for a second proof - it did rise quite a bit better, though that could have been due to the extra white flour in that one... (Make sure you cover with oiled clingfilm for the second rise - about 30 minutes this time)

The picture below was taken just before the second rise.


Meanwhile, preheat the over to about 180°C (350°F).

Once the second proof is over, put it in the pre-heated oven and bake for about 30 minutes. Once ready, the loaf will sounds hollow when tapped on the bottom.

Cool on a wire rack before tasting!

Crispy Szechaun Duck with Pak Choi and Noodles

Crispy Szechaun Duck with Pak Choi and Noodles

I absolutely love duck, so was well chuffed to find it half price at my local supermarket. Such a treat for a dreary Tuesday night in January! If possible try to get whole peppercorns and crush just before using - the taste is miles better.


  • 2 duck breast, skin on
  • 1 large pak choi (or a couple of smaller ones!)
  • 3/4 spring onions (scallions)
  • 1 crushed clove of garlic
  • 1.5 inch piece of ginger root
  • 2 portions egg noodles
  • sesame oil
  • soy sauce
  • 1 heaped tsp crushed szechaun pepper corns
  • 1 tsp salt
Start by cross-scoring the duck skin at about 5 mm intervals - this allows the szechaun flavour to get right into the meat, and also makes the crispiest skin. Be careful not to cut right through the skin though - a sharp knife will help a lot!

Once this is done, dry the skin with a bit of kitchen towel, then season with the salt - rubbing it right into the scores. Then rub the crushed szechuan pepper into the skin in the same way.

Place the duck skin-side down into a cold frying pan, then turn on the heat as low as possible.

Allow to cook like this for 15 minutes, draining off fat as required. I used quite large duck breast - if yours are smaller, maybe reduce this time by 2/3 minutes.

While the duck is cooking, prepare the vegetables:
  • Finely shred the spring onions on the diagonal.
  • Peel and chop the ginger into thin matchsticks
  • If using the big pak choi, then roughly shed (each piece about 2 inches wide) If using the baby stuff, then half or quarter it
Back to the duck! Once the cooking time is up, turn the heat to high and cook for 3 minutes just to finish crisping off the skin. Don't strain any fat at this point - we will be using it to prepare the rest of the dish. Reduce the heat to medium and turn over the duck breasts. Cook for 2-4 minutes - or until required 'doneness'! For the tenderest duck meat, you want it to be pretty pink in the middle. Remove duck to a plate.

Cook the egg noodles according to the packet. Once cooked, drain well and return to pan. Add 1 teaspoon each of sesame oil and soy sauce and stir to mix.

While the noodles are cooking, add a teaspoon of roasted sesame oil to the pan you cooked the duck in, follow with the garlic and ginger. Turn the heat to medium and fry for a couple of minutes.

Add the spring onions and pak choi and fry for 3 minutes until just tender. Add a teaspoon of soy (or to taste) and remove from the heat.

Time to plate up!
Move the duck breasts to a chopping board and slice on the diagonal. If there are any juices on the resting plate, pour these onto the pak choi mix.
Place a mound of noodles onto each dish. Top this with the pak choi mix, then placed the sliced duck breast on top. Drizzle any juices from the pak choi pan over the duck and if you have any lying around, garnish with coriander!

To pok, bok, pak or bak...? That is the question...

Pok choi, bok choy, bak choi, pak choi.... I have come to the conclusion they may actually all be the same thing! I used to think that bok choi was the small version, and pok choi was the fully grown vegetable - but after a somewhat confusing trip to the greengrocers yesterday I have reconsidered! It looks like a cross between celery and spinach - though is actually from the cabbage family. If anyone can shed any light on the matter, please do!

What ever it's called, I used the fully grown version for this duck dish - and it tasted great.

Tuesday 22 January 2008

Little ears, Orecchiette and peu d'oreille...

This week's Presto Pasta Night entry was inspired by finding a lovely packet of artisan orecchiette over the weekend. Orecchiette is Italian for 'little ear' - even though Wikipedia reckons it probably originated in France... so shouldn't it be called peu d'oreille?!

Can you imagine how long it takes to make a decent bowlful of the stuff? I found a couple of youtube videos on the subject, both using different methods. This one looks more professional - whereas this one... oh no - I've lost the link... Oh well, suffice to say it seems very labour intensive and would take HOURS to make a bowlful!!

Orecchiette with Spicy Italian Sausage and Broccoli


The meat forms the basis for the sauce in this - so make sure you use good sausages! I wanted some hot Italian Sausages, but they deli didn't have any, so I used Italian garlic and basil pork sausages - and added dried red chilli and paprika as I was cooking.

Have you ever noticed that if you type the word sausages enough it starts to lose its meaning... and almost looks French! Oh - just looked it up I was right - though maybe not for the right reasons!
"The word sausage is derived from Old French saussiche, from the Latin word salsus, meaning salted."
  • 200g tenderstem broccoli
  • 400g italian style sausages
  • 150ml chicken stock (I used bouillon concentrate, made up with the cooking water)
  • 1 clove garlic, crushed
  • tbsp tomato paste
  • tsp paprika
  • tsp dried red chile flakes
  • 250g Orecchiette
  • 100g pecorino romano cheese, finely grated
  • Glug olive oil for frying
  • salt and pepper to taste
Boil a bot of salted water and add the broccoli. Boil for 4 minutes until only just tender and still pretty al dente. Remove from the water with a slotted spoon and place in a bowl of cold water to cool.

While the broccoli is cooking, remove the sausage meat from the casings and roughly chop.

Heat the olive oil over a medium heat, then add the meat. Fry for a few minutes til browned - breaking the meat up with a spoon as you go. Once browned, sprinkle over the paprika, chile and garlic.

Once you have removed the broccoli from the water, add the orecchiette and boil for about 10 minutes - until not quite cooked.

While the pasta is cooking, chop up the broccoli fairly finely. and add to the sausage meat.

When the pasta is ready, drain, reserving the cooking liquid. (I used mine to make up the chicken bouillon.)

Add the sausage/ broccoli mixture to the pasta, then add the stock and tomato pasta. Check for seasoning, add pepper and salt as required. Allow to simmer for 3/4 minutes until the orecchiette is fully cooked.

Just before serving, stir in the pecorino cheese.*

* As always, Boyfriend would rather eat his little finger than anything cheesy - so I served up his portion without - it really didn't need the pecorino - but it was a nice addition!

Monday 21 January 2008

Mixed Pakora

Pakora are a deep fried south asian snack that were available at any Indian restaurant in Scotland when I lived there. (And I'm sure still are!) We even used to get haggis ones - they shouldn't work, but they soooooooo did! Now that I am down on the South Coast of England pakora are much more difficult to get a hold of - the closest thing you can get is onion bhaji... though I personally don't think they even comes close to pakora!

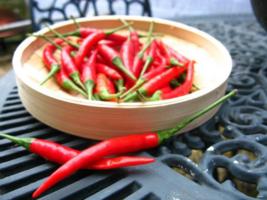
Pakora can be made from various different food stuffs - onion, spinach, chicken, fish, potato, cauliflower, mushroom etc - and is often made from a combination of two or three. The veg is bound by a gram flour spiced batter and deep fried.

I had an urge to make some last Friday night as I was staying at Boyfriend's (who has a deep fat fryer!), and chose onion, mushroom, courgette and carrot, and potato and pepper. Now I admit the last two varieties are not traditional, but I thought they might work... and they did!

Pakora keep for a few days in the fridge, and can also be frozen.

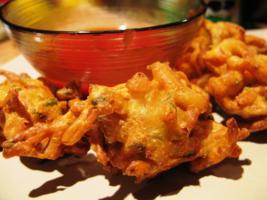
I don't weigh anything out when making things like this - so much depends on the size and wetness of the veg you use - and the spicy flavour you want from the end result. I made up the batter slightly different for each type - though each of them had garam masala and dried fenugreek leaves. Over all I think I used about 600g gram flour, 2.5 large onions, 1 large potato, 3 chillies, 1 carrot, 2 courgettes and 12 mushrooms. They made about 36 large pieces of pakora - I reckon they would have fed at least 12 people as a starter :)

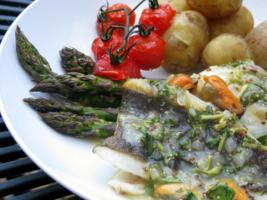
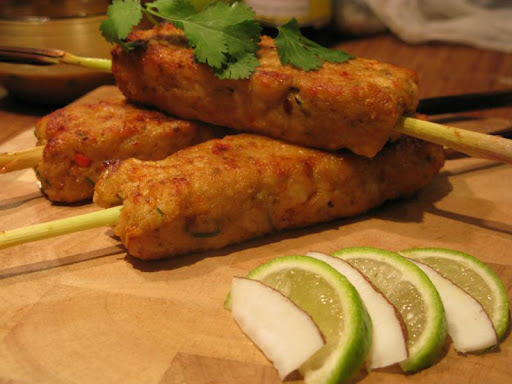
Serve with a wedge of lemon to squeeze over and a simple green salad.

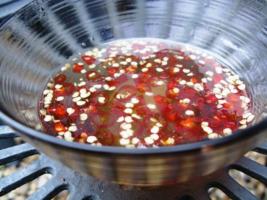
There are many different sauces you can get to accompany pakora. I often just buy them in from the Indian deli round the corner. However, if I don't manage that, I have two simple ones that I can knock up in minutes. (Again, I apologise to the traditionalists!)

1) Raita - mix plain yogurt with finely diced cucumber (remove the seeds), a handful of mint and a squeeze of lemon juice for a cooling dip.
2) Mix tomato ketchup with lemon juice, tabasco sauce and dried red chile flakes for a hotter sauce to dip into.


Before you start, preheat your deep fryer to 175 degrees celcius.

Onion Pakora

2 large onion, halved and thinly sliced
gram (chickpea) flour
water to mix (not too much!)
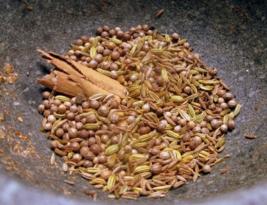
garam masala
dried fenugreek leaves
ground cumin and coriander
small handful roughly chopped coriander
dried red chile flaked to taste
1/2 tspn baking powder
salt

Place onions in a large mixing bowl.
Sprinkle over 2 large handfuls of gram flour, the baking powder, a good pinch of fenugreek leaves, all the spices you want to use. Give it a good stir, them add a bit of water to make a fairly thick paste. You want the batter to be thick enough to cling to the onion, but not so thick that it clumps together too much (otherwise it will go stodgey in the middle). And if it's too thin the pakora won't stick together in the fat, and will separate into pieces... You might want to add another bit of flour, then another bit of water if you want more batter.


Make sure you salt the batter at this stage - as you can't really add it afterwards. To check the seasoning you'd have to deep fry a little bit of the batter for a minute or so and taste. I probably added a teaspoon.

Carefully drop spoonfuls of the mixture into the hot oil, and cook for about 6 minutes. They can be kept warm in the oven til ready to eat.


Mushroom Pakora

This time, start off by mixing the gram flour with a bit of water to mix to a thick batter, then add the baking powder, spices, fenugreek and salt. I kept my mixture quite similar this time - but added more dried red chillies for a bit of extra heat. Remember, there is much more veg to batter in this one, so you can flavour it more strongly.

Add the mushrooms and stir to thouroughly coat.

Drop the mushrooms into the hot oil, and again, cook for about 6 minutes.


Courgette and Carrot Pakora

Mmmmm - I absolutely loved these - they were gorgeous and moist in the middle, with a proper crunch on the outside!

Grate the courgette, place in a sieve and sprinkle with salt to draw out the excess juices. Squeeze them dry and place into a bowl with the grated carrot. As before add gram flour and water until you have a thick batter. Add the fenugreek, spices, baking powder, and a handful of chopped coriander. For this one I omitted the dried red chile, but added one scotch bonnet chile pepper, finely chopped. I even left the seeds in as I wanted some heat! ;)

Cook as before.

Onion and Red Pepper Pakora

Chop a large potato into 1cm dice, and par boil for 3 minutes until slightly softened. Thinly slice half an onion and add to the drained potatos. Finely dice a red pepper and add to the other veg.

I then added 2 thai red chiles - finely chopped, a large handful of coriander, and one crushed clove of garlic.

For spices, I added garam masala, fenugreek leaves, tumeric, cumin and coriander.

Mix all the above with gram flour and baking powder to form a thick batter - adding water as required.

Deep fry as above.

Friday 18 January 2008

Plastic bag amnesty!

I came across this post from cathy at Not Eating Out In New York asking Should we do as China when it comes to plastic bags.

I whole-heartedly agree - it's a horrendous waste, very bad for the environment - and is so unnecessary.

Please check it out- you might also want to take a look at this dinky cute plastic bag alternatives, as recommended in the comments!

Thursday 17 January 2008

Pain in the neck Pasta... Part 2!!

Well, this is the second (and hopefully last!) of my pain in the neck pasta mini series! The first was last week when I managed to put my neck out... it got somewhat better but by yesterday I was in loads of pain again. But I was recommended a chiropractor, who did all manner of strange things to my spine (acupuncture, a machine called 'thumper', posture alignment, and a bit of crick cracking!) and the upshot is, my back feels better than it has done for years. Though I am still somewhat taken aback (no pun intended, groan) that I have one leg 3/4 inch shorter than the other!!

Anyway - hope I haven't put you off your dinner - basically I made this before I went to see him - and again was focusing on max taste - minimum neck movements!

Creamy Leek Tagliatelle with Bacon & Mushrooms


I had an idea a few days ago of cutting up leeks lengthways into tagliatelle sized strips and mixing them through pasta. So I considered a few options before hitting on this combination - and hope the guys at Ruth's Presto Pasta night over at Once Upon a Feast will approve!

I did fancy a creamier sauce for a change - which is something I seldom get to eat due to Boyfriend's cream/cheese phobia. (Well, not quite a phobia, but bordering on it!) I was originally going to use a goats cheese, and just mix it into my portion, but then I saw portion size boursin cheese - each one about 16g. I used 2 for my pasta - and it was fabulous! Ok, so maybe not great for the waistline... but it was a treat! Boyfriend said it was great even without the creaminess - I just used extra stock for his.

As always my quantities are approximate. I served two good sized portions from mine.
  • handful of pinenuts, lightly toasted
  • 2 leeks - try to make sure they aren't too old, or they will go stringy - look for a diameter of less than 1.5 inches, and no yellowing.
  • Medium sized punnet of chestnut mushrooms
  • 2 rashers bacon (I used smoked back bacon, pancetta would work too... I also thought about chorizo - but my supermarket had sold out!)
  • boursin (optional and as required, see note above!)
  • About 150 ml vegetable stock
  • 1 clove garlic
  • knob of butter
  • olive oil
  • tagliatelle
  • salt and pepper to taste
Slice each leek in half, and pull out any hard core from the middle. Slice each half lengthways into tagliatelle-width strips and wash well.


Melt the knob of butter along with the olive oil, then add the leeks. Saute for 3/4 minutes, adding a couple of grinds of black pepper when they start to soften.

Add vegetable stock and simmer til tender, but still with a bit of bite.

Meanwhile, thickly slice the mushroom and roughly chop the bacon. It's probably about the right time to put the tagliatelle on to cook now!

Over a medium heat fry off the mushrooms and bacon. When the liquid comes out of them, add salt and pepper to season, the crushed clove of garlic, and turn the heat up. They are ready when all the liquid has gone and the mushrooms start colouring at the edges.

Once the pasta has cooked, drain (reserving some of the cooking liquor in case it needs loosening) and return to the pan. Add the leeks and a dash of olive oil, and combine so the leeks are worked through the pasta. Add the boursin, and mix til combined - this is when you may need some of that cooking liquor!

Place in dish, and top with the mushroom/bacon mix. Scatter toasted pine nuts on the top.


Tuesday 15 January 2008

My smug and tasty bean salad!

Well, after my speedy efforts to cook myself a quick dinner last night, I found myself with time to spare to make something nice and healthy to bring to lunch today!

After going for sushi on Saturday night, and snacking on pork gyozas when watching Terminator 2 on Sunday, I was feeling somewhat Japanese inspired, and decided to do something with edamame beans (soybeans) - but I can't take credit for the salad idea, as I nicked it from from Marks and Spencers...!

It tastes fabulous, and is super healthy. Unfortunately since I started typing this I've scoffed a choccie biscuit - but I still feel fairly virtuous!

Tuna and Bean Salad with a Spicy Sweet Chilli Dressing


Now, I have absolutely no idea what quantities I used - so am going to use handfuls! I made enough for 2 lunches - add or remove from this as required... Though it will keep for a couple of days in the fridge - just don't put the dressing on until you are ready to eat it. I reuse an old vitamin bottle to take salad dressings to work - then just shake it up and pour it on!

  • 200g tin tuna steaks
  • Large handful of broad beans (I used frozen)
  • Large handful of edamame beans (I used frozen)
  • Large handful of sugarsnap peas
  • 100g fine green beans, chopped into 1cm long pieces
  • Small handful of chopped coriander
  • 2 large handfuls leafy salad (I wanted to get rocket for this, but the shop didn't have any - so I tried pea shoots instead - lovely! Watercress would also work well)
Cook the broad beans , edamame and green beans for 3/4 minutes, or until just tender, then plunge into iced water to refresh. Drain well.
Divide the cold cooked beans between two dishes.
Place a handful of the salad leaves on top of the beans and top with the coriander.
Scatter over the sugarsnap peas.
Flake the tuna steaks and divide between the two dishes.

The dressing:
6 tbsp sweet chilli sauce
Juice of one lemon
Dash soy sauce
2 tbsp olive oil

Shake dressing ingedients together well, and pour over salad just before eating.


Lemony spiced chicken!

Now, I usually like to take my time about cooking.... and love dishes that take a while to cook. I don't think it's because I have so much free time on my hands (I don't!!) but because I generally end up in trouble if I have to think about my timings too much ;) So I prefer slow cook meals where an extra half hour or so really doesn't make any difference!

Last night - inspired by a recipe I saw in a magazine, I decided to have a go at this speedy dinner - 20 minutes from getting through the door to sitting down!

Lemony Spiced Chicken


  • 400g chicken breast meat (I bought mine ready diced, thereby saving even more time!)
  • 400g tin chickpeas
  • 1 lemon
  • 1 onion
  • 1 tsp cumin
  • 1 tsp coriander
  • 1 tbsp tomato puree
  • 250ml chicken stock
  • 200g fine green beans, cut into quarters
  • 250g spinach
  • 2 tbsp olive oil
  • Bread to serve

Use a pot big enough for all ingredients!

I started by halving and finely slicing the onion, then frying over a moderate heat for 5 minutes.
Turn up the heat and add the chicken and fry for another 3/4 minutes until golden.
Add the cumin and coriander and the zest from the lemon, and fry for another minute.
Add the stock, chickpeas and tomato puree, cover and simmer on a low heat for 3 minutes.
Add the green beans and simmer for another 2 minutes.
Add the spinach, recover and allow to wilt for 2 minutes.
Remove from the heat, stir, then add the juice from the lemon.
Serve with crusty bread to mop up the broth!

So what did I think of my speedy effort?? Well, it was very tasty, filling and healthy. And it was a nice change to have something different for a quick meal (my quick meals are usually pasta or beans on toast!).

But I do think the chickpeas would have tasted better if they had had longer in the stock! ;)

Thursday 10 January 2008

Home-made roasted garlic pasta

Yum! I made this to use some roasted garlic - and was really please with the gorgeous silky pasta result! I served it with a roast garlic ragu - the flavours were fab together! But I think it would work just as well with very basic sauces - maybe even some good olive oil with some dried red chilli! If you don't have a food processor, you can make this by hand, but make sure you knead it until it's silky!

I love garlic - so was very chuffed to see that
Sunita from Sunita's World blog has chosen "Garlic" as her choice this month for her Think Spice... Think... event. I'm sending this over to her now - hope she likes it!


I think this made enough for about 6. It's always difficult to say how many 'normal' portions it would cover, as Boyfriend always eats enough for at least two and occasionally 3!

  • 500g strong white pasta
  • 4 whole eggs
  • 4 egg yolks
  • 1 head roasted garlic
  • Semolina (durem) flour for dusting

  1. Using a food processor with a dough blade, pulse the flour, eggs, and cooled roast garlic until it resembles large breadcrumbs. At this stage you may want to add a spot more egg white (or water) if the mixture looks dusty, or a bit more flour if it looks too wet.
  2. Turn on the processor and allow to turn for 2/3 minutes until the dough is shiny. (Alternatively do this by hand-kneading)
  3. Turn out the dough and continue to knead by hand for a further 1/2 minutes.
  4. Wrap dough in clingfilm and allow to rest in the fridge for an hour.
  5. Remove dough from fridge and cut into 4 pieces - keep one piece out and make sure you cover up the others so they don't dry out.
  6. I use a pasta machine to make my pasta, but I'm sure you could roll it by hand if you had the time or inclination ;)
  7. Roll the piece of dough into a ball and flatten slightly.
  8. Pass through the pasta machine at it's thickest setting, then fold each end in towards the middle (folding it at the 1/3 way point) to make a rectangle. Lightly dust with durum flour.
  9. Pass this through at the same setting, the repeat folding process.
  10. I usually do this 7 times - it is one of the main techniques to ensure really silky pasta!
  11. After the 7th pass through, don't fold the dough - but reduce the pasta machine setting, lightly dust, and pass though.
  12. Repeat this, reducing the machine setting each time, until you have the thickness you are looking for (Usually 1/1.25mm for tagliatelle type pasta)
  13. To make tagliatelle, cut the length of rolled out dough into sections about 25cm long.
  14. Dust both sides of the the dough and roll up.
  15. Using a sharp knife, cut the roll into the pasta width required, then separate.
  16. If using immediately, place onto a plate, and cover with a damp cloth while you finish the rest of the dough. Alternatively,you can hang it to dry for 6-8 hours (must be brittle and snap easily) then store it in an airtight container for up to one month.
  17. How long the pasta will take to cook depends on how thin you rolled it - remember fresh pasta takes much less time to cook than dried - check it after 2 minutes. Use lots of well salted water and a large pan to give the pasta lots of room to move. I heard on a TV show recently that the Italian rule of thumb is for every 100g pasta, use 1 litre water and 10g salt!

Slow-cooked Roast Garlic Ragu

It's January - and usually a month where I try to avoid pasta... but when I found Ruth's Presto Pasta night over at Once Upon a Feast... my will-power started to crumple. Or crumble... all these carbs have affected my brain!

It all started with the
home-made roast garlic fresh pasta but I needed more... I needed a sauce! After roasting off almost a dozen heads of garlic I set my mind to what else I could use them for...

I eventually came up with this gorgeous slow cooked ragu, with a pork and beef base, finished with 3 bulbs of garlic. It sounds like a lot, but the garlic was slow roasted until there was no sharpness left - just sweet, rich garlicky lushness!


  • 3 carrot
  • 3 sticks of celery
  • 2 onions
  • 3 roasted heads of garlic
  • Some olive oil for frying/drizzling
  • 500g minced (ground) beef steak
  • 500g minced (ground) pork
  • 1 beef stock cube
  • 1 tbsp fish sauce
  • 6 drops Tabasco sauce
  • 1 tbsp paprika (preferably smoked!)
  • 500g carton passata
  • 400g tin of chopped tomatoes
  • 3 tbsp worcester sauce
  • 1/2 tsp sugar
  • 1 tsp salt
  • 2 bay leaves
  • 2/3 bottle decent red wine
I started off by preparing the 'holy trinity' of Italian cooking - onions, carrots and celery. I already had my food processor out for making my pasta - so decided to save time and effort and use it for the veg too. I finely chopped one onion and used the grater attachment for the carrots and celery. Use an ovenproof dish to sweat this mixture off for about 20 minutes, or until soft. I used my Le Creuset casserole dish to do this - after lusting after one for years, I finally bought one last year and get it out whenever I can!

As I was going for sweet, rich favours I decided to caramelise the other onion. I cut the onion in half, then thinly sliced each half. After heating some olive oil over a medioum heat I chucked on the onions and let slowly cook for abotut half an hour until they were golden and caramelised. The kitchen was already starting to smell lovely!


When the onions and veg are cooked, remove to a bowl. If you have lots of lovely burnt bits on the bottom of the onions pan, then use a bit of the wine to de-glaze, and add that to the bowl too.

In the same ovenproof pan, brown off the pork mince - make sure the pan isn't overcrowded so it fries rather than boils! As it's January and I'm trying to be healthy, I strained off the pork and discard the fat, setting the meat to one side. While this was straining I fried off the beef in the same ovenproof pan. Once it was brown I added the strained pork, beef stock cube, Tabasco, fish sauce and paprika and let it fry for a couple of minutes.

Preparation almost done! Still a lot of cook time to go though...

I added the softened veg and onions, the passata, tinned tomatoes, worcester sauce, sugar, salt, bay leaves, and finally the red wine, then brought the whole lot to the boil. I was a bit surprised at how pink it looked - but I guess I'm used to making bolognese ragu with all beef!

I think I let my ragu cook in the oven for about 5 hours - but I think it would probably be ok after 3/4 hours. I stirred it every 30 minutes or so - it was quite easy to see when it all started to come together - initially it looked quite pink and 'bitty', but once it was ready the colour deepened to a dark colour and the texture was much softer.. I didn't need to, but make sure you add some water if it starts looking like drying out.

Right - almost ready - and the kitchen should smell amazing!

I removed the garlic mush from the roasted heads, and mashed it into a rough paste, then stirred it into the ragu. You could probably serve it right then - but I had to finish making my pasta, so it went back into the oven for another 15 minutes!
I served this with my roasted garlic pasta... I know that was probably overkill - and the sauce was definitely enough to stand alone - but it really did taste amazing! I found that I didn't need too much sauce with the pasta - nowhere near the quantity I was put out when making bolognaise. It was really rich, and coated the pasta well.

And it keeps the vampires away!

Sweet, oozy, roasted garlic...

I'm lucky enough to live close to some amazing stores though - one of my favourite is a little turkish shop. I went out to buy some garlic a couple of days ago - but all they had was massive bags bags - each containing about a dozen large heads of garlic! Considering it was the same price as the supermarket would charge for one head, I bought it anyway - decided I'd work out what to do with the rest when I got home!

About the same time I had an urge to make some homemade pasta - and came up with a way to combine the two - roast garlic pasta... yum!


I cut the top 1/4 off the top of each head - and placed each onto a square of foil. I drizzled over some olive oil, a pinch of salt and some white pepper... My eyes were starting to water from the fumes... and the cats kept looking at me expectantly. Any idea why my cats seem to be obsessed with garlic?? The only other food stuff that gets that reaction is bacon!

I folded the foil up to make little roasting packets and put them it into the oven (preheated to 200c (425f)).

About 50 minutes later I brought them out the oven and left to cool in their packets for a bit. When I opened them up they look like this!


And smelt absolutely fab!

I used a fork and the point of a knife to remove the oozy, sweet garlicky lushness from their paper cases - you can eat it as is, spread it on bread, or use it in your recipes. It'll keep for a couple of weeks in the fridge in an airtight container. Make sure it is airtight though or your fridge will stink!

Tuesday 8 January 2008

Pain in the neck pasta!

Well, I had lots of good intentions today of going to my seafront fish monger to buy some lovely fresh fish for tea tonight... but somehow managed to trap a nerve in my neck! So my walk by the sea was changed for an afternoon with the cats, and fresh fish to a larder pasta dish! The key criteria was that it had to be simple to make - with minimal neck movement...

I fancied a smooth sauce, that would cling to the pasta - if you prefer not to blend the sauce, then chop the pepper to an appropriate size. Either way, you may want to roast the red pepper off first for extra sweetness - but that was way too much effort for me today!

  • 1 tin tuna steak
  • 1 400g can of tomatoes
  • 1 red pepper
  • Small handful dried mushrooms
  • 1 clove garlic, crushed
  • 2 tbsp olive oil
  • 1 tsp sugar
  • Salt and pepper to season
  • pasta to serve - I used linguine
I put the dried mushrooms in a cup of warm water to soak for 30 minutes. (Sat down an watched an episode of Barefoot Contessa!)

Once the mushrooms were soaked, I roughly chopped them along with the red pepper. Over a medium heat, fry the pepper, mushrooms and garlic in the olive oil for a couple of minutes. Strain the soaking liquor from the mushrooms to remove grit, then add to the pan. Add the tomatoes, sugar and season.

Let all this simmer for at least 20 minutes - though longer cooking won't hurt it at all. (I had another wee sit down and watched Jamie Oliver!)

Once the sauce has cooked, blend it up to a smooth, thick sauce and add flaked tuna.

Serve with the cooked pasta of your choice!

Spicy Pork and Crab Meatballs

I started making these spicy meatballs to accompany my New Year noodle soup, but decided to put them up as a separate page as they can be included in way more dishes than just this soup. I made a monster batch of them, froze some, used some in the soup, baked and served with dipping sauce. And - one of my new favourites - using fine egg noodles, soy sauce and a beaten egg, created an noodle nest for each meatball - fried until golden and crispy. (I forgot to take pics of this one, but will put it up next time I make it!)


I've just realised I put the soup up before the meatballs and now everything's out of order - between that, forgetting to take pics or note my quantities, and losing my camera cable - this blogging thing isn't quite as easy as I thought ;)

Ingredients

  • 2 cloves garlic - roughly chopped
  • 1 large shallot (or 3 scallions) roughly chopped
  • 2 red chillies (Add more or less to taste depending on how hot you like it, and how hot the chillies are!) - roughly chopped
  • 2 inch piece of fresh ginger - roughly chopped
  • 1 red pepper - cut into large pieces
  • Zest of one lime
  • 1 tbsp dark/thick soy sauce
  • 1 tbsp fish sauce
  • 1 tsp sesame oil
  • Small handful coriander (cilantro) - roughly chopped
  • 1 tin crab meat (or replace with 150g fresh crab meat)
  • 500g minced (ground) pork
  • 1 egg - beaten

  1. Add the garlic, shallot, chillies, ginger, red pepper, zest and coriander into a food blender and blitz until all ingredients are very finely chopped.
  2. Remove from blender into mixing bowl.
  1. Add crab meat to mixture and combine.
  2. Put the pork, egg, soy and fish sauce and sesame oil into blender and blitz until pureed.
  3. Add this to the crab mixture and mix until well combined.
  1. Using damp hands, shape the mixture into small walnut-sized balls. I got about 32 from the quantities above.
  1. Put the balls in fridge for 30 minutes to chill (This is optional - but will help them stay together better!)
  2. Use as you like - but make sure they're cooked through!

Spicy Pork and Crab Meatball Soup

Well, I guess December was a bad time to start a food blog - no sooner had I started to think about it the party season started... then went to visit family for a few days... all in all, not much cooking has been done recently!

January is always a month where I try to cook everything 'from scratch'- in a panic to be healthy and save money! So the first thing I turned to when the excess of Hogmanay and New Year was over was a huge steaming spicy tasty bowl of noodle soup! Left-over pork mince from stuffing the turkey tempted me towards meatballs... and rather randomly a spare packet of brussel sprouts was a somewhat non-traditional veg - but they worked well. Though if you really don't like them, then some sliced cabbage would do just as well!


Apologies for the blurry, messy picture! Just before I made this a friend popped by and we went out for a quick New Year drink... So much for the detox. Then by the time I got home and made this, I was too hungry to stop and take my pics properly. I also forgot to put on the chilli garnish... Still tasted good though!

You will need:

  • 24 pork and crab meatballs - uncooked
  • 1 clove garlic - crushed
  • 1 inch piece ginger finely chopped
  • 1 litre Clear chicken broth
  • 4 baby bok choi,
  • 2 portobello mushrooms - thinly sliced
  • 12 baby sweet corn
  • 2 small handfuls bean shoots
  • Fine rice noodles (I use 100g per person!)
  • Chopped coriander/ wedge of lime and sliced red chilli to garnish
  • Fish sauce and soy sauce to season

Directions
  1. Cook the rice noodles according to the instructions on the packet, drain, rinse under cold water and set aside.
  2. Heat the chicken broth to simmering point - so the bubbles are only gently breaking the surface.
  3. Add the garlic and ginger to the broth.
  4. Gently slide in the pork balls.
  5. Bring the broth back to a gentle simmer.
  6. After 3 minutes, add the vegetables.
  7. Simmer for another 3 minutes.
  8. Check seasoning and adjust with soy or fish sauce as required.
  9. Divide the noodles between 4 soup bowls.
  10. Add the meatballs and veg to each bowl then ladle over the stock.
  11. Garnish with the sliced chillies, coriander and lime.
  12. Serve immediately and enjoy!