


This is my first contribution to That Cookbook Thing II... this time featuring: Mastering the Art of French Cooking by Julia Child. I'm so excited to have been asked to take part!! French cooking is not an area I'm familiar with, so it's great to have the impetus to try something new.
The other members of the Thing are:
- Mike from Mel's Diner
- Sara from iliketocook
- Mary the Breadchick from The Sour Dough
- Ruth from Once Upon A Feast
- Deborah from What’s In My Kitchen
- Mary from Cooking For Five
- Shaun from Winter Skies, Kitchen Aglow
- Elle from Elle's New England Kitchen
And I've often liked the idea of spicy foods for breakfast, though the closest I've really come is some barely spiced kegeree... and leftover hot n' spicy pizza after a girl's night in! Bingo - spicy brunch it was, baked eggs with asparagus and Sauce au Cari*!
But, later that week I started planning a roti recipe for Srivalli's Roti Mela, and another idea began to form...
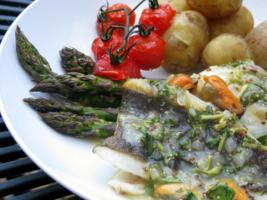
Thick spears of asparagus in a fenugreek spiced roti, served with a soft poached egg and as much Sauce au Curi as you can shake a stick at!
I am so chuffed with the results! The curry sauce was creamy - but because I used stock rather than milk, I didn't feel it was too heavy or rich. It also had just enough spice for a brunch! (Although people less inclined towards chili than me may disagree on this point... ;) The roti were quite heavily spiced, but the creamy sauce, yolk of the egg and crisp asparagus balanced them really well.
I would definitely make this again, either as a brunch or light supper - the whole thing took me less than an hour - including the roti!
A Rather Unusual Brunch: Spicy Roti with Asparagus, Egg and Curry!
 Serves 4
- 1 tbsp flour
- 2 tbsp ghee
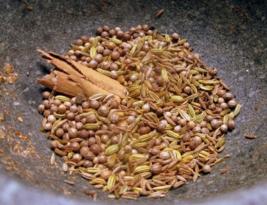
- 2 tbsp madras curry powder (Rajah variety - my personal favourite when I'm too lazy to grind it all up myself!)
- 1/2 tsp turmeric (for colour!)
- 1 cup hot vegetable bouillion
- 1/2 large onion, grated
- 1 tsp black mustard seeds
- 4 tbsp double cream
- Squeeze of lemon juice
- Salt to taste
- 16 thick spears of asparagus
- 4 eggs
- 4 roti
- Cilantro to garnish
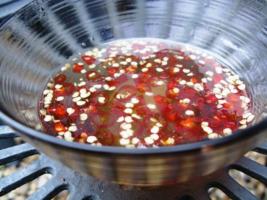
Prepare the Sauce...
My take on the curry sauce, adapted from the Julia Child recipe:
- I used ghee instead of butter - mostly because I have ghee in the fridge!
- I grated the onion instead of finely chopping it - I wanted a smooth finish
- I added some mustard seeds, just for fun
- Some of the other reviewers had noticed that the sauce was very thick - so I only used a tbsp of flour
Add the curry powder, turmeric and flour to the mix and cook out for 2/3 minutes. Take the pan off the heat and slowly blend in the bouillion and a squeeze of lemon juice. I did a quick seasoning check here and added a touch of salt - the bouillion added quite a bit of seasoning though.
Cook for a further 15 minutes at the lowest possible heat, stirring regularly.
Before serving, stir in the cream, taste and add more lemon juice or salt to taste.
Put the Dish Together...
Take one roti per person and pour a little of the curry sauce inside. Place some lightly steamed asparagus onto the roti and fold in half. Place a lightly poached egg on top of the fold and pour over more curry sauce. Finish with a garnish of cilantro.
* I did briefly consider adding smoked haddock into the mix in a weird French-Indo-Scots fusion... but fear of the wrath of the Greek stayed my wandering mind and I limited myself to a simple two way fusion ;)


