Thursday, 16 October 2008

Scottish Scran 7 - Mince and Tatties

Mince and tatties. Sounds plain enough, but it was always a source of excitement when we found out we were getting this for our tea! I even thought about calling my two cats after it - Minnie and Tattie for short! it has it's own 'World' championships, and has even been the topic of European parliamentary dispute.

I've been looking forward to this post since I came up with the idea for Scottish Scran. Mince and tatties is another comforting childhood favourite of mine. And just perfect for the colder weather.

There'll be no tough mince here. No watery gravy or onion bulk. The mince is real Scottish steak mince, hung and flavourful. Slow-cooked to a thick sauce, served over buttery mashed potatoes, served with a dash of the ubiquitous broon sauce. Then on the second day, made over with the addition of marrow fat peas (no petit pois, thank you), and potatoes infused with flavour from being slowly cooked in the pot.

Mince and Tatties... Day 1


  • 1 kilo of good beef steak mince
  • 1 large onion, finely chopped
  • 3 medium carrots, peeled and diced
  • 2 tbsp Worcester sauce
  • Beef stock to cover
  • Salt and Pepper to taste
  • Mashed potatoes to serve
In a large saucepan, brown the mince in batches, being careful not to overcrowd. This is important - crowd the pan and your mince will boil and lose a lot of flavour. Only drain excess fat if you must - you'll lose flavour and tenderness if you do.

In the same pan, fry off the onion for 3/4 minutes, before returning the mince to the pan. Add the worcester sauce, and beef stock to cover. Cover the pan and simmer gently for 45 minutes.

Adjust seasoning if required, then add the carrots. Now, continue to simmer for a further 30 minutes, leaving the pan uncovered as required to reduce the stock down to a thick sauce. Top up with more stock if required, though this shouldn't be necessary.

Serve atop a pile of mashed potatoes, and with a bottle of broon sauce on the side!


Mince and Tatties... Day 2


  • Leftover mince from yesterday
  • 1 tin marrow fat peas, drained. or soak your own if you must
  • Potatoes, cut into bite-size pieces
In a saucepan large enough to take all ingredients, heat the leftover mince. Add the potatoes, and top up with water if required. (Or stock if you have any left) Adjust seasoning - bear in mind that the tatties will absorb a lot of saltiness. Cover and cook gently until the potatoes are cooked through.

Add the peas and cook for a further minute or two.


Scottish Word of the Day!

mince - nonsense, rubbish

Yer no listenin' tae whit that heid-th-ba tells ye, ur ye? His heid's full a' mince!
Or, in response to some haivering blether, simply: Mince!

Tuesday, 9 September 2008

Scottish Scran 4 - Mum's Steak Pie

Well, it's definitely Autumn. It's sunny today, but there is a bite to the air. My flip flops aren't quite finished with - tucked under the bed, resolutely hoping for an Indian summer. But the boots are back, cosy cardie on, and maybe a light scarf to keep the chill off my neck in the evening. And my final festival of the summer has just been cancelled as the site is water-logged... ya boo hiss, rain.

As with every change of the seasons, the end of summer means a change to how we eat - a cold salad just isn't as appealing when the central heating is on. And though I already miss summer (or the summer that wasn't!), there is something so comforting about cold weather food that I maybe don't feel so blue after all!

So to celebrate the change in the seasons, here is the fourth Scottish Scran dish - a warm comforting Steak Pie.

Not so dissimilar from most typical British pies, the Scottish steak pie is traditionally topped with puff pastry, and has no base crust. It also contains beef sausages - I was distressed as a child to have a steak pie in England and to find out there were no sausages in!! As well as allowing the pie to stretch further, the addition of sausages undoubtedly adds flavour to the finished pie.

Steak pie is an emotive dish for me. In Scotland, Hogmanay/ New Year is traditionally as big a deal - if not bigger - than Christmas! So after bringing in the bells, singing Auld Lang Syne, and doing our first-footing on Hogmanay, we'd look forward to our New Year's Day celebrations. Hair of the dog and a steak pie dinner - what better way to start the year?!

And more than this, steak pie was a regular Sunday dinner, everyone round the table together, and as often as not a grand-parent or two down for the afternoon. For a time, on Sundays, my dad played doms - the grand prize, a family sized steak pie. He hardly ever won...!

And I can tell you one thing that steak pie isn't. It isn't a bowl of meat stew, with a square of separately cooked puff pastry on top. That is a travesty, and should be removed from any (probably less than mediocre) pub menu instantly. My daddy never stood for it, and neither will I.

There are two camps of thought on steak pie pastry: Those who like the middle bit of the pastry, where it's a bit stodgy and all the gravy has soaked into the crust (me and my dad); and those who like the dry flaky pastry at the edges (my mum and sister). An even family split like this works very well, with minimal fighting, and no leftovers. I dread to think what would happen to a family whose steak pie crust preference was unbalanced. I'm quite sure there would be blood loss, possible divorce, and at the very least wasted steak pie.

Steak pies are generally bought at the butcher - and can be bought in varying sizes - through individual portions to huge family sized ones. Every family will have their favourite steak pie butcher - who may or may not be the butcher used for buying meat. The popular butcher can have huge queues - when I was there when I got this photo, the queue was out the door and past the shop front outside. At New Year it's best to order your pie in advance - they'll be well sold out by hogmanay!

Steak Pies!

My mum often used to make her steak pies herself. This involves having to order the skirt of beef from the butcher. It's much easier to get skirt in England - my guess is that it's all used to make the butcher's steak pies in Scotland! Not quite so easy to get beef sausages, but not too difficult... though I still dont' think they're the same... This is one recipe I would never mess with - in fact, despite it's simplicity, I still called my mum twice when making it, just to check my memory. I'm glad I've committed it to writing now!

It's an easy recipe, but it does need a long, slow cook. I would usually make the base up the day before it is needed, the meat should be falling-apart tender. Then the next day you're only half an hour away from dinner!

My Mum's Steak Pie

Serves 6
  • 1 large onion, finely chopped
  • 1lb skirt beef, chopped big bite size bits
  • 0.5 lb beef sausages
  • 3 tbsp plain flour
  • 1 beef stock cube
  • salt and freshly ground black pepper
  • Oil to fry
  • Puff pastry for lid. I cheated and bought ready-made... but feel free to make your own!
Preheat oven to 150c.

Prepare the Skirt...

Heat a little oil in a casserole dish and fry off the onions for a couple of minutes. Season the flour and dredge the skirt beef in it. Add to the onions and brown off. Dissolve the stock cube in a bit of hot water and add to the pan, then top up with boiling water until the meat is covered. Add a decent amount of freshly ground black pepper - about a tablespoon.

Put the lid on the pan and put into a low oven for a couple of hours. Check every so often and top up water as required. The water becomes the gravy, so don't let it dry out!

Add the Sausage...
Chop each sausage into three, and add to the meat. Check water levels again and return to the oven for an hour - checking and giving a stir half way through.

Making the Pie...
Righty ho, so we have a lush base which should be full of the tenderest beef steak. If you squeeze a bit between finger and thumb, it should flake without pressure. And that's how you know it's ready!

Increase oven temperature to 170c.

Pour the meat mixture into a pie tray. Roll out your pastry to be slightly bigger than the pie dish. Cut off a couple of edges of the pastry and stick round the edge of the pie tray.


I put the egg holder thingie in to stop the pastry sinking in the middle. But it was too high. So I took it out, crossed my fingers and hoped for the best!

Brush a bit of milk over the edges, and place the pastry on top. Trim the edges and brush the top with milk. Stab in a couple of steam holes and we're set to go.

Bake the Pie!
Put the pie into the middle shelf of the oven for 30 minutes or so, while you make up some creamy, buttery mashed potato and steam some veg.

It's not pretty food, it's steak pie!

Scottish Word of the Day!

Stodgy - I can't think of an alternative to this word, it's kind of thick, heavy, starchy.

Often mistakenly* used as a negative, in my opinion stodge is often a very good thing. It's the basis of all comfort food. Think mashed potato, rice pudding, pies, chili con carne with rice, fruit crumble... oh yes!


Hmmm... on consideration, I'm not even sure if stodgy is actually a Scottish word! Though it does describe a lot of Scottish food.
So I'll give you some bonus vernacular just in case!

Vino Collapso - cheap, strong wine

Ah wis steamin' last nite - shouldnae hae open'd that last boattle of vino collapso. A boattle o' ginger'll soart me right oot tho!


*IMO!


This is also my entry for Ivy's Savoury Pies event! If you have a pie you think the world should know about, head over and check the announcement page out now - you have 'til the end of the month to get it in!

Monday, 28 July 2008

Scottish Scran 1 - Square Sausage

Well - as it says on the profile, I'm a Scots lass living in England... and being the experimental type I have cooked many different cuisines over the years. However, one nation that I just haven't made much of an effort with is my own!

So I am starting a new challenge - to blog something Scottish every week or two, to prove it isn't all about deep-fried mars bars, pizza crunch and heart disease...

This will be a learning experience for me - I don't know nearly as much about Scotland's cuisine as I should - but I am looking forward to finding out!

The first recipe on my list is my favourite ever Scottish foodstuff... square sausage, sliced sausage or lorne sausage - depending on where you're from. A slice on square (a slice of plain Scottish bread, with a slice of square sausage, and a daub of broon sauce) is the ultimate morning-after breakfast, and something I look forward to (almost!) as much as seeing my family at Christmas!


Right, so I couldn't get Scottish plain bread, but ciabatta - with its chewy texture and savoury taste makes a decent alternative!

It's an easy recipe - mixture of ground beef and pork, mixed with breadcrumbs and spices, cut into a handy square shape, just right for putting on a roll. It also forms the basis of my family's own version of stovies - recipe to follow!

Square Sausage

Sliced and Ready for Storage
  • 2 lbs minced beef - not too lean!
  • 2 lbs minced pork
  • 1 tsp onion salt
  • 2 tsp pepper, freshly ground
  • 2 tsp nutmeg, freshly grated
  • 4 tsp coriander berries, toasted and ground
  • 2 tsp salt
  • 3 cups bread crumbs
  • Water as required
Right... I thought about doing this in my mixer... but there was just too much of it!! So - wash your hands really well, roll your sleeves up to the elbow, and be prepared to get stuck right in...

Mix the breadcrumbs with the spices and salt. Then using your hands, combine the two meats reasonably well. Mix both the breadcrumb mix and and the meat together and combine really well. If the mixture is too dry add a little water - no more than a cup though.


Now you want to pack it into the container that will shape your final 'sausage'. I used a weighing tray - measuring about 25cm * 18cm * 8cm. I lined it with clingfilm first to make it easier to remove, then packed the mixture into it as much as I could. There was some of the mixture left over - I'll tell you what I did with that later!

Cover the mixture tightly, put a weight on top, and put into the freezer for at least an hour - no more than 2! To weight it I used a hardback book, with a

Remove from the freezer and turn out from the container. Cut the block in half lengthways, then use a really sharp knife to cut slices. I don't think my breadcrumbs were fine enough - I think if they had been finer/dryer the slices would have stayed formed slightly better.

I decided to freeze my sausage in packs of four slices, separated by greaseproof paper, then wrapped in film - this makes it really easy to take some out.
Oooops - so maybe my slicing needs perfecting!

Ps. in case you were wondering about the title - scran is Scottish for food!

That I may be blest wi’ health, And scran.

Robert Wilson, Poems Chiefly in the Scottish Dialect (1824)

Friday, 25 July 2008

Home-Corned Beef

Did you know there is no corn in corn beef?

Err.... durrrrr.... probably!

So do you know why they call it corn beef (or corned beef) then?

Hmmm...

Well I didn't until recently - apparently it is because it is cured with coarse salt - and the grains are also known as corns of salt.

So there you go!

Well, what is this stuff then??

Ah... this is what we folks in the UK call corn beef.... also known as bully beef outside of the UK. And it comes in a dangerous tin that you need a special key to open...

And we call American-style corn beef, salt beef!

Confused yet?! Well the German's apparently have two different varieties of tinned corn beef... And the Danish have yet another two types on top of that...

And don't even start me on pastrami (smoked, not boiled, if you're interested!)

Basically, what it all comes down to, is that corn beef is beef that has been cured with salt.

No corn involved!


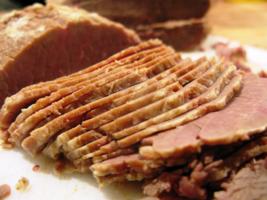
So, the type of corned beef that I am making here is an American-style cure - I soaked the beef brisket in a spiced brine for 6 days, before gently simmering it for three and a half hours until the meat is meltingly tender.

I then chilled it before slicing and chunking.

To saltpeter, or not to saltpeter?
Corn beef cures traditionally contain saltpeter - a food preservative, which also gives the meat the traditional pink colour. Also known as
potassium nitrate, saltpeter is now thought to be carcinogenic - so I left it out. With modern refrigeration methods it isn't needed as a preservative - and it didn't seem worth the chemicals, just to make it pink! The flavour and texture are unaffected.

This recipe takes a bit of time to make - but not much actualy work is involved. So if you have a spare space in your fridge, give it a go. Adjust the spices used in the brine to your own taste - want it hot? Add more dried chilli. Hate garlic? Leave it out!

Recipes using my corned beef to follow!


Home-Corned Beef


Makes a lot of corned beef!!
  • 3 kilo beef brisket
  • approx 8 cups of filtered water
  • 1 cup maldon sea salt - I wouldn't use cheap salt here - that's what's going to be flavouring your meat!!
  • 1 cup sugar
  • 3 cloves garlic, crushed
  • 1 tsp black mustard seeds
  • 1 tsp juniper berries
  • 1 tbsp mixed whole pickling spices (allspice berries, dried chili, black peppercorns, bay leaves)
Prepare the Brine...
I prepared my brine in the casserole dish I was using to soak it. (I tried to buy a zip lock bag to use, but couldn't find one big enough!)

Bring half of the water to the boil and add the salt and sugar to it. Stir until dissolved (bring back to the boil if required).

Add the other spices to the mix, the remaining water and allow to cool. (I put some reusable ice cubes in to make it cool down more quickly without diluting! I guess if you add less water you could put in real ice cubes... or be patient and wait for it to cool down naturally!)

Add the Beef...
Trim any excess fat from the beef joint, and gently place into the cooled brine.

Use a non-metallic weight to ensure the joint is fully submerged - add more water if necessary.

Just after immersion!

Wait...
Store in the refridgerator for 6 to 10 days, turning the joint daily. I'm not sure how you're supposed to know when it's ready to take out (I'm writing this at day 2), but I'll let you know!

Wait...
Wait...

Whilst you're waiting, here's a pretty pic of a pre-sunset from my living room window!

And back to the waiting...
Wait...
Ok... And I'm back!

I waiting 6 days in the end - and I'm still not sure if that was too little/ too much or just enough!

But the joint felt firm to the touch all over, and had turned a pale pink colour. Does that mean anything?!??

Prepare for the Cooking...
Anyway, on the 7th day, I removed the meat and discarded the brine. I then rinsed it thoroughly under cold water, before placing it in a large saucepan along with one roughly chopped onion, 6 peppercorns, 3 juniper berries and a couple of bay leaves.

Cook!
Top up the pot with water until the meat is covered, then bring to the boil. One boiled, cover and turn to the lowest heat possible and gently simmer for 3-4 hours (depending on the thickness of your meat.
I reserved the stock that the beef was cooked it - it had a gorgeous deep spicy flavour, yum!

Once cooked, remove to a dish, loosely cover and leave to cool.* Once cold, put in the fridge for at least a couple of hours - you want it really cold before you try to slice it.

Using a really sharp knife, cut the corned beef into thin slices for sandwiches - and into chunks if you want to use it in hash/soup etc.


* I was going to have some of it hot, but in the end, decided to save it all for future use!

Monday, 16 June 2008

Think Spice: Wasabi Fried Beef with Ginger Crisps

This month Think Spice is hosted by Krishna of Cooking from A to Z and features wasabi. It's a great choice - I can't wait to see the different dishes that come out of the round up! Since the first time I ate sushi I've loved wasabi - but I've never really used it in cooking. Krishna gave us a couple of vital wasabi hometruths:

Wasabi isn't horseradish!
I did know that one! Although... it is from the same family (the Brassicaceae if you're interested) and is often called Japanese horseradish!

And not only isn't wasabi horseradish - often it isn't even wasabi!! The worst of the pretenders (supermarket tubes!) is no more than a mix of horseradish+mustard+food colouring - and even the restaurants generally cheat away from the real thing.
Nice! I did not know that!! Apparently it's because wasabi loses its potency very quickly - so horseradish is added to give the 'nasal burn'... And true enough - I check my wasabi powder - only 10% real!!

I have another wasabi fact to add to the mix:

Wasabi is neturalised by ginger.
Yep, so you can get a huge lump of it, mix it in with your sushi and soy and feel your brains explode for as many seconds as you can bare... Through streaming eyes, find a few slices of pickled ginger and ease them past your burning lips. Chew, relax and feel the wave of ginger juice calm the burn!

So the next time you're eating sushi - don't add the ginger to the sushi 'bundle', but use it as a palette cleanser between pieces!

Anyway, with this month's offering I couldn't resist a return to my deep fryer. Beef marinated in ginger, mirin and soy, with a crunchy wasabi coating. Served with crispy ginger slices to protect against the wasabi! (Not that it was needed - I think next time I'd probably double the wasabi powder used... But I do like my food hot, so let personal taste drive your choice on this one!)

This made a great appetiser - but would also work well as a light lunch with a salad!

Wasabi Fried Beef with Ginger Crisps


  • 4 tbsp corn flour
  • 1 tbsp plain flour
  • 1 tbsp wasabi powder
  • 200g thick beef steak
  • 3 tbsp soy sauce
  • 3 tbsp mirin
  • 1 tsp toasted sesame oil
  • 2 tbsp finely grated fresh ginger
  • 1" fresh root - very finely sliced
Mix the marinade...
In a bowl big enough to take the steak, mix together the mirin, soy, sesame oil and ginger

Prepare the steak...
Slice the steak against the grain into slices about 5mm each. Add the beef slices to the marinade, cover and refrigerate for at least an hour.

Lovely steak!

In a food bag, mix together the two flours and the wasabi powder. Once the steak has marinated, strain the beef to remove the excess marinade (I was happy leaving the grated ginger in the meat - feel free to get rid of it if you want :)

Put the strained beef strips into the bag and mix thoroughly so that the meat is completely covered with the flour wasabi mix. Shake off the excess and leave the beef to sit for 10-15 minutes to allow the flours to bind with the marinade.

Heat the Oil...
Eeek! I don't have a real deep fryer, or a thermometer... so I can't give you an exact temperature. You want it really pretty hot though - ideally we are just crisping up the corn flour mix - not cooking the beef through!

Make the Ginger Crisps...
Carefully drop the ginger slices into the hot oil. Watch for them to turn golden, stirring occasionally. Remove from the oil and set onto some kitchen roll to drain.

Fry up the Beef...
Cook the beef in two batches to ensure there is enough space for it. Gently drop the beef into the hot oil, stirring immediately to separate the slices. Cook for 30-40 seconds - until the flour is crispy, remove from the heat and drain on kitchen roll. Give the oil a minute to come back up to heat before going the second batch. Don't over cook these - as they will continue to colour when drained... But if you *really* hate pink meat then give them up to a minute to ensure brownness!

Serve!
Serve with the ginger crisps scattered on top. I didn't feel that they needed dipping sauce, but if you really want to then keep it simple - there are already a lot of strong flavours going on in there!

Friday, 6 June 2008

Something for the Weekend: Corned Beef Hash with Hot Caramelised Onions

Phew - what a hectic week!

I found out this week that I am to start a new position in a new office on Monday - so things have been a little hectic here. I'm looking forward to the change, but I think life is going to be a bit different from now on!

So I'm really looking forward to a relaxing weekend, and was planning out tomorrow's brunch (watch this space!) when I remembered this - the last brunch I made!

Question. What do you do when you are starving hungry on a Sunday morning, there's no bread or milk in the house and you're too lazy to get dressed to go to the shops?

Answer:

Corned Beef Hash with Hot Caramelised Onions

No quantities here - just make up as much as you like!
  • Left over boiled new jersey royal potatoes (They don't have to be left overs - you could always cook them when the onions are caramelising!)
  • corned beef, cut into bite-sized pieces
  • 1 small/medium onion per person
  • 1/2 tsp sugar
  • oil to fry
  • salt and pepper to taste
  • hot sauce to taste
  • 1 soft poached egg per portion
Caramelise the Onions...
Half the onions, and slice pretty finely.
Heat a glug of olive oil in a heavy based frying pan, keeping the temperature low. Add the onions, sugar and a pinch of salt (the salt stops them burning). Cook for 30-40 minutes, stirring often. If they get too dry add a splash of water. They're ready when sticky, sweet and brown. Add as much hot sauce as you like - I added about 1/6 tsp per onion - it's hot stuff!!! Continue to cook for another minute or so and set aside.

Prepare the Potatoes...
Cut up the cooked potatoes, and fry in a hot pan with a little oil/butter until they are browned and crispy at the edges.

Put it Together...
Once the potatoes are crispy, add the onions into the potato pan and stir to mix. Add the corned beef and combine well - the corned beef will start to break up a little in the heat.

Serve with a soft-poached egg on the top and tuck in!

Friday, 23 May 2008

A Noteable Post and The Constant Crowd-Pleaser: Chili Con Carne

Guess what?

No... not THAT, silly...

This is my 100th post!!!

How exciting is that?! I have now been a food blogger for almost 6 months - in which time I have written on average four posts a week, concocted about 90 recipes of varying success, and entered numerous food blog events... Hell, six months ago I didn't even know events even existed!

I spend a lot of time dreaming up recipes and shopping for food, even more time making my 'creations', probably not nearly enough time photographing them (!), and hours cleaning up!

My must-read blog roll now has 14 blogs on it - with another 60/70 on my leisurely read list... (and counting - I added another this morning!) What an amazing community to be part of - I'm so looking forward to the next 100 posts!!

Anyway, reaching a milestone always leads to moments of reflection (as well as expectation!), so it is quite fitting that this post is also my entry to Tastes to Remember hosted by Sarah over at Homemade. It's another last minute entry for me - my third this week. Maybe at some point in the next 100 posts I'll develop some organisation skills?

As I mentioned when I made my Ultimate Chili Con Carne, I always remember the excited anticipation had by me and my sister whenever my mum was working away from home. Not because we were desperate to get rid of her (!) but because it meant my dad would make one of his two staples: chilli con carne or macaroni cheese (with HP brown sauce, of course!). Beloved by the three of us, those were two dishes that my mum just didn't appreciate - so when we were fending for ourselves, there was no choice but to indulge. Now, my mum is a fantastic cook - she's taught me a lot (when she comes to stay with me we spend hours watching cookery shows and deciding what to have for dinner that night!). But... kind of like me... she is pretty experimental and like to try new things - so there isn't the same constancy of dishes. (In saying that, watch this space for the BEST steak pie you'll ever taste... I'm planning a Scottish run of recipes soon!)

So, this recipe is pretty close to the one my dad used to cook for my sister and I - using ground beef and a nice amount of dried chili. And has to be served with plain rice and pita breads -open the pita pockets and stuff in as much chili and rice as you can.

Eat with your hands, in front of the telly. Just don't tell mum!


The Constant Crowd-Pleaser: Dad's Chilli Con Carne


  • 500g ground beef
  • 1 large onion, finely chopped
  • 3 cloves garlic, crushed
  • 1 tin chopped tomatoes
  • 1 carton passata (sieved tomatoes)
  • 1 beef stock cube
  • Salt and pepper to taste
  • 1/2 tsp sugar
  • 1 tsp ground cumin
  • 1 tsp ground coriander
  • 1 tbsp paprika
  • dried chillies - to taste, ground or flaked. I reckon at least 2 tsp though!! I used 1 tbsp of reconstituted holy trinity blend (Pasilla, Ancho, Mulato) and 1 tsp habenero flakes. Hot! Nice!
  • A few drops of tabasco if you fancy it (I usually do!)
  • 1 tin kidney beans

Fry...
Heat a glug of oil over a medium heat in a large saucepan, then add the onions and garlic and fry until soft. Remove to a bowl and fry off the ground beef in batches. Don't do it all at once, or you'll boil the beef instead of browning it - and lose half the flavour!

Mix...
Return all the beef and onion mix to the bowl, crumble in the stock cube and add the spices. Fry off for a couple of minutes before adding all the tomatoes and the sugar.

Simmer...
Bring to the boil, cover and simmer for 20 minutes. Taste it and adjust seasoning. If the tomatoes were very sharp you may want to add a bit of extra sugar here too. If it ain't spicy enough chuck in some more tabasco - or maybe some cayenne pepper. Make it yours baby!

Cover again and simmer for another 20-30 minutes, stirring occasionally. Add the rinsed kidney beans 10 minutes before the end.

Serve...
Like I said, lightly toasted pita breads and steamed long grain rice. Nowt else. Especially no cheese. Yes, I know it's lovely, but not for here. Save that for a huge bowl of chilli nachos with all the trimmings!

EAT!
yum nummm gobble slurp mmmmm..........


Tuesday, 13 May 2008

So Much More Than A Roast Beef Sandwich... The Ultimate Leftover Sandwich!!

I just looked at my recent posts and realised I've covered a lot of firsts this month so far...My first taste of frog legs, a birthday and me!, My first award - the Arte Y Pico!!!, and My First Roast Beef Dinner!

I'll see what else I can try for the first time - I seldom cook the same thing twice - but I don't even think that counts anymore!

I think this is the first time I have blogged a sandwich. But it was so much more than that -it was the best sandwich ever! The photograph doesn't do it justice (note to self, book into photography course) - but think of the sweetness of caramelised onions with the sharp heat from the mustard - and tender rare beef with a drizzle of rich, thick gravy....

Serendipitously, I got the notice about Anupama from Food n' More's Sandwich festival 2008 just after I had decided to blog this - it must be fate!


The Ultimate Leftover Beef Sandwich!!


  • left over rare roast beef - sliced as thinly as you possibly can
  • 2 tbsp mayonnaise
  • 1 tbsp English mustard - it has to be English!!!
  • handful rocket
  • left over gravy - if you have any!
  • caramelised onions - I made a huge batch when I made this left over dinner!
  • 1 ciabatta loaf
  • freshly ground black pepper
  • a teensy sprinkle of maldon sea salt - skip this is you're watching your sodium intake - I just love how it develops the taste of the beef...

Assembling the sandwich...
Cut the loaf in half
Mix together the mayo and mustard and spread on the cut side of the bread.
Layer on a few layers of the wafer thin beef - as much as you think you can wrap your gums round!
Drizzle on some of the left over gravy
Put the rocket on top of that, and the caramelised onions atop the rocket.

Cook the sandwich...
I did mine in my George Foreman grill - but press the panino* however you can!


* Panino - singular of panini. I read a rant recently about people misusing the word panini. Apparently it is especially irritating when people say "Panini sandwich". As this essentially means little breads sandwich. Which doesn't make any sense. (pan = bread, ini = little (pl)). And to say paninis - well, let's not even go there.

I love grammar Nazis - especially foodie ones!

Thursday, 8 May 2008

Left Over Roast Beef Tagliatelle with Caramelised Onions

Ok... now in your head, start thinking of Fleetwood Mac, Albatross....

... are you ready?

... doo be doo be doo be dooooo.....

(cue food porn voice)

... This is not just pasta, this is silken, al dente tagliatelle mixed with succulent cubes of rare roast beef...

...in a rrrrich, red wine sauce with just a hint of heat from dried red chillies, laden with sweet caramelised onions...

... this is not just garlic bread, this is home-made focaccia, split and spread with garlic and black pepper infused butter, baked in the oven until crispy at the edges...

...This is not just food, this is kittie's leftover roast dinner food!


Ok, ok, so I'm being even more random than usual... For those of you not based in the UK (or perhaps for everyone if my impression was that bad ;) that was a mini-spoof of the M&S food adverts. Which shouldn't really be allowed on telly until after the watershed!

Anyway, without further ado, here is my entry for this week's Presto Pasta Night - a fabulous weekly event hosted by Ruth at Once Upon a Feast - if you like pasta - get over there and check it out!

Leftover Roast Beef Tagliatelle!


  • Left over rare roast beef, cut into cubes
  • 1 tin chopped tomatoes
  • 1 shallot, finely chopped
  • 1 clove garlic, crushed
  • 1 glass red wine
  • 2 red onion, halved and thinly sliced
  • 1/2 tsp red chilli flakes
  • Olive oil to fry
  • 1/2 tsp sugar
  • salt and pepper
  • Pasta to serve
Caramelise the onions...
Over a very low heat, place the sliced onions in a pan, add a glug of olive oil and gently fry. Once they start cooking down add a pinch of salt to stop them burning, and a pinch of sugar to encourage the natural sweetness of the onions. Cook for 30-40 minutes until dark golden and caramelised, adding a little bit of water if required to keep them moist.

Meanwhile... make the sauce...
Heat a glug of olive oil and gentry fry the shallot and garlic until soft. Add the wine, tomatoes, 1/2 tsp sugar and chili flakes. Simmer gently for 25 minutes and turn the heat off. Add the roast beef cubes. You want to keep these as tender as possible - so allow them to be heated by the heat in the sauce - don't allow to boil again.

And the garlic focaccia...
To accompany it I served the remains of the focaccia I made for Taste and Create. I mixed some softened butter with a bit of olive oil, one crushed clove of garlic and a few decent grinds of black pepper. I split the bread in half, and spread the cut side with the butter mixture. I then wrapped it in foil and chucked it in the oven for 10 minutes - opening the foil for the last couple of minutes to let the edges start crisping!


Serve the sauce thoroughly mixed with the tagliatelle - with the garlic bread on the side!

Wednesday, 7 May 2008

My First Roast Beef Dinner!

You might remember a couple of weeks ago I broke my store cupboard challenge when I saw the most amazing hunk of sirloin roasting joint at an amazingly low price!

I'm not really a meat, tatties and two veg kind of girl, so very rarely cook up a roast dinner. I made a turkey dinner at Christmas, and the last time before that was at least 3 years ago! Even then - I would only ever cook chicken - I liked being able to use the carcass for stock.

So this was a new venture for me... and definitely one I'll try again! I failed to take pictures of the roast dinner - it was tasty, but I can't help it - I'm just not that inspired by this type of food - it's the leftovers that really turn me on! Though I have to say, the gravy was astounding - I deglazed the pan with red wine and a bit of water, added some flour and a load of freshly ground black pepper. The meat juices, onions and garlic from the roasting process were still in the pan, so I squished and squeezed every bit of goodness out of them. I strained the whole thing through a sieve, and left it to separate so I could skim off the fat. After melting in a knob of butter... it was the richest tastiest gravy ever (if I do say so myself! I'm in a very modest mood today ;)

Meltingly Rare Roast Beef!

Preheat the oven to 240c.

Prepare the meat...
Pat the surface of the meat with paper towel to remove excess moisture.
Mix together a heaped tablespoon of flour, a tablespoon of smoked paprika and rub it all over the joint. Season the joint well with Maldon salt and freshly ground black pepper.

Prepare the pan...
Take 3 similarly sized onions, peel, and cut in half against the grain. Put a little spot of oil into the bottom of a roasting tin and lay the onions in in. We're going to use the onions as a roasting rack. All the juices from the meat are going to go into the onions, and help make the best gravy ever! Try to use as small a roasting tin as possible. Scatter 3 unpeeled garlic cloves around the onions.

Cook the joint...
Place the joint on top of the onions and put the whole thing into the pre-heated oven. Cook at the temperature for 20 minutes, then turn the oven down to 180c. Cook for a further 35 minutes per kilo. This will give you beautifully rare beef. I'm not going to tell you how to make it any other way as I'm a rare beef fascist, and believe that anything other than rare is a waste of the beast's death ;)

Rest the joint...
Do NOT skip the step. If you skip this bit you'd be as well chowing down on a road side cafe 'top quality' rump steak.
The joint will need at least 40 minutes to rest - this is also the bit that finishes the cooking. Remove it from the oven, cover with foil and leave for 40 minutes. Now is probably a good time to prepare your potatoes, veg, yorkies, etc.

Rested and ready to go!

When the meat is rested, remove to a board. Use the pan, juices, onion and garlic to make the gravy, and carve the beef as you will!

Wednesday, 19 March 2008

Leftover Curry Soup Curry!

This isn't much of a recipe, but it tasted sooooo good I thought I better share! Seriously, this is one of the best curries I've ever made - and it was by accident!!!

A couple of days ago I made a Spinach and Chickpea Curry soup for No Croutons Required. It was very tasty, and I had it for lunch the next day too.

There was still vats of it left. I seem to be still cooking for two - even though there is just me to eat it!

Anyway, wasn't too interested in eating more soup last night, so instead decided to convert it back to a curry...

Beef, Spinach & Chickpea Curry


I got a nice piece of rump steak, and sliced it before quickly browning it in a little oil. I added some of the soup - trying to add the sauce only so the potatoes/chickpeas didn't cook any more! Then I let it simmer for a few minutes. I added some potatoes and chickpeas, and heated it through.

I dished up some fennel saffron pilaf, then spooned the potatoes, meat and chickpeas over the top - adding a couple of spoonfuls of the base soup as sauce.

Sprinkle with some cilantro and I was ready to eat. I even had seconds, and that hardly ever happens! It is the never ending pot of soup!

Tuesday, 29 January 2008

My Ultimate Chili Con Carne!

This is one of the dishes of my life!

I remember when I was young I used to be excited when my mum was away for the night - because it would mean that Dad would cook his Chili Con Carne for me and my sister. Mum wasn't a fan, so this was a rare treat! Fast forward a few years, and it became one of my student day staples - either to cook up a vat of it and freeze in single portions - or to cook up a vat and feed a group of starving students for about £5 (I bought food, they brought beer - good deal!)

Though I don't cook it as much now, it is still one of my ultimate comfort foods - spicy, tasty and soft - easy to make and easy to eat! So I am throwing it over to Meeta's Monthly Mingle at the lovely What's for Lunch, Honey?.

I do like it pretty spicy, and add different types of heat to give a more interesting burn! Please feel free to adjust the chili and spice quantities to suit!

Apologies for the lack of pictures - the only one I have is from during the cooking time - I forgot to take more when serving up!

My Ultimate Chili Con Carne!


  • 500g lean beef mince
  • 4 chicken thighs - trimmed and small diced, should be about the same size as a kidney bean!
  • 2 medium onions, medium chopped
  • 4 cloves of garlic, crushed
  • 1 beef oxo cube
  • 3 Thai red chilies, finely chopped - I leave the seeds in ;)
  • 1 heaped tbsp smoked paprika
  • 1 tsp chili powder
  • 1/2 tsp cayenne pepper
  • 1 heaped tsp ground cumin
  • 1 heaped tsp ground coriander
  • Good shake of tabasco sauce
  • 2 400g tins of peeled plum tomatoes (I sometimes replace one of these tins with a carton of sieved tomatoes)
  • 1 large tbsp tomato puree
  • 1 tsp sugar
  • 1 tsp salt
  • 1 400g tin of kidney beans, drained and rinsed
  • 200ml water
  • oil for frying
Begin by frying the onions in a little oil over a medium heat until starting to go soft, then add the garlic and Thai chilies. Fry for a further couple of minutes, then remove from pan and set to one side.

Turn up the heat, add a spot more oil to the pan and add the minced beef and diced chicken. Fry til browned.

Add the paprika, chili powder, cayenne, cumin, coriander, crushed oxo cube and fry for another minute. Put the onions back in and fry for yet another minute!

Add both tins of tomatoes, the tomato puree, tabasco, sugar, salt and water. Stir.

Leave this simmering away for a couple of hours, adding the kidney beans 10 minutes before the end of cooking. It will be ready enough to eat after about 45 minutes, but tastes even better with a long cook. It is also really good to make a day in advance, then let the flavours develop overnight!

I usually serve mine with plain steamed long grain rice, and toasted pita breads. also good with the usual suspects - baked potato, tortilla chips, potato wedges...

This time I actually served mine as a chili bake. The day after I cooked it, I heated it in a casserole dish, added about 500g rice and a pint of boiling water. I then covered it and cooked it in the oven at about 200°c for about 25 minutes. Make sure you check it frequently to ensure it doesn't dry out - and to adjust seasoning if required. Once it was ready, I smoothed the top of the bake and covered it with finely sliced tomatoes, scattered over a mix of slightly crushed tortilla chips, cheddar cheese and pecorino. Whacked it under the grill for 5 minutes til the top was bubbling and gorgeous then served... yum yum yum!

Thursday, 10 January 2008

Slow-cooked Roast Garlic Ragu

It's January - and usually a month where I try to avoid pasta... but when I found Ruth's Presto Pasta night over at Once Upon a Feast... my will-power started to crumple. Or crumble... all these carbs have affected my brain!

It all started with the
home-made roast garlic fresh pasta but I needed more... I needed a sauce! After roasting off almost a dozen heads of garlic I set my mind to what else I could use them for...

I eventually came up with this gorgeous slow cooked ragu, with a pork and beef base, finished with 3 bulbs of garlic. It sounds like a lot, but the garlic was slow roasted until there was no sharpness left - just sweet, rich garlicky lushness!


  • 3 carrot
  • 3 sticks of celery
  • 2 onions
  • 3 roasted heads of garlic
  • Some olive oil for frying/drizzling
  • 500g minced (ground) beef steak
  • 500g minced (ground) pork
  • 1 beef stock cube
  • 1 tbsp fish sauce
  • 6 drops Tabasco sauce
  • 1 tbsp paprika (preferably smoked!)
  • 500g carton passata
  • 400g tin of chopped tomatoes
  • 3 tbsp worcester sauce
  • 1/2 tsp sugar
  • 1 tsp salt
  • 2 bay leaves
  • 2/3 bottle decent red wine
I started off by preparing the 'holy trinity' of Italian cooking - onions, carrots and celery. I already had my food processor out for making my pasta - so decided to save time and effort and use it for the veg too. I finely chopped one onion and used the grater attachment for the carrots and celery. Use an ovenproof dish to sweat this mixture off for about 20 minutes, or until soft. I used my Le Creuset casserole dish to do this - after lusting after one for years, I finally bought one last year and get it out whenever I can!

As I was going for sweet, rich favours I decided to caramelise the other onion. I cut the onion in half, then thinly sliced each half. After heating some olive oil over a medioum heat I chucked on the onions and let slowly cook for abotut half an hour until they were golden and caramelised. The kitchen was already starting to smell lovely!


When the onions and veg are cooked, remove to a bowl. If you have lots of lovely burnt bits on the bottom of the onions pan, then use a bit of the wine to de-glaze, and add that to the bowl too.

In the same ovenproof pan, brown off the pork mince - make sure the pan isn't overcrowded so it fries rather than boils! As it's January and I'm trying to be healthy, I strained off the pork and discard the fat, setting the meat to one side. While this was straining I fried off the beef in the same ovenproof pan. Once it was brown I added the strained pork, beef stock cube, Tabasco, fish sauce and paprika and let it fry for a couple of minutes.

Preparation almost done! Still a lot of cook time to go though...

I added the softened veg and onions, the passata, tinned tomatoes, worcester sauce, sugar, salt, bay leaves, and finally the red wine, then brought the whole lot to the boil. I was a bit surprised at how pink it looked - but I guess I'm used to making bolognese ragu with all beef!

I think I let my ragu cook in the oven for about 5 hours - but I think it would probably be ok after 3/4 hours. I stirred it every 30 minutes or so - it was quite easy to see when it all started to come together - initially it looked quite pink and 'bitty', but once it was ready the colour deepened to a dark colour and the texture was much softer.. I didn't need to, but make sure you add some water if it starts looking like drying out.

Right - almost ready - and the kitchen should smell amazing!

I removed the garlic mush from the roasted heads, and mashed it into a rough paste, then stirred it into the ragu. You could probably serve it right then - but I had to finish making my pasta, so it went back into the oven for another 15 minutes!
I served this with my roasted garlic pasta... I know that was probably overkill - and the sauce was definitely enough to stand alone - but it really did taste amazing! I found that I didn't need too much sauce with the pasta - nowhere near the quantity I was put out when making bolognaise. It was really rich, and coated the pasta well.

And it keeps the vampires away!