Thursday 28 February 2008

Puttanesca Putapasta

I had the girls around again last night. And what with my parents arriving for a visit today, I had loads of clearing up to do (and there's one corner of my bedroom is stuffed with bags that I can't quite bring myself to unpack).

But I got home from work last night, looked around and decided to ignore the rest of the house, and make a dish for Presto Pasta Night instead! (After all, it is the 1 YEAR BIRTHDAY of Presto Pasta Night - the first blog event I ever participated in. Thanks to Ruth at Once Upon a Feast for her continued efforts and humour in hosting this event!) Anyway, I needed some food therapy, so decided to make the pasta from scratch. From the kneading of the dough, to the repetitive passes through the pasta machine, this was a task to calm my mind, and soothe my soul.

A piquant, spicy pasta sauce was also required - the comfort-food blandness of mac and cheese, mashed potato or chicken soup was just too insipid to tempt me - I wanted something to burn through the fug I've been wandering through for the last few days...

A puttanesca sauce was in order - and as one of the girls doesn't like olives (or too much spiciness!) I decided to make fresh olive and chili papperadelle to go with it.

Puttanesca Puta-pasta!


For the pasta:
  • 250g semolina flour (plus extra for dusting)
  • 250g strong pasta flour
  • 18 kalamata olives - pitted
  • 1tsp ground red chillies - add more or less to taste!
  • 4 whole eggs
  • 4 egg yolks

For the sauce:
  • 50g anchovy fillets, roughly chopped
  • 3 cloves of garlic, crushed
  • 2 red chillies, deseeded and finely chopped
  • 700g ripe tomatoes - cut into quarters, deseeded and the hard core removed, then halved again (a tin of chopped would work just as well, and be much cheaper and quicker!)
  • 2 tbsp caper - rinsed/drained and roughly chopped
  • 75g kalamata olives, pitted and quartered
  • olive oil to fry
  • black pepper
  • handful fresh basil

First of all, to prepare the pasta. I went into more detail on how to make fresh pasta when I posted my Home-made roasted garlic pasta - I'll just put down the quick version here - please refer to my earlier post for details in rolling and cutting!

Blitz the olives with the dried red chili and one egg yolk until very finely chopped - but not quite a purée. You want to be able to see the flecks of olive in the finished dish!

I mixed this by in my food processor - put the flour, olive mix and eggs into a mixer with a dough blade on it, and pulse until well combined - the dough should be coming together into big chunks. If it feels sticky, add some more flour.

Turn out onto a work surface, and knead for 5 minutes until elastic and shiny. Wrap in cling film and put in the fridge for an hour or so.

Meanwhile, prepare the sauce (and this is one of the easiest sauces in the world!).
Heat a glug of olive oil over a medium heat, then saute the chilies, garlic for 1 minute, and the chopped anchovies and cook for a further minute or two until they start to melt.

Now I confess - I've never cooked with anchovies before - I don't really like them... but I do like them in cooking - and it turns out them were wonderful in this sauce - not fishy at all. So if you don't like anchovies, don't be tempted to leave them out - they really make the dish!

So at this point the sauce was smelling very anchovesque - and I was contemplating takeaway options - just in case it all went wrong.

Add the tomatoes, capers and olives to the pan - I also added a splash of water to get it going. (I also removed one portion of the sauce before I added the olives so it didn't get contaminated ;)
Add a few grinds of black pepper - you shouldn't need salt - the anchovies/capers are salty enough!

Allow to simmer for 20 minutes or so - you can tell when it's ready, because the anchovy/fresh tomato smell is suddenly replaced by something that makes you want to eat it NOW!

Take the sauce off the heat, and set to one side until the pasta is ready.


Back to the pasta!

Remove the pasta from the fridge, divide into 4 balls, keep one out, and rewrap the others.
Following the instructions here, roll out and cut the pasta in 3/4 inch widths. One tip that I've picked up since writing that blog, is that once you have rolled the pasta to the desired thickness, you should leave it to dry slightly for 5 minutes or so before cutting (start rolling the next bit!). This definitely seemed to help with the cut pieces unrolling properly.

Cook the pasta in salted water for 1 to 2 minutes then drain thoroughly.

Add the drained pasta to the sauce, and throw in the handful of chopped basil. Mix well and serve!


Wednesday 27 February 2008

My third meme - and a note on my week...

I haven't cooked for a whole week. Apart from breakfast, and ramen noodles - and I don't think that counts... I've missed two deadline for events I wanted to participate in - and am even going to struggle to make a dish for Presto Pasta Night (although I am determined to get into the kitchen tonight...)

This hasn't been an easy week for me - Boyfriend and I have split up - it's such a horrible time... I think that is all I can say about that.

I wanted a blog entry - but had no dishes to discuss, so I decided to take this chance to do the meme I was tagged for last week by Val from More Than Burnt Toast. I only recently came across Val's blog (isn't it amazing the variety of blogs you can find, just by clicking through from one to the next!) and I'm very glad I did. She has an amazing variety of recipes - from pasta to moussaka, falafel to pikelets! And she loves cookery course - just like me!


What were you doing 10 years ago?1998?

I was in my 2nd year at university in Glasgow, studying English Literature and Social And Economic History I was looking after my then boyfriend, who was pretty sick. I was also preparing for the World Cup - it was the last time Scotland qualified. I don't even like football that much - but the atmosphere was amazing. We didn't survive the first round though...

What were you doing 1 year ago?

I was in the middle of negotiating to a new position with my company (which I am now in!) Still living in the same place. From looking back at my calendar, it looks like I was going to lots of parties too!

Five snacks you enjoy

Argh, this is a tough one - I love savoury snacks!!! I'm not a huge fan of chocolate - I like it well enough, but a whole bar is often too much for me...
  1. salty, buttery popcorn... drool....
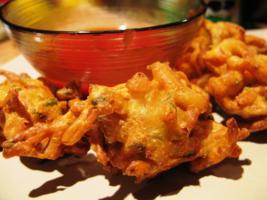
  2. I don't know if these count as snacks, but I love sushi, tapas, Indian snacks (like these pakora), dolmades and other such finger food!
  3. Dried mango slices
  4. triscuits - though I can't get them in the UK... :( (and any other crunchy, salty snack - i.e. pretzels, baked bagel bites...)
  5. Swizzels double lollies (apparently my mum used to be addicted to these when she was pregnant with me!)

Five things you would do if you were a millionaire

Oh, I love this game! (Though a multi-millionaire I hope!)
  1. Quit my job and pay off my mortgage! (And/Or buy a house with a huge kitchen and garden!)
  2. Help the people I love: pay off the mortgages of my parents and sister - and take us a on huge family holiday; sort my best friends out to make they're lives more comfortable - or to help them achieve their dreams.
  3. Travel the world - trying all the food I could manage, attending any classes I came across, and learning lots of new things!
  4. Throw a huge, lavish party for all my friends :)
  5. Retrain in a career that I truly want to do (Almost definitely in the food industry)

Five bad habits
  1. Blogging when I should be doing other things - or spending too much of the day deciding what I'm going to cook that night!
  2. I'm rubbish at keeping in touch with old friends - I'm seem to get caught up in the moment - and all of a sudden weeks have gone by without contact :(
  3. Messiness - my whole house is a state - it drives me mad, because I actually hate living like that... but can't seem to keep myself organised.
  4. Pressing the snooze button on my alarm clock! I end up snoozing for 45 minutes - and it isn't even proper sleep!!
  5. Putting off things that I don't want to do (i.e. getting up - or tidying the house!)

Five things you like doing

Cooking! Blogging about Cooking! Reading about cooking! You get the idea?
Ok then - other things ;)
  1. Seeing my girlfriends - drinking wine, and having silly conversations. And they are always there when I need them :)
  2. Shopping - especially for shoes!
  3. Clubbing
  4. Relaxing in my house with some rubbish on the TV, surfing the net, or reading!
  5. Eating!

Five things you would never wear again

I would usually never say never.. but I would definitely never wear an Eightiesque shell suit again!


Five favorite toys
  1. My mobile phone - it has a cute camera for taking silly pics when I don't want to use my 'proper' camera!
  2. My camera
  3. My pasta machine - I haven't used it that much - but I find pasta making is such a relaxing thing to do :)
  4. My laptop
  5. My GHD straighteners!

Here are the rules:
  • Select five people to tag.
  • Next, send them an e-mail or let them know by commenting on their blog that they have been tagged.
  • They are then encouraged to select 5 different bloggers and to tag them.
And now who to tag??

I think I'll start with Bryce at Chilefire - who always hits the spot with his fiery recipes!
Secondly Holler from Tinned Tomatoes - a vegetarian blogger from my home country :D
And finally Chew on That - the first blog I ever subscribed to!

I promise my next post will be a recipe :)

Friday 22 February 2008

Drunken tortilla de patatas!

I called Boyfriend yesterday afternoon and told him not to buy anything for dinner, that I wasn't in the mood for after-work drinks, and would be home early... Famous last words!

I was fairly shocked to find myself scurrying around my nearest shops trying to pick up the ingredients for dinner at 8pm, after 3 hours in the pub... I fixed on making a Spanish Omelette - mostly because I had loads of eggs to finish up... However, the drinks I had consumed made me throw a lot of chilli in there. It was a beaten egg away from a a kebab by the time I was finished!

Spicy Chorizo and Mushroom Tortilla

I'm usually rubbish at remembering quantities - and this time more than ever!
  • 6 eggs
  • 100ml milk
  • 150g chorizo, cubed
  • 500g new potatoes - sliced
  • 1 large banana shallot, finely chopped
  • 2 cloves garlic, crushed
  • 2 thai chillies, finely chopped
  • 250g chestnut mushrooms, sliced
  • Salt and pepper
  • olive oil for frying
In a saucepan, place the sliced potatoes in cold, salted water, bring to the boil, then cook for 5/6 minutes until just soft. Drain well.

Meanwhile, heat a glug of olive oil over a medium heat, then saute the shallot and chorizo for 3/4 minutes. Add the mushrooms and fry until the water starts to come out of them.

Throw in the garlic, chilli, some salt and pepper and fry until all the liquid has reabsorbed and the mushrooms are starting to brown at the edges.


Remove the mushroom mixture to a pan and turn up the heat. Heat another glug of olive oil for a minute, then put in the cooked potatoes. I just remembered I threw in some ground red chilli flakes at this point too!

Fry over a high heat, tossing regularly, until the potatoes are browned and crispy at the edges, then add the mushroom mix back into the pan, and turn the heat as low as it will go.

Beat the eggs, with some salt and pepper, and the milk. Pour the eggs into the pan, and allow to cook, uncovered for about 10 minutes. The top will still be raw, but the edges will be cooking up. The picture below is after about 5 minutes.


Meanwhile, preheat the grill to a high to medium heat. Once the tortilla is cooked about 2/3 of the way through, put it under the grill for another 5 minutes until cooked through. (I think this is called broiling in the US??)

Turn upside down on a plate, cut into slices, and enjoy. With another Magners!

Thursday 21 February 2008

Chicken & Balsamic Caramelised Onion Risotto

I couldn't think what to cook for the girls coming round last night, then writing up my recipe for Soup Aux Moules somewhat randomly inspired me to make risotto! It was perfect - I could adjust the quantity as required, and I could use the creamy, cheesy ingredients which are usually out of bounds!

I pondered what to make - A doesn't eat anything orange (!) so butternut squash risotto was out of the question and V doesn't do seafood. Two of my standbys were struck down! I thought about something with chorizo, but couldn't make it click into a whole meal. So in the end I decided to make something completely different...

Chicken & Balsamic Caramelised Onion Risotto
Served 4 hungry gals!
  • 1 rotisserie chicken, meat taken off the bone and chopped into bitesize pieces
  • 2 large onions
  • 2 cloves garlic, crushed
  • 1 tspn sugar
  • 100 ml balsamic vinegar
  • olive oil to fry
  • 500g risotto rice - I usually use Carnaroli, but the store was out do I used Arborio instead - with good results!
  • 1 litre stock - I used some of the stock I made from the roast turkey we had for Christmas - its flavour was perfect for this!
  • 200 mls white wine
  • 100g finely grated parmigiana - plus extra for shavings
  • 1 tbsp chopped fresh tarragon
  • salt and pepper
Half the onions, and thinly slice 3/4 of them. Pour a decent glug of olive oil into a frying pan, and heat over the smallest heat possible. Chuck in the onions and toss to coat. Fry slowly, slowly, slowly, stir every 5 minutes or so. After the first 5/10 minutes sprinkle over a good pinch of salt. This helps draw the moisture from the onions. When they start getting brown and sticky (after half an hour or so), pour in a couple of tablespoons of balsamic vinegar, and sprinkle the sugar over. Continue to cook til absorbed. Repeat this step as required. In the end I think I used about 100ml BV, and let them caramelise for over an hour. But the end result was gorgeous, sweet, sticky onions which matched the risotto perfectly!

Right - hope you're still with me!

You can make the caramelised onions in advance - just keep them in the fridge for up to a week until you need them. They are also fabulous with cheese, or spread on garlicy crusty bread... so beware them may not last long enough to make it into the risotto!

In a saucepan, heat the stock thoroughly and keep it at a simmer - when you ladle it into the risotto it should not be cold.

You should have 1/2 onion left from the caramelising process. Finely chop this.

Heat a glug of olive oil over a medium heat, then sauté the onions for 3/4 minutes. Add the crushed garlic and fry for another minute.

Add the risotto rice, and continue to fry, ensuring you keep the rice moving at all times. After a few minutes it will start to go translucent round the edges, and also makes a slight cracking sound. (Which sounds a bit weird, but you can hear the tone of the frying change!)

Add the white wine to the pan, and keep stirring until all the alcohol has evaporated off/been absorbed.

Add a ladle of the stock and stir until it is absorbed. Repeat. After 15 minutes, test the rice for doneness - it should still have a bit of bite, but have lost its chalkiness. Add the tarragon now. If the rice still isn't cooked, when the stock runs out, use boiling water to finish it off.

Once the rice is done, turn off the heat, mix in the chicken, grated parmesan, and caramelised onions. Put a lid on it and leave it to sit for at least 5 minutes. This is similar to resting meat - and gives the rice a chance to relax and absorb excess liquid.

Serve in big bowls with parmesan shavings on the top!

Girls Night In!

Last night I had the girls round. Us getting together is supposed to be a weekly occurrence - but this was the first time I'd really seen a couple of them this year. One girl pulled out at the last minute - and another had the audacity to be in Sydney when I was cooking!

So in the end it was just the four of us - but I still made enough of my roast chicken and balsamic caramelised onion risotto for six... And there was barely a spoonful left this morning, when I finally got round to the dishes! YUM!

We were pretty stuffed after that (queue conversation about how rice swells once in your belly - so you keep getting fuller and fuller way after you've finished!) but still managed a decent effort against the Curly Wurly cookies I had made just before they arrived!

I think we still got through as many bottles of wine as if there had been six of us - which is why I think one of my glasses ended up like this!


A good night all in!

My First Taste & Create: Curly Wurly Cookies!

I signed up for my first ever Taste and Create last month... and that was almost as far as it went! It wasn't until I received a comment from Grace over at A Southern Grace that I realised my confirmation had been trapped by my spam filter. (At the same time, I found a missing invitation to Blogging By Mail - sad to miss that one - but can't wait for the next!)

Anyway - back to T&C!

Taste And Create is a blogging event where you sign up and are matched to another blogger at random. You then have to look through each other's blog, then make and blog about one of their recipes! As I said - I was matched up to Grace - a southern USA gal, living in New York. I've always been fairly sure I was Scarlett O'Hara in a past life - so I think it's a good match!

Grace blogged about my coconut rotis that I learned as part of my Sri Lankan cookery course - check out her recipe here!

I looked through her epicurean endeavours, and immediately fell in love with Ebenezer. I'm not a natural baker, though am trying to improve my knowledge and skills... (watch this space for efforts good and bad!) I have been thinking about creating a sourdough starter for some time. Unfortunately, with the whole notification spam thing - I only had a few days to get this blog out - nowhere near as long as I'd need to cultivate my own little sourdough pet!

So instead I opted for the Toffeed-Up Oatmeal Cookies. Given I've had moderate success in making cookies before I hoped to be successful...

Now, before I proceed any further, I'd like to give a disclaimer... My cookies don't look anything like the ones in the pictures. Something weird happened and they went very flat and thin. I'm thinking it may have been too much butter, and maybe the type of toffee... I'll let you know when I try my second batch! Unfortunately that was my last chance to bake before the deadline, so I didn't have time to try again!

However... HOWEVER... Despite appearances, they tasted amazing! I let them bake for about 8 minutes, and the toffee went all chewy, and they had a winning combination of crunch and chewiness... they just didn't look too pretty!

Curly Wurly Cookies!


It was fun using cups to measure this - I've had a set for years, but hardly ever use them!

So there was a couple of things I had to change: I was out of baking powder, so used bicarbonate of soda instead; I'm not used to measuring butter with a tablespoon, and didn't know if it meant heaped, level or rounded... I think my equivalent was about 50g; and finally Grace's recipe called for Heath bars - I figured Daim bars would be a good replacement... unfortunately the supermarket didn't have any, so I had to opt for curly wurlies!! I also did everything in the food processor - yay for lack of dishes to do!!


  • 3/4 cup brown sugar
  • 3/4 cup flour
  • 1/2 cup porridge oats
  • 1/2 cup curly wurly, chopped
  • 50g butter, at room temperature
  • 1 tsp vanilla extract
  • 1 tsp bicarbonate of soda
  • 1/4 tsp salt
  • 1 egg
Preheat oven to 180 c (350 f)

In my food processor, I mixed the butter, vanilla extract, and brown sugar to a cream.

I added the egg and whizzed until well mixed.

Add the flour, baking powder, salt and mixed until well combined, then add the porridge oats and pulsed to mix. Fold in toffee.

Place tablespoon-sized blobs of dough on cookie sheets and bake for 8 minutes or until they look "set" and the bottoms are just golden. I had to let mine cool a little before I could peel them off and pplace them to cool on a wire rack.

The original recipe said this would yield 2 dozen cookies, but I only got 14 from it. I think next time I'll add a bit less butter, and an extra 1/4 cup oats. I also think the softer caramel in curly wurlies probably broke down too much, so I will hold out for the daim bars!


Thanks for a great recipe Grace - I look forward to making a friend for Ebenezer soon!!


Wednesday 20 February 2008

Me and Food, Food and Meme!

Yay, another meme! Is it sad that I get really excited when I get tagged by someone who's blog I love?!? Today, I was tagged by Deborah from What's in My Kitchen to tell you 7 facts about me and food! (If you haven't already, go check out her blog - she has a great writing style, and amazing recipes!)

7 Things you didn't realise you needed to know about me and food

  1. I'm allergic to bananas. This only developed about 6 years ago, but now the slightest hint of a banana in a smoothie can make me pretty sick. I'm thinking about trying to rehabilitate myself - because I love banoffee pie - but not quite sure that it's possible :(
  2. I have a phobia of peas. They are small, green and evil. Bleurgh. And go pop when I bite into them.... Though I am attempting to get over this too!
  3. I adore sushi - but I don't really know how to eat it... So I usually get it take away, then eat it privately... with my fingers... How embarrassing!
  4. I think I may well be addicted to chillies. I always had a tendency towards hot food - but since I started seeing Boyfriend, I seem to eat something spicy pretty much every day. At least once!
  5. Not so much about food - but I have a thing about the number three, and generally do things in multiples of 3. So, instead of adding 2 tablespoons of sugar to a dish, I'll add 3 two-thirds tablespoons. My alarm clock is set for 0727, and the volume on the car is a mark 9. And I just realised how crazy that sounds...
  6. I have a dirty, secret liking for completely rubbish foodstuffs. Once a year or so, I'll get a Macdonalds when out shopping. I stock up on Kraft mac & cheese when I visit home (They don't sell it in England. Can't imagine why... ;) it's perfect hangover food!
  7. Only two people who I know in real life, know that I write this blog - and neither read it!!

Right, now to tag some other peeps to try to keep this going!

I hope you enjoyed the random trivia - now I need to get back to the serious business of planning what to cook for tonight's girlie night!

Italian Cookery Course: Soup Aux Moules

Blimey... I just realised it's been almost a week since my last post! I've got a wee bit of catching up to do - what a busy week! Though not in the kitchen - the last two nights we've had takeaway... tsk tsk tsk...

Anyway, here is one of the recipes from my Italian cookery class last week by Francis Adou - a gorgeous, rich, creamy mussel soup. I seldom eat cream, and as such this was maybe a little bit too rich for me - I think next time I will serve it in half size portions.

Because there will be a next time - it was seriously good!

It was the first time I've cooked with mussels - I was always a little bit scared on them. The first time I ever ate mussels I got terrible food poisoning. (I even went blind for a couple of hours - took me a long time to even look at shellfish again...) I think that put me off cooking any shellfish - I didn't want to be responsible for causing anyone else that kind of sickness! Anyway, under the watchful eye of Francis, I cleaned and de-bearded, and discarded the dead ones - and I'm now confident I can go it alone!

Soup Aux Moules
Excuse the sloppy bowl and dark picture - I was at Boyfriend's house, and starving! My belly became more important than the photo ;)

Serves 2 large bowls - or 4 small :)
  • 3 large shallots, finely chopped
  • 1 clove of garlic, crushed
  • 20 g flour
  • 250 ml fish stock
  • Generous pinch of saffron
  • 100 ml double cream
  • Sea salt
  • 250ml white wine
  • 500g mussels
  • ½ bunch of flat parsley
  • olive oil to fry
Sort and clean the mussels - pull out the stringy beard, discard any that are cracked, or any that are open and don't close up when gently tapped!

Heat the oil and fry the shallots gently for 4 minutes, then add the garlic and cook for a further couple of minutes until the shallots are soft but not coloured.

Sprinkle in the flour and stir well to absorb all the oil. Slowly add the stock, mixing to make a smooth broth. At this point it felt like I was making a risotto - which I now have a craving to do! Could be a plan for tonight - I'm having the girls round!

Add the saffron, cream and seasoning, then simmer for 15 minutes. Make sure

Meanwhile, in a different pan, heat the wine over a medium heat. Add all the mussels, then cover and cook for 4/5 minutes until they are all open. (Any that are not open after 6 minutes should be discarded.)

Strain the liquid, allow to cool slightly, and add it to the soup. Allow the mussels to cool, then remove the meat from the shells and add to the soup.

Reheat gently (don't let it boil!), add the parsley, and serve.

Thursday 14 February 2008

Italian Cookery Course: Week 4

Well, it's taken me a week, but I've now made the dishes at home that I should have made at my class last week!

I served them up to Boyfriend last night as an early Valentine's day treat - as I will be at my class on Valentine's itself. He brought me a beautiful bunch of flowers, which I meant to take a picture of to share with you... but completely forgot!

We started with a cocktail, a twist on the cosmopolitan inspired by Haalo at Cook Almost Anything. I saw this recipe a few days ago - and when I realised I had the orange blossom water for the cantucci, I couldn't resist! As I was doing it from memory, I added lime juice to Haalo's recipe. It still tasted very fine - but next time I will leave it out and see how we go!

We then had Seared Tuna with Puy Lentil Salsa... yum yum yum. It made me think of summer - I can imagine eating this out in the garden in a few months time! Healthy, tasty, a kick of heat, and no garlic - perfect for a romantic meal!

I then made (with some intrepidation!) the Apricot and Almond Cantucci Biscotti. They turned out to be very easy to make, made the house smell gorgeous, and was a lovely light way to finish off the meal along with a strong cup of Italian coffee!

Right, well it's time for me to go and pick up the rest of my ingredients, and head to class number 5!

Italian Cookery Course: Seared Tuna with Puy Lentil Salsa

This recipe is from last week's Italian cookery class, which I missed because my dad was visiting. I made it last night - and thoroughly enjoyed both cooking and eating it!

The original recipe called for salmon, but the salmon I had available didn't look as nice as the tuna. I also reduced the quantity of olive oil - the one I used is pretty fruity, so I didn't need as much.

Seared Tuna with Puy Lentil Salsa

This recipe is adapted from the one I was given at my Italian cookery course by Francis Adou.
  • 2 tuna steaks
  • 4 tablespoon of olive oil
  • 100 g puy lentil
  • 50g coriander leaves
  • 4 large tomatoes
  • 1 red onion
  • 1 red chilli
  • The juice of one lime
Wash the lentils, the boil 400ml of water then add the lentils, simmer and covered, for 30-35 minutes or until the lentil are tender but still have some bite and retain their shape.

While the lentils are cooking, blanch the tomatoes for 1 minute. Remove them and slip the skins off, then halve and squeeze out the seeds. Chop the flesh into small pieces.

Finely chop the chilli (I left the seeds in as it wasn't too hot a chilli - but you should adjust this according to taste. I think what you want is the flavour, and an edge of heat - rather than hot!), onion and coriander and set aside.

Whisk or shake the lime juice and oil together to make the dressing - then season with salt and pepper.

Once the lentils are cooked, empty into a bowl and toss with the dressing while still warm. Taste and adjust seasoning if required. Add the onion and tomato mixture, mix well and set aside.

Prepare the tuna by rubbing with olive oil and a sprinkling of salt and freshly ground black pepper. Heat a frying pan until it's very hot.

Place the fillets in the frying pan and sear for about 1 minute on each side. The inside should still be dark pink.

Serve the salsa with the tuna placed on top.

Italian Cookery Course: Apricot and Almond Cantucci Biscotti

I don't usually do sweet things - and had definitely never made biscotti before. But when I missed last week's Italian cookery class, I decided I would try all the recipes that I missed.

It turns out that biscotti is just Italian for biscuit - not specifically for the hard, crunchy dunking biscuits that appear to be universally known by that name. These twice-baked snacks are actually cantucci or cantuccini!

They turned out to be very easy to make... and even easier to eat!

Apricot and Almond Cantucci Biscotti
This recipe is adapted from the one I was given at my Italian cookery course by Francis Adou.
  • 250g caster sugar, plus a couple of tbsps more for sprinkling!
  • 250 Italian 00 flour, sifted
  • 2 large eggs
  • 1 teaspoon orange blossom water
  • 1 teaspoon bicarbonate of soda
  • A pinch of salt
  • 115g unpeeled almonds
  • 115g dried apricots, roughly chopped
  • 1 egg yolk for the glaze
Preheat the oven to 150c and line two baking sheets with greased greaseproof paper.

Using a mixer, whisk the sugar, eggs and orange blossom water for about 5 minutes until its thick, creamy, and almost mousselike.

Sift the flour , bicarbonate of soda and salt into the egg mixture and fold in. Add the almonds and apricot to form a sticky dough. Make sure it's well blended, but don't over work!

Turn out the mixture onto a well floured surface - I was surprised by how easily it stayed together - it seemed very sticky in the bowl, but once it hit the flour it came together very well.

Shape the dough into 2 sausage shapes and place onto the baking sheets.


Beat the egg yolk and brush over the surface of each sausage. Sprinkle with sugar.


Bake the biscotti for 30 minutes until slightly risen and golden brown. Take out of the oven and set aside until cool enough to handle. Don't let it get too cold, or the almonds will not cut well - I left mine for 10 minutes and it cut fine.

Turn down to oven to 120c

Gently move the biscotti onto a cutting board and cut into slices about 1 inch wide. Arrange slices on the baking tray (on greaseproof paper) and return to the oven. Bake for another 20 minutes, transfer onto a wire tray and leave to cool and harden.

Serve dunked into strong Italian coffee!

Saving the world... One Peanut Butter and Jelly Sandwich at a time!

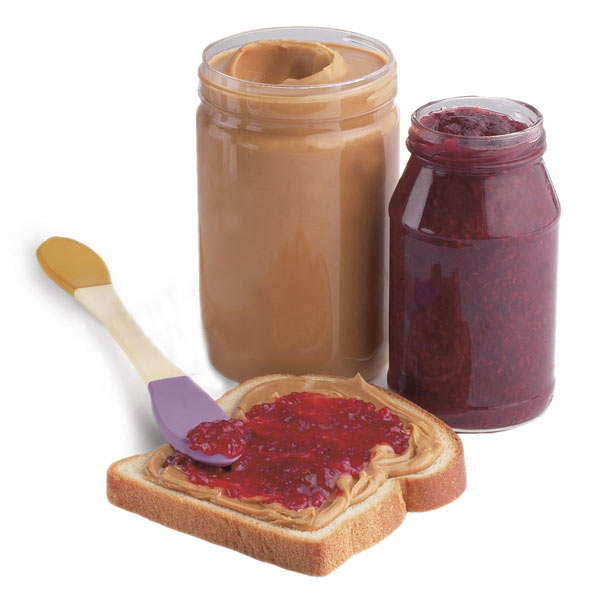
I just came across this article - apparently we can save the world by eating peanut butter and jelly sandwiches!

According to the article, eating a peanut butter and jelly (PB&J!) sandwich instead of a meat/egg/fish based snack saves water, saves land, saves natural resources and slows global warming!

Choosing PB&J over a meat-based sandwich saves:

  • the equivalent of almost 3.5 pounds of greenhouse gas emissions, including 2.5 pounds of carbon dioxide.
  • about 280 gallons of water
  • anywhere from 12 to 50 square feet of land from deforestation, overgrazing, and pesticide and fertilizer pollution.
Headline numbers, eh??

I know that whilst I only buy free-range eggs, usually buy organic free-range meat and buy local, seasonal produce where possible, I certainly don't think enough about the environmental impact of what I choose to cook and eat. Whilst I'm not saying I'll never have a ham sandwich again, this article has made me realise that small differences can mean big differences - and I'm blogging it here to hopefully spread the word!

Please read the article, and if you agree, talk it up!


And now - a confession! I've never tried PB&J. I'm going to rectify that soon with a PB&J snack fest. Expect a post soon with my experiences - toasted, fried and raw!

Watch this space!

Wednesday 13 February 2008

One ugly plate of food...

I almost didn't post this. I mean, it's not like I'm usually a beacon of food presentation - preferring the more-is-more approach to dining. However, this was outstandingly unattractive. And not even in a good hearty rustic kind of way. More in a I've-had-school-dinners-that-look-more-attractive-than-that kind of way. You probably wouldn't eat this voluntarily - especially if the pizza place round the corner was still delivering... Unfortunately for Boyfriend, he didn't have that kind of freedom of will, and it was just as well. Because it actually tasted really good!

Haddock Fishcakes with Crispy Potato Wedges

I got the recipe for these fishcakes years ago from a BBC show called The Best. I don't remember them being this messy when I made them first time round - I might have missed something! Amazingly, they contain mushy peas - I decided to make them again as part of the battle against my pea phobia. Mushy peas aren't as bad though - at least they don't pop!


Now this is the ugly plate. The Wedges weren't actually burnt as they look here, just crispy! And I know it would have looked better with a poached egg on top (which is what I had meant to do!) But I had ran out of saucepans, and the frying pan was right in front of me...

  • 300g smoked haddock
  • Milk for poaching fish
  • 3/4 lb floury potatoes (I used maris pipers), peeled and chunked
  • 3 or 4 large potatoes, cut into wedges, parboiled for 5 minutes and drained
  • flour for dusting
  • 1 egg, beaten
  • breadcrumbs for coating
  • 1 tspn mint sauce
  • 300g tin of mushy peas
  • salt and pepper
  • broccoli or other veg to serve
Preheat oven to 210c.

Boil the chunked potatoes in salted water until soft, drain, and mash (or pass through a ricer). Season as desired.

While the potatoes are cooking, place the haddock into a pan, cover with milk, bring to the boil then leave for 6 minutes.

Heat a decent glug of olive oil in a baking tray in the oven for 5 minutes. Add the par-boiled wedges, sprinkle with sea salt and roast for 20 minutes - shaking a couple of times during cooking.

In a large bowl, mix the mashed potatoes, mint sauce, peas and flaked haddock. Form the mixture into large fishcakes. I got 6 from my quantities - Boyfriend ate 2, I ate one and a half!

Dip the fish cake into the flour, then into the beaten egg, then into the breadcrumb coating. Fry over a medium heat for 2/3 minutes on each side. Repeat for all fishcakes - keeping the cooked ones warm in the oven.

I had some problems that the cakes were quite difficult to handle - which made it really messy! If you think the plate of food looks bad - you should have seen the kitchen!!! I think next time, I'd maybe wait until the potato mixture had cooled before handling. Possibly ricing the potatoes may have made them too soft also.

To plate up, serve a fish cake (or 2!) with some wedges and an egg on the top. The runny yolk went very well with the haddock - though I would recommend poaching instead of frying!

Bizarrely enough, I also found out last night that my cat likes eating broccoli! Is that not a bit unusual??!

Easy Peasy Pasta... though no peas, please!

I don't like peas. Scratch that. I hate peas. In fact, you may say I'm almost phobic. I was once almost reduced to tears when a (so-called) friend saved some peas from his meal at the pub, then pinged them at me when I was trapped in the car. Peas are small, green and evil. They make a squelchy 'pop' when you bite into them. One pea, hidden away in some chicken-fried rice, will pop and contaminate the entire mouthful with its evil juice. Bleurgh.

Though I have decided I am going to wean myself away from this irrational phobia. I managed to eat a few peas recently, hidden in a highly spiced, highly textured curry. It was a big step. The pop was almost unnoticeable.

I couldn't decide what to call this dish! It's my default pasta dish, which I almost always have In Case of Emergency. It is super-easy, super-fast (about as long as it takes to cook the pasta!), and super-tasty! A couple of possible variations mean I always have the ingredients. And it never contains peas.

ICE Pasta (In Case of Emergency)

I'm glad to have an entry to Ruth's Presto Pasta Night this Friday - the round up last week was fabulous!


  • 125g pasta per person (or however much you want!)
  • a hunk of chorizo, diced
  • 1 punnet chestnut mushrooms, halved or quartered depending on size
  • 1 clove garlic, crushed
  • 1 bag wild rocket, washed
  • Small handful pine nuts
  • olive oil for frying
  • dried red chilli flakes
  • Salt and pepper
Cook the pasta in plenty of boiling salted water. When cooked, drain, reserving about 1 cup of the cooking liquid.

Meanwhile, heat a frying pan to a medium heat, add the pine nuts (no oil) and lightly toast.

Remove the pine nuts to a bowl, heat a glug of olive oil in the pan, add the chorizo and fry until the chorizo oil starts to come out.

Add the mushrooms to the pan and toss so they soak up the oil from the chorizo. Fry until the mushrooms start to cook, then add the garlic, red chilli flakes to taste, and salt and pepper. Continue to fry for another couple of minutes, or until the mushrooms are cooked through.

Once the pasta is cooked, add the rocket to the pasta pan, add the reserved cooking liquid,then add the drained pasta. Stir and allow the rocket to wilt slightly - the heat of the pasta and the water should do this for you. Add the mushroom and chorizo and mix well.

Serve with the toasted pine nuts scattered on top!

Friday 8 February 2008

Defining Blego... and the world of memes!

Well! I was just perusing my Google Reader, when I saw the title My first meme: Define Blego from Gay at A scientist in the kitchen. My incredibly limited knowledge of memes had little to do with cookery - A scientist in the Kitchen indeed, I thought! So I read down the page, and was little wiser... then I saw my name. Hurrah... I thought, I've been tagged!! Then realised I had no idea what that meant!

So, after a little bit a google-digging, I found this article by Chris G, which told me all I needed to know!

So here it is - my first meme - and thanks to Gay for the tag!

The rules:
* The person tagged must copy the word and paste the definitions of the word contributed previously by the people who did the meme. Link backs would be nice, but not necessary.
* The person tagged must then add her own definition in this format ‘yourname.com’s definition’ and place your link. Being creative with the acronym is encouraged.
* Answer the following questions.
* Tag 5 other people to do the meme.

Definition
Blego (evilwoobie.com’s definition) - n. an acronym of “blog ego”, which pertains to a blogger’s sense of self in the blogosphere.

Blego (Darkside-Dreamland.com’s definition) - n. a protologism combining blog and ego. Used to define the ego of a blog or blogger. Like personal ego, blego may be good or bad.

Blego (benbarden.com’s definition) - n. a toy for children to build with but with a B in front.

Blego (ascientistinthekitchen.net’s definition) - Braised LEG Of pork

Blego (kittensinthekitchen’s definition) - Blethering Lassie's Excitable Gastronomic Other !


Questions

If you answer no to any of the questions, just skip the “if yes” part. Also, it’s easier to follow if your answers are beneath each question.

1. Do you know what your blog is really about, and you can write a one-sentence promotional material for it in a flash? If yes, write it here.

A chronicle following my adventures in the kitchen!

2. Do you join social networks to promote your blog? If yes, do you hope to find friends in these social networks and in the process get regular readers of your blog?

I have absolutely loved meeting food bloggers from across the world! I have enjoyed participating in Blog Events - its a great way of finding new blogs - and of publicising what I've done.

3. Do you or do you plan to join ranking sites that put your blog in competition with others for popularity? If yes, do you or do you plan to monitor your stats regularly?

This is something which I don't do at all just yet - though it is something I probably will look at in the future!

4. Do you tweak your blog often in accordance with the tips you get from blogging guides and gurus? If yes, list the bloggers you visit often to obtain these tips.

I haven't really changed my blog since I first created it - but I've only been writing for 5 weeks, so no doubt that will change soon!

5. Do you think of your next post even if you have just written a new one? If yes, list your inspirations for posting, and/or some routines that you go through before posting.

Yes, I often have a queue of posts - either on recipes I've made, but haven't written up, or recipes I have floating round in my head that I have yet to cook. My inspiration comes from everywhere - but I've noticed that since I started to read so many food blogs, there aren't enough meals in the day to try out everything I want to!

Now, I tag these friends:

JavaGirlKT
Once Upon A Feast
A Forkful of Spaghetti
What Did You Eat?
What's In My Kitchen?

Thursday 7 February 2008

Italian Cookery Course: Week 3

Well, in a very roundabout way, I have finally managed to share a couple of the recipes that I have been making in my Italian cookery course!

I started the course last month - and my fourth one should have been tonight. As my dad is down visiting, I am going to miss the class tonight, but hope to be able to attempt the recipes myself over the weekend.

My class is at a nearby college, and is taught by Francis Adou, a French chef with experience of cooking in many different regions.

So far we have made chicken thighs stuffed with apricots and rolled with parma ham; rump of lamb with porcini; osso buco; and tonight will be salmon - so a good rounded selection!

Each class involves the preparation (and usually eating ;) of two dishes. In week three these were:


followed by:


Absolutely delicious - give them a go!

Italian Cookery Course: Osso Buco

This recipe is adapted from the one I was taught at my Italian cookery course by Francis Adou.

Osso buco (or Ossobuco or Osso Bucco!) originates from Milan, and is traditionally a dish of braised veal shanks - in fact that is where it gets its name: the shank is called in Italian osso buco, literally 'hole bone'!

It was traditionally made without tomatoes and sprinkled with gremolata, a mix of parsley, garlic and lemon peel. It was then served with risotto alla milanese - a creamy saffron risotto. Since the addition of tomatoes in the late 19th century, the flavour of the osso buco is far moister and bolder - polenta is a more appropriate accompaniment. Though I am definitely going to have a go at making risotto alla milanese - sounds lovely, and I haven't cooked risotto for months! When I made this at home I cooked it with rosemary and garlic potatoes - mostly because that it what I had at in the cupboard!

Traditionally the meat would be from the veal shank - cut across the bone into 3cm slices. In this version, we used diced, boneless veal - it can also be made with other meats - although the veal was delicious, I won't cook with it again. I think I would replace it with lamb, though beef shank would also work well.

Details from wikipedia!

Osso Buco with Rosemary and Garlic Potatoes


Osso Buco

  • 400g diced veal
  • 2 tbsps flour
  • 1 medium onion, finely chopped
  • 2 cloves garlic, crushed
  • 1 large carrot, finely chopped
  • 1 stick celery, finely chopped
  • 1 glass white wine
  • Vegetable bouillion
  • 1 tbsp tomato puree
  • 6 large tomatoes
  • olive oil and butter for frying
  • Salt and pepper for seasoning
Season the veal with salt and freshly ground black pepper, then toss in the flour to coat - shaking off any excess.

Melt the butter and oil in a pan, and cook the veal until coloured on all sides. Add the onion and garlic and sweat for 2/3 minutes until the onion is starting to soften. Add the carrot and celery and sweat for a further 5 minutes. If there is a lot of fat in your pan at this point you can drain it off.

Deglaze the pan by pouring in the glass of white wine, and scrubbing off the brown bits on the bottom of the pan off with your spoon. Add the stock and tomato puree, cover and simmer gently for one hour - ideally in an oven. I don't have a measurement for how much stock to add, but the liquid should cover the veal for the duration of the simmer.

While the veal is cooking, prepare your concasse tomatoes:
Place the tomatoes in a bowl, and cover with water.
Remove the skins, quarter and discard the seeds.
Roughly chop the tomato flesh.

Once the cooking time is up, add the concasse to the veal, taste and adjust seasoning as required. Cover and return to oven to cook until the meat is tender (for me, this was about 15 minutes)


Rosemary and Garlic Potatoes

  • As much potatoes as you want to eat
  • Garlic to taste (I used one clove per person)
  • A few sprigs of rosemary
To prepare the potatoes, I diced them into 2cm chunks and parboiled for about 5 minutes. I then left them to drain for about 10 minutes to ensure the surfaces were as dry as possible.

I heated a little butter and olive oil in an oven suitable pan, and chucked in the potatoes. I fried them over a high heat for 5/6 minutes, tossing every couple of minutes. Just before the end, I tossed in the crushed garlic, finely chopped rosemary, and some salt and freshly ground black pepper.


I then put the whole thing into a hot oven for about 20 minutes - tossing half way through.

Serve the osso buco alongside the potatoes, with some chopped parsely over the top.

Wednesday 6 February 2008

Italian Cookery Course: La Ribollita

This recipe is adapted from a recipe I was given at my Italian cookery course by Francis Adou.

This is a 'proper' winter soup - full of lovely winter vegetables! Ribollita means 're-cooked' in Italy, from looking on a few sites on the internet, it seems that the traditional method of cooking is as follows:

  • Make basic soup (as per recipe below) - this is basically a typical minestrone soup.
  • The next day, spoon the soup into a baking dish and layer with slices of bread - scatter with sliced red onion and bake until the top is crunchy and golden. Some non-traditional methods add cheese here!
  • On the third day, break the bake up so that the bread is broken into the soup - it should be thick enough to eat with a fork!

Another re-cook method I read was to put more vegetables and water into the pot each day and cook for another hour - not so sure about the health and safety of this - I guess you can still only do it for 3 days or so!

I didn't do either re-cook method this time - I ate it all as it was on the first day (with help of course!) But I do like the sound of a variation each day - so will give this a go next time!

Making sure everything is cooked veeerrryyy slowly is really important to get the best taste out of all the vegetables.

La Ribollita


  • 1 400g tin of cannellini beans, drained and rinsed
  • 1 large onion, finely chopped
  • 2 carrots, finely chopped
  • 2 courgettes, finely chopped
  • 2 stocks celery, finely chopped
  • 2 cloves garlic, crushed
  • 1 large potato, diced
  • 1/2 savoy cabbage, shredded
  • 200g chopped tomatos (either tinned or fresh - I used fresh!)
  • 1 spring onion, chopped
  • Thyme, sage, rosemary - fresh or dried
  • Dried red chilli, to taste
  • Butter and olive oil for frying
  • salt and pepper, to taste

Heat a knob of butter and a glug of olive oil in a soup pan.

Add the onion, garlic, carrot and celery and sweat over a very low heat for 10 minutes until soft, then add the spring onion, cabbage, potato and courgette and cook for a further 10 minutes, stirring frequently.

Add the beans, tomatoes, herbs and chilli, then add 1 litre of water and season. Bring to the boil, then simmer until all the vegetables are cooked through.

Taste and adjust seasoning if required.

At this point, you can serve the soup as it is - however, you may want to blend or mash some of it to get a different consistency. This time I left is all whole, however, next time I'll probably try blending 50% of it to see how it turns out!

No Croutons Required: Spinach and Garlic Soup

As soon as I heard about the new blog event: No Croutons Required I knew I was going to like it! It is about vegetable salads and soups - and every month is going to have a different theme. Now I love soup (I think it's such a Scottish thing - a huge vat of broth to line your tummy on a chilly day!) and was excited to get an excuse to go home and make some! (Even though what I should have done was go home and do housework as I have a parental visit today... Never mind - my dad likes soup too!)

No Croutons Required is being jointly run Lisa of Lisa's Kitchen and Holler at Tinned Tomatoes and this month we're making... Vegetarian Soup!

I made Spinach and Garlic Soup - hot, thick, filling and healthy! I started making this when I was a student - it evolved from potato and leek soup (!) when I tried to force more nutrients in. I still love it - I ate some of it last night, and have some here at work in a flask for when I've finished writing this. Served with a hunk of crusty bread, it's a meal in itself!

Spinach and Garlic Soup


As always, quantities are approximate - add more potato for a thicker soup, or more stock for a thinner one. I usually make this as a one-pot soup, but because the spinach was really sandy, I decided to cook it separately just to ensure all the grit was removed.

My gorgeous spinach - but how much sand???!
  • 2 big bunches of spinach - I usually use a large bag from the supermarket, but managed to pick some up fresh - yummy!
  • 1 kilo floury potatoes, peeled and cut into large chunks
  • 1 onion, finely chopped
  • 4 cloves garlic, crushed
  • 1 litre of vegetable stock - I made mine from Roast Vegetable Bouillon concentrate
  • Salt and plenty of black pepper
Wash Spinach thoroughly (took me ages!!) Roughly chop, place in a pan and cover in boiling water. Allow to boil for 2/3 minutes, then refresh in cold water. Blitz drained spinach along with a cup or so of water to a purée and set aside.

Gently fry the onion and garlic in a little butter or olive oil until soft, then add the stock, about a teaspoon of salt and a good few grinds of black pepper.

Add the rinsed potato chunks, bring to the boil and cook until soft.

Remove the potatoes from the stock with a slotted spoon and mash. I actually used a ricer to do mine - mostly because it was at the front of my utensil drawer!

Return the potatoes to the stock mix and stir well. Taste, and adjust seasoning as required.

Add the spinach purée, taste again, and serve! You could add a swirl of cream, or a grating of parmesan to the top of this, or leave it bare - it will taste good any which way!

Now how easy was that??

Tuesday 5 February 2008

Eating, not cooking...

I've been a few days without a post - mostly because I haven't done one little bit of cooking since my Italian course last Thursday! (Oh, actually, I did make bacon and egg sandwiches for breakfast one morning, if that counts??)

Over the weekend I went to stay at a lovely country hotel with Boyfriend. We decided to call it our Valentine's treat to each other - but that is only because of the date proximity - I don't usually go in for mushiness too much ;)

The hotel has a Michelin starred restaurant, which is probably the main reason we fancied having a go! So I just thought I'd write a quick post to tell you about my first ever Michelin starred dinner.

The dining room was small but formal, with no music. It was maybe a bit too quiet for me - as there were only 4 occupied tables, and it felt like all conversations were communal!

When we sat down we were served canapes - I think they were haddock and potato croquettes, served with tartar sauce. I liked them, though Boyfriend thought they were slightly too greasy.

We then had an amuse bouche of spiced creamy cauliflower soup. It was gorgeously rich and silky - Boyfriend even finished his - even though it was loaded with cream, which he hates!! (I know - he's a bit strange ;)

For my starter, I had seared scallops served with pancetta, garlic cream, brussell sprout purée, topped with crispy fried garlic. Boyfriend had crispy roast sweetbread, served with pickled mushroom pate, pea shoots and carrots. Both dishes were fabulous! I had never tried sweetbread before (and don't think I would have ever ordered it!) but when I had a taste myself I actually liked it a lot! The crispiness of the skin might have made a difference though - it may have been too soft without it... My scallops were large, sweet and perfectly cooked, and the garlic cream wasn't overpowering.

For my main, I went for roast cod with oyster blanquette (in this context I think blanquette just meant creamy mushroom sauce??!), with crunchy, buttery potato topping. So something else new for me to try - I'd never had oysters before! They were delicious in the sauce, but I still think I'd be too squeamish to eat a raw one... Shockingly, I've completely forgotten what Boyfriend had! Though I think it was some sort of gamey bird...

For dessert... I had two! Boyfriend ordered lemon tart with blackberry sorbet. But it was too creamy for him, so I ate most of it. I then had the BEST cheeseboard I've ever seen!

The waitress came out with a trolley loaded with cheese - I think there could have been 30 of them. There was a strong smell of stinky feet - I'd never tried washed-rind cheese before, but decided that that was the night! I chose four, could have had more, but was pretty stuffed from my previous dessert ;) The first was a creamy goat's cheese, also a soft and creamy blue cheese - it had the texture of camembert! I then tried a calvados washed brie - boy, was that pungent!!! It was very strong - maybe a little too strong for me, though I did enjoy it. Finally, I tried the Durrus - another washed-rind - which was my favourite of the lot! It stank of feet, but tasted gorgeous - deep, creamy and smooth.

I am now most definitely a washed-rind convert. Which will not impress my cheese-hating Boyfriend much at all!

We finished with coffee and petit fours, though couldn't finish them all! A lovely dinner - the food was amazing, and the staff were fantastic.


PS, this made me giggle:

'my starter of parsley soup made me almost boss-eyed in pleasure'
- a quoted review from the hotel's website!

Friday 1 February 2008

Happy February!

It's a new month - and my second as a foodie blogger!

I'm definitely starting to get a feel for it now - have participated in three Presto Pasta Nights at Once Upon A Feast, and even joined the Great Cooks Blogroll!

I've really enjoyed the last month - my rss reader is overflowing with fabulous things I want to cook and eat! It's a whole new world!

My aim for February is to try more new recipes, to keep cooking, and to continue being inspired about what other food bloggers from across the world are cooking.

Oh, and if Lady Luck is listening, I'd love to win the lottery so I could get a bigger kitchen please!