Thursday 29 May 2008

Tried & Tasted: Tastes Like Home Caribbean Sunday Lunch

Tried and Tasted is a brand new monthly event hosted by Zlamushka of Zlamushka's Spicy Kitchen. Every month Zlamushka nominates one blog - and the entrants recreate and blog recipes from the chosen blog. For the first month the chosen blog is Tastes Like Home. This was a perfect choice for me - I have never cooked Caribbean food before - though have long had it on my list; I had never visited Cynthia's blog before - and now I have another addition to my google reader; and I could indulge my love of hot food... excellent!

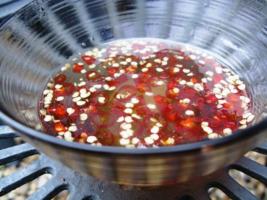
It's a great idea - and I've had a great time playing around with these recipes. The hot pepper sauce was something I made outside of the event - though I have decided to include it in my little round up as it was so good it deserved a second mention!

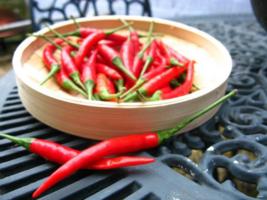
In fact - I ended up using it even more than expected. On Sunday morning I realised I was out of chillies. Seriously - to me that is like running out of salt or something - I always have some in the fridge! So instead, I turned to the hot sauce and walloped a teaspoon into the fried salt fish and half a teaspoon into the buljol. Wow - was it ever good!! The scotch bonnets gave it had an altogether different heat from my usual Thai chillies - and it had a beautiful fruity flavour to back up the burn!

So I present you with....

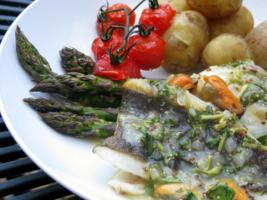
My Carribean Sunday Lunch!

What a spread!


Fried Salt Fish
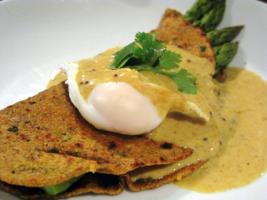
This was my favourite of the lot - deeply spicy, lovely chunks of salt cod simmered in tomatoes and onions. And a spoonful of scotch bonnet pepper sauce of course ;) It went absolutely perfectly with the bakes - I will be making this again. And once the fish is desalted, it's super quick to make!

Buljol
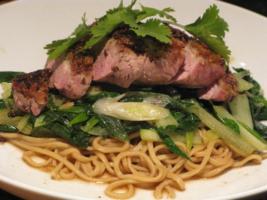
This is a cold salad of boiled and flaked salt fish, with peppers, spring onions, onions and tomatoes. (And hot sauce ;) I think I needed to flake the fish more - but I did enjoy the flavours a lot!
Oiled Paratha Roti

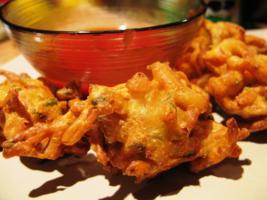
I was so impressed with how well these turned out! - I didn't get a picture, but they were beautifully flakey inside, and tasted gorgeous. Not too oily - which I was a little concerned about. In fact not oily at all, just a really nice texture!

Guyanese Bakes

Why are they called bakes when they are deep fried?

Don't care - they're lovely!

Cythia's original!

Thank you Zlamushka for thinking up and hosting this amazing event - I look forward to more!

And many many thanks to Cynthia for her recipes and also for her help when I was making them!

Wednesday 28 May 2008

Szechuan Squid with Sweet Chilli Sauce

Since I first cooked squid a month or so ago, I've now managed to use it three or four times* But every time I've picked some up from the fishmongers I've always known what I really wanted to do...

...
...
...
yeah baby, dunk it in some spices and deep fry it!

It's taken 29 years, but the true Scot in me is finally coming out! To paraphase one of my favourite bloggers: why sauté when you can deep-fry... And never more so than this past week. In order to prepare one of the dishes** for Tried and Tasted I've converted my broken pressure cooker into a deep fryer for a while. And I can't stop frying things!

I've never really deep-fried anything much before. I made these mixed pakora a few months back - but even then I was using someone else's deep fryer - and had to get him to work it for me! Yet last night I even found myself deep-frying egg noodles - just to see what would happen***.

So, anyway, back to the squid. I'd been wanting to deep fry some squid for ages, and my fishmonger just happened to have some beautiful specimen in the day after I created my impromptu deep fryer...

I went for an Asian twist on the calamari theme, using a fair whack of szechuan pepper in the dredging flour. I also cut them into scored strips - for some utterly bizarre reason I still have a distaste for squid rings. But I do love the tentacles!

Is it big headed to say these were the best calamari I've ever had? The coating was so crunchy and flavourful - I ended up just pigging out on these and passed on my main! Even if you don't try the flavours - have a go at this 'batter' method - it was so effective.


* Yes, I have a bit of a backlog of posts to publish at the moment!
** Yep, that dish ain't up yet either - but it's underway and will be with you soon!
*** As it turns out, dust them with garam masala, chill powder and a wee bit salt and they're lovely... Just don't put too much in. I almost had an oil explosion. Note to self, don't get cocky with boiling fat.


Szechuan Squid with Sweet Chilli Sauce


  • 2 large squid, cleaned and cut into scored strips
  • 100 ml milk
  • 1 crushed garlic clove
  • 5 tbsp corn flour
  • 1 tbsp white flour
  • 1 tbsp szechuan pepper corns
  • 1 tsp black pepper corns
  • 1 tsp chilli flakes
  • 1 tbsp sea salt

Prepare the squid...
Place the squid and the garlic into the milk and set aside in the fridge for at least an hour. Apparently this softens the squid, but I used it mostly to create a self-making batter...

Mix up the flour...
Pound the peppers, salt and chilli in a mortar and pestle, mix with the two flours in a food bag.

Prepare the squid (part deux)...
Pour off the milk from the squid, and shake off the excess - don't worry about being too thorough though.

Put the squid in the bag with the flour/spice mix and shake very well until all the squid is coated.

Remove the squid from the bag and shake off the excess. Leave the squid in the fridge for a further half hour - this will set the milk with the flour - and become your crunchy batter.
That's the most important bit - try not to skip it!

Prepare the chilli sauce...
Put 6 chopped chillies, 1oog sugar, 50ml vinegar and 50 ml water into a sauce pan, bring to the boil and simmer for 15 minutes!

Cook!
Heat the oil so that a cube of bread takes about 30 seconds to brown. (or a cooked noodle - that's how it all started ;). Fry off the squid in a couple of batches, making sure you don't over crowd the pan. I let mine cook for about 45-60 seconds - cook for longer at your peril!


Tuesday 27 May 2008

Royal Foodie Joust: Lime Raspberry Stuffed Cupcakes

Hmmm... I really can't think of a good name for these cupcakes! Raspberry lime cupcake surprise? Marzipan, Lime and Raspberry cupcakes?? Lime and Raspberry Marzicupcakes??? I give up, and apologise for the unimaginative title!

This is my entry to the Royal Foodie Joust, hosted by newly-wed Jenn over at The Leftover Queen. This month's challenge was to use limes, raspberries and almonds. And for some reason I had a total mind blank! I don't usually do sweet - and no savoury inspiration was forth-coming... Until last week, when I thought about making some marzipan from scratch... which made me think of almonds... then the joust... and in the space of an hour I had this recipe pretty much planned!

Now, as I mentioned I don't usually do much with sweet foods - I even had to go out and buy a muffin pan! But now that I have had a go and realised it isn't so scary (and it's a shame to let my shiny new bakeware go to waste ;), I have some more muffin/cup cakes recipes just desperate to be tried. My work mates will be pleased too - they got to eat the fruits of this experiment!

Lime Raspberry Stuffed Cupcakes

Makes 12 cupcakes!
  • 1.5 cups all-purpose flour
  • 1 cup caster sugar
  • 1/2 tbsp baking powder
  • 1/2 tsp salt
  • 50g unsalted butter, cut into cubes
  • 3 eggs
  • 1/3 cup milk
  • 1 small pot raspberry yoghurt
  • 1/2 tsp vanilla extract
  • 1 cup of frozen raspberries
  • 250g ground almonds
  • 250g icing sugar
  • 4 limes
  • Raspberry jam
  • Icing sugar to make frosting
Prepare the Marzipan...
Sift the almonds and sugar into a bowl (I was feeling lazy again, so used my processor!) Mix in one beaten egg and the zest of two limes and mix to a stiff dough. If the dough is too dry mix in some of the lime juice - if it is too dry add some lime juice to moisten, if it's too wet add some more icing sugar. Knead for a couple of minutes, wrap tightly in clingfilm and put into the fridge overnight.

Make the Marzipan Discs...
Take about a third* of the chilled marzipan onto a surface lightly floured with icing sugar. Roll it out to be about 3mm deep. Spread with raspberry jam and roll up like a swiss roll. I ran into some difficulty here as the marzipan was stuck to my board - so I'd recommend rolling it out on greaseproof paper that has been 'floured' with icing sugar :)

Ideally put these rolls back in the fridge to chill before slicing them into 4-5mm thick rounds just before you use them!

Make the Cupcake Batter...
Again, I used my processor with the dough hook attached to make these - no idea if that was the best thing to use - but they turned out as expected so can't have been too bad!

Mix together the flour, sugar, baking powder and salt. Add the butter and pulse lightly til the butter looks like very large bread crumbs.

In a separate bowl mix together the milk, yoghurt, vanilla extract and 2 eggs. Once mixed add into the flour mixture in two goes - being careful not to over-mix it! Add the raspberries, give it a stir and we're good to go!

Prepare the cupcakes...
Pre-heat oven to 170c & line a muffin tray with paper cases.

Place a tablespoonful of batter into each case, then lay a marzipan/jam round into each one. Divide the rest of the batter equally between the cases.

Bake for about 20 minutes - they should feel firm to the touch (Note that the skewer test will be skewed (groan!) as the marzipan centre will make it look unclean even if the batter is properly cooked.

Cool on a wire rack.

Decorate!
Mix 6 tablespoons of icing sugar with just enough lime juice to make a very thick paste. Mix in some raspberry jam to make it pretty and pink! (I had to sieve my jam first to get out the seeds...)

Top each cupcake with a spoonful of icing sugar, a couple of almonds and a marzipan disc!


* that's all you need for this recipe. I should probably have decreased the recipe more. Lime zest marzipan is good though - so I'm sure you'll think up some use for it!

Friday 23 May 2008

A Noteable Post and The Constant Crowd-Pleaser: Chili Con Carne

Guess what?

No... not THAT, silly...

This is my 100th post!!!

How exciting is that?! I have now been a food blogger for almost 6 months - in which time I have written on average four posts a week, concocted about 90 recipes of varying success, and entered numerous food blog events... Hell, six months ago I didn't even know events even existed!

I spend a lot of time dreaming up recipes and shopping for food, even more time making my 'creations', probably not nearly enough time photographing them (!), and hours cleaning up!

My must-read blog roll now has 14 blogs on it - with another 60/70 on my leisurely read list... (and counting - I added another this morning!) What an amazing community to be part of - I'm so looking forward to the next 100 posts!!

Anyway, reaching a milestone always leads to moments of reflection (as well as expectation!), so it is quite fitting that this post is also my entry to Tastes to Remember hosted by Sarah over at Homemade. It's another last minute entry for me - my third this week. Maybe at some point in the next 100 posts I'll develop some organisation skills?

As I mentioned when I made my Ultimate Chili Con Carne, I always remember the excited anticipation had by me and my sister whenever my mum was working away from home. Not because we were desperate to get rid of her (!) but because it meant my dad would make one of his two staples: chilli con carne or macaroni cheese (with HP brown sauce, of course!). Beloved by the three of us, those were two dishes that my mum just didn't appreciate - so when we were fending for ourselves, there was no choice but to indulge. Now, my mum is a fantastic cook - she's taught me a lot (when she comes to stay with me we spend hours watching cookery shows and deciding what to have for dinner that night!). But... kind of like me... she is pretty experimental and like to try new things - so there isn't the same constancy of dishes. (In saying that, watch this space for the BEST steak pie you'll ever taste... I'm planning a Scottish run of recipes soon!)

So, this recipe is pretty close to the one my dad used to cook for my sister and I - using ground beef and a nice amount of dried chili. And has to be served with plain rice and pita breads -open the pita pockets and stuff in as much chili and rice as you can.

Eat with your hands, in front of the telly. Just don't tell mum!


The Constant Crowd-Pleaser: Dad's Chilli Con Carne


  • 500g ground beef
  • 1 large onion, finely chopped
  • 3 cloves garlic, crushed
  • 1 tin chopped tomatoes
  • 1 carton passata (sieved tomatoes)
  • 1 beef stock cube
  • Salt and pepper to taste
  • 1/2 tsp sugar
  • 1 tsp ground cumin
  • 1 tsp ground coriander
  • 1 tbsp paprika
  • dried chillies - to taste, ground or flaked. I reckon at least 2 tsp though!! I used 1 tbsp of reconstituted holy trinity blend (Pasilla, Ancho, Mulato) and 1 tsp habenero flakes. Hot! Nice!
  • A few drops of tabasco if you fancy it (I usually do!)
  • 1 tin kidney beans

Fry...
Heat a glug of oil over a medium heat in a large saucepan, then add the onions and garlic and fry until soft. Remove to a bowl and fry off the ground beef in batches. Don't do it all at once, or you'll boil the beef instead of browning it - and lose half the flavour!

Mix...
Return all the beef and onion mix to the bowl, crumble in the stock cube and add the spices. Fry off for a couple of minutes before adding all the tomatoes and the sugar.

Simmer...
Bring to the boil, cover and simmer for 20 minutes. Taste it and adjust seasoning. If the tomatoes were very sharp you may want to add a bit of extra sugar here too. If it ain't spicy enough chuck in some more tabasco - or maybe some cayenne pepper. Make it yours baby!

Cover again and simmer for another 20-30 minutes, stirring occasionally. Add the rinsed kidney beans 10 minutes before the end.

Serve...
Like I said, lightly toasted pita breads and steamed long grain rice. Nowt else. Especially no cheese. Yes, I know it's lovely, but not for here. Save that for a huge bowl of chilli nachos with all the trimmings!

EAT!
yum nummm gobble slurp mmmmm..........


Thursday 22 May 2008

Indian Spiced Tuna Fish Cakes

Following on from the success of my Thai spiced tuna cakes, I was looking forward to having some spare mashed potato to have another go... but in the end I got fed up with waiting (it's almost summer now - why would I mash potato?! Especially when I can cook with gorgeous Jersey Royals!)

So anyway, I toddled out and bought some old floury potatoes. Came home and boiled them whole in their skin before passing through a ricer. Now here's a good tip for you: If you're using a ricer you don't need to peel the potatoes first! Just chuck em in and squish! Yay! And although it's much quicker to dice up the potatoes before boiling... don't do it. The potato gets waterlogged and loses starch, therefore the dough doesn't work as well. And if that wasn't enough, they don't even taste half as good! So - boil whole, then rice without peeling. Easy peasy!

Anyway - on from the mashed potato preparation... Oh, hang on, one last thing! If you do rice them, then spread them out on a chopping boil after ricing and leave for at least 10 minutes. This lets excess water evaporate away, and also lets them cool down. Both these thing will give you better tattie dough!

Riiiight... deep breath, step away from the mashed potato!
So anyway, this time I decided I wanted to go with more Indian flavours - and I used chickpeas to bulk them out into a main meal rather than an appetizer.

Hey, whaddya know - turns out I don't actually have anything else to say!


Indian-Spiced Tuna Fish Cakes

Don't be put off by the long ingredient list - it's mostly spices!
  • 1/2 tsp cumin seeds
  • 1/2 tsp black mustard seeds
  • pinch fenugreek leaves
  • 1/2 tsp ground turmeric
  • 1/2 tsp ground cumin
  • 1 tsp ground coriander
  • 1 tsp chilli powder
  • 1/2 tsp cayenne pepper
  • 1/2 tsp garam masala
  • 1 cup mashed potato - preferably cold
  • 400g tin chickpeas, rinsed and drained
  • 1 tin tuna, drained
  • 1 clove garlic, crushed
  • 1" piece ginger, grated
  • 2 banana shallots, halved and thinly sliced
  • 1 egg yolk
  • 5 heaped tbsp plain white flour
  • Ghee
  • Salt and pepper to taste

Prepare the chickpea mixture...
Heat a tablespoon of ghee over a medium heat and add the mustard seeds, cumin seeds and fenugreek leaves. Fry until mustard seeds start to pop, then add the shallots, ginger and garlic and fry until soft.

Add the rest of the spices and a few tablespoons of water, and continue to fry for another couple of minutes. Add the chickpeas and cook out for 5-10 minutes. Taste and adjust seasoning as required. Once the cooking is finished, lightly crush the chickpeas with a masher - don't mash them though as you want to save some of the texture!

Also, don't let the mixture dry out - but make sure you don't add too much water. This is going to be part of your dough, if it's wet it'll be messy!

This can be made in advance - along with the mashed potatoes to throw together at the last minute. I wouldn't advise preparing the whole dough in advance as it may go sticky...

This is the chickpea mix just before crushing - it was so tasty!! I'd have been quite happy to just have eaten this as it was with naan bread!

Make the dough...
Add the mashed potato to the chickpeas, along with the egg yolk and flour. Mix well, flake in the tuna and mix again. Have a little taste and adjust the seasoning as required. If the mixture is very soggy add more flour.

Cook!
I used cookie cutters to mould my fishcakes - a bit of a palaver, but they looked pretty! Make sure you oil them first!
Heat a dab of ghee over a medium heat and place the ring into the pan. Spoon the mix into the ring and cook for 3/4 minutes. Ease the cake out of the ring, and turn - cooking for another 3/4 minutes on the other side.
Repeat until they're done - keep finished ones in the oven until ready.

Serve!
I served mine with salad - they were flavourful enough not to need a sauce. However, a nice raita and a spicy tomato and chili sace would have worked very well!

Wednesday 21 May 2008

Scotch Bonnet Hot Hot HOT Sauce

Zlamushka of Zlamushka's Spicy Kitchen is hosting a new Food Event - Tried and Tasted - a monthly event to appriecaite other blogs. This month, the blog chosen is Cynthia of Tastes Like Home. I don't intend this post to be my entry to that event as I have picked another dish - but when I saw this pepper sauce, I knew it was the kind of thing I would love!

This is my entry to Putting Up - hosted by Pixie at You Say Tomahto, I Say Tomayto. It's a great idea for an event - for me it gave me the kick I needed to actually make a preserve type thing. For some reason I was scared of the sterilization thing - it always seemed to be a lot of work! But I thoroughly enjoyed making this scotch bonnet sauce, and look forward to using it in my cooking!

Tabasco, eat your heart out!!

Scotch Bonnet Hot Pepper Sauce


  • About 300g scotch bonnet chilli peppers - the original recipe called for 4 cups - I think this was slightly more...
  • 6 large cloves of garlic, minced
  • Salt to taste - I added 1 tbsp - there was no way I could taste it at that stage!!!!!!!!
  • Distilled vinegar to loosen - Cynthia told me you can use water or oil in place of this - I used mostly vinegar with a bit of oil.

RIGHT THIS IS IMPORTANT!

WEAR GLOVES!!!


Seriously. I wore gloves the whole way through, and still managed to get some under a nail. These chillies are HOT!

Place chillies in a colander and wash well. Remove the stalks and place in the food processor with the garlic and salt.

Blend to a fine purée, making sure there aren't any big bits stuck to the side!

Add 1/3 cup of vinegar (or oil/water!) and blend again. Check the consistency - if you want to loosen it further, slowly add more vinegar/oil/salt until you have the thickness you want.

Decant into sterilized jars.

Cynthia told me that her mum used to leave hers in the sun to cure for a few days before using - so I have put my jars into the sunniest spot of my apartment. I have already used a little bit of it in this salad - wow, seriously hot but you can still taste the fruitiness of the peppers!! I'm looking forward to trying it again in a few days!

Yay for pretty jars of stuff I made from scratch!!!

NCR: Hot (Sauce!) Potato, Pear & Blue Stilton salad

This is the salad that I had worked out as my entry for No Croutons Required this month. Unfortunately life conspired against me, and between parental visits, a trip to Liverpool, and trying to prepare my apartment for sale I've had hardly any time to do the shopping/ preparation required to do many of my dishes! Anyone fancy coming to help me paint and garden the place into submission??

Anyway, I'm a day late for the submission, but here's my entry anyway - it's still worth a post! I had meant to make crispy pear croutons by drying out syruped pear cubes in the oven... but forgot to put them in the oven... So instead I fried them in a teeny dot of butter with a touch of sugar and a sprinkle of black pepper.

The 'Hot' in the title comes from the drizzle of the home made hot hot HOT scotch bonnet sauce I made yesterday - I was thinking along the lines of buffalo wings being served with blue cheese dressing! The salad should be served just warm or room temperature - not hot or the greens will wilt!

Hot (Sauce!) Potato, Pear & Blue Stilton salad

Serves 2!
  • 1 pear, halved and sliced
  • 100g blue stilton - I used Organic Stilton from Ley Cross Farm - a gorgeously smooth and creamy stilton... I still have a bit left - looking forward to it already!
  • 1 chicory
  • watercress
  • Jersey royal potatoes - boiled and thickly sliced
  • A few drops hot sauce to drizzle
  • 3 tbsp extra virgin olive oil
  • 1 tbsp white wine vinegar
  • 1/2 tsp english mustard
  • salt

Prepare the potatoes...
Heat a glug of olive oil in a frying pan, add the potatoes and fry until crispy round the edges.

Prepare the dressing...
Whisk together the vinegar, olive oil mustard and salt to create an emulsion. Crumble in the Stilton and mix well.

Once the potatoes are crisped, transfer them to a bowl and pour over half of the dressing. Mix well - the heat from the potatoes should start to melt the cheese. Leave to cool for a bit - you don't want to add the potatoes when they are too hot.

Prepare the pears...
I would still have preferred the crispy pear croutons... bah... Oh well, will try to be less rubbish next time ;) Heat a tiny dab of butter in the frying pan and arrange the pear slices in the pan. Sprinkle with a little bit of sugar and a grind of black pepper. Cook for a minute or two on each side.

Assemble the salad!
Break up the chicory and half each of the larger leaves. Combine with the watercress and dress with the remaining dressing.

Arrange the potatoes and pears on top of the leaves. Drizzle with hot sauce to taste.

Tuesday 20 May 2008

The Simplest of Snacks and an Award!

Mmmmm... I am soooo loving the summer sun! Ok, so it isn't as warm as it was last week, but just seeing the sun when I open the curtains in the morning starts the day off in the right way.

The other thing that I am loving about the shifting seasons (yeah yeah, I know, me and every other Western food blogger!) is the changing available produce. As much as I love the soups and stews of winter, nothing beats real fresh summer fruit and veg.

I mentioned last week about the gorgeous British Vittoria Tomatoes that are currently available here. Well, here they star in their own right as a tasty, healthy snack. This isn't in any way a recipe - but, well, sometimes you just don't need one!

Vittoria Tomatoes with Maldon Sea Salt and Pepper


Lick the tomato and dip it one side into the maldon salt, then the other into the pepper (a 50:50 mix of Szechuan pepper and plain old black pepper, toasted and ground).

Place the tomato on your tongue, salted side down, and let it sit there for a second or two while the salt starts to melt in your mouth. (It shouldn't be too salty - don't use table salt!!!!!!) Bite into the tomato - sweet meets salty, a hint of heat from the pepper and a lot of juice...

Repeat as required.


Done!


And now to an award!

Many thanks to Icsa99 from Heaven is Chocolate, Cheese and Carbs for awarding me the Blogging with Purpose Award.


I have now been blogging almost 6 months, and I am enjoying it so much! Food blogging is forcing me to think even more about food. I can't remember the last time I resorted to a beans on toast dinner - each mealtime at home is an opportunity to try something new!

For this reason, to hear that my blog was part of the reason that someone else decided to come into this wonderful world is incredibly touching. Thank you Icsa99 - and also, thank you for introducing me to your blog - I look forward to more of your recipes!

Here are my picks! I've chosen three because that's the best number (it should have been five...)

1. Sher from What Did You Eat? This was the very first food blog I ever found - only about a year ago! Compared with how huge the food blogosphere is- I can't believe I didn't know about it. I will be recreating that recipe soon - watch this space!

2. Ruth from Once Upon a Feast. Her Presto Pasta Nights event was the first food event I ever took part in, with some Roast Garlic Ragu - still one of my favourite recipes!

3. Heather from Gild the Voodoolily... just to annoy her. Snarf snarf. Ok, it's really because she's got a great blog and great recipes... but this will annoy :P


Thursday 15 May 2008

A Quick Freezer Snack: Gyozas with Spicy Sauce!

I got home from the pub the other day, desperately wanting to snack, but with nowt a thing t' eat. My store cupboard challenge had gone well... too well... superfluous food stocks at an all time low.

I suddenly recalled some vegetable gyozas I found in my freezer during the aforesaid challenge, spicy and healthy* - perfect! I simply heated a teeny spot of nut oil in a hot frying pan and placed the gyoza in, straight from the freezer, flat side down. After a couple of minutes add half a cup of water, cover and allow to steam for another couple of minutes, or until all the water has gone.

The spicy sauce to go with it was another store cupboard knock up: add a couple of tablespoons of sambal brandal to a couple of tablespoons light soy sauce. Squeeze in the juice of half a lime, mix together and you're set to eat.

Time from pub to belly? 7 minutes!


* healthy as compared with my friend's snack...


... chips and curry sauce from across the wee Chinese place across the road! Ok, I confess, I had more than a couple of chips... it would have been rude not to with a plate that size... and damn they were good!!!

Wednesday 14 May 2008

A Very Seasonal Affair: Pan-fried Brill with Mussels and Asparagus

The sun was shining, it was an utterly beautiful day. I had an urge to cook something as fresh and in season as possible! So in my lunch hour I wandered down to Sea Haze - the fishmonger on the beach, who sources its produce from local day boats - and picked up some gorgeous brill and a couple dozen mussels (presumably the last of the season!). As I hadn't decided what to cook at this point I left the brill whole and ended up filleted it myself when I got home - I was very proud of myself!!

On the way home I stopped at the greengrocers and got a bunch of British asparagus, vine ripened Jersey Vittoria tomatoes, Jersey Royal potatoes and British watercress.

All the flavours were amazingly vivid - the tomatoes especially were the most gorgeous ones I've tasted since last year!!! They smelled like real tomatoes should - like the ones my dad used to grow in the greenhouse when I was growing up.

Pan-fried Brill with Mussels and Asparagus
Serves 2

  • 4 brill fillets (i.e. one fish)
  • A couple of vines of cherry tomatoes
  • Bunch of asparagus
  • Boiled Jersey Royal potatoes to serve
  • 12 mussels
  • 2 shallots, finely chopped
  • 2 cloves garlic, crushed
  • 1 tbsp wholegrain mustard
  • 1 tbsp flour
  • 1 tbsp butter
  • olive oil to fry
  • 300ml vegetable bouillon
  • 1 glass of white wine
  • 1 large handful water cress, roughly chopped

Preheat the oven to 200c.

Prepare the mussels...
Clean the mussels by pulling out the beards and scrubbing the shells under cold water. Discard any that stay closed after a sharp tap on the counter (they're dead!)

Heat the wine in a saucepan, when it is bubbling, throw in the cleaned mussels, cover the pan and steam for 3/4 minutes - shaking the pan after a minute or so.

Remove the mussels with a slotted spoon and reserve the wine. When the mussels are cool enough remove them from the shells and set aside.

Make the sauce...
Heat the olive oil and butter over a low-medium heat in a saucepan. Add the shallot and garlic and cook until soft, be careful not to let it colour.

Sprinkle over the flour and cook out for a couple of minutes - keep it moving so the flour doesn't burn. Gradually add the stock, stirring constantly - it should thicken up nicely. Add the mustard, wine, and the water cress, mix and cook for another couple of minutes. Add the mussels and set aside.

Prepare the veg...
Snap and peel the asparagus as appropriate to its age and thickness. Arrange on an oven tray. Put the vine tomatoes alongside.

Drizzle with olive oil, sea salt and black pepper and put into the oven for 10-12 minutes.

Cook the brill...
Mix some white pepper and salt with some flour, and dredge the fillets in it. Make sure you pat off as much flour as possible.

Heat some olive oil on a medium heat, and place the fillet in skin side down. Cook for 3/4 minutes. Turn the fish over, cook for a further minute on the other side, then turn off the heat. Allow to sit in the pan for 2/3 minutes more to finish cooking.

Serve...
Place the fillets on top of the asparagus and spoon over plenty of the sauce. Put the tomatoes on the side and serve the potatoes along side.

So I Ate a Hippo for Breakfast Last Week...

While grilling some breakfast bacon the other day I was most astonished when my bacon rashers turned into an army of little hippos!!


How cute are they! Can bacon be cute? Hmmm...

Tuesday 13 May 2008

So Much More Than A Roast Beef Sandwich... The Ultimate Leftover Sandwich!!

I just looked at my recent posts and realised I've covered a lot of firsts this month so far...My first taste of frog legs, a birthday and me!, My first award - the Arte Y Pico!!!, and My First Roast Beef Dinner!

I'll see what else I can try for the first time - I seldom cook the same thing twice - but I don't even think that counts anymore!

I think this is the first time I have blogged a sandwich. But it was so much more than that -it was the best sandwich ever! The photograph doesn't do it justice (note to self, book into photography course) - but think of the sweetness of caramelised onions with the sharp heat from the mustard - and tender rare beef with a drizzle of rich, thick gravy....

Serendipitously, I got the notice about Anupama from Food n' More's Sandwich festival 2008 just after I had decided to blog this - it must be fate!


The Ultimate Leftover Beef Sandwich!!


  • left over rare roast beef - sliced as thinly as you possibly can
  • 2 tbsp mayonnaise
  • 1 tbsp English mustard - it has to be English!!!
  • handful rocket
  • left over gravy - if you have any!
  • caramelised onions - I made a huge batch when I made this left over dinner!
  • 1 ciabatta loaf
  • freshly ground black pepper
  • a teensy sprinkle of maldon sea salt - skip this is you're watching your sodium intake - I just love how it develops the taste of the beef...

Assembling the sandwich...
Cut the loaf in half
Mix together the mayo and mustard and spread on the cut side of the bread.
Layer on a few layers of the wafer thin beef - as much as you think you can wrap your gums round!
Drizzle on some of the left over gravy
Put the rocket on top of that, and the caramelised onions atop the rocket.

Cook the sandwich...
I did mine in my George Foreman grill - but press the panino* however you can!


* Panino - singular of panini. I read a rant recently about people misusing the word panini. Apparently it is especially irritating when people say "Panini sandwich". As this essentially means little breads sandwich. Which doesn't make any sense. (pan = bread, ini = little (pl)). And to say paninis - well, let's not even go there.

I love grammar Nazis - especially foodie ones!

Monday 12 May 2008

My first taste of frog legs, a birthday and me!

It's my birthday today!

And it's the last one that starts with a two. Although my dad just texted me to say I am creeping ever closer to the big 4-zero... which makes me feel a bit better - that's ages away! ;)

It is a beautiful day here in Brighton - and it's been a gorgeous weekend. I went up to Liverpool to meet with my family for a couple of days - we went on the Magical Mystery Tour, had drinks in the Cavern Club, and I tried frog legs for the first time in a Vietnamese restaurant!

Fried Frog Legs with VERY garlic butter!

They were so good - I would definitely have them again. In fact, I will probably go looking for them!! I'm not sure I agree with the ubiquitous 'chicken' flavour that is often attributed to them. Although there was a lot of garlic in this dish! The flavour was delicate and not-quite-meaty. And I would describe the texture as more prawnlike than chicken. Either way, yum yum YUM!

And just in case you were wondering who the lassie behind the kittie is - here's a pic of me at Penny Lane!


I've decided go public/personal with my blog - I might even upload a proper profile pic sometime soon! And then I'll tell my folks about it ;)

Anyway, my mum came back down to Brighton with me, it's 27c out there and the beach is calling. Time for some birthday sushi in the sun!

Hope you're all having as good a day as I am!


Thursday 8 May 2008

Left Over Roast Beef Tagliatelle with Caramelised Onions

Ok... now in your head, start thinking of Fleetwood Mac, Albatross....

... are you ready?

... doo be doo be doo be dooooo.....

(cue food porn voice)

... This is not just pasta, this is silken, al dente tagliatelle mixed with succulent cubes of rare roast beef...

...in a rrrrich, red wine sauce with just a hint of heat from dried red chillies, laden with sweet caramelised onions...

... this is not just garlic bread, this is home-made focaccia, split and spread with garlic and black pepper infused butter, baked in the oven until crispy at the edges...

...This is not just food, this is kittie's leftover roast dinner food!


Ok, ok, so I'm being even more random than usual... For those of you not based in the UK (or perhaps for everyone if my impression was that bad ;) that was a mini-spoof of the M&S food adverts. Which shouldn't really be allowed on telly until after the watershed!

Anyway, without further ado, here is my entry for this week's Presto Pasta Night - a fabulous weekly event hosted by Ruth at Once Upon a Feast - if you like pasta - get over there and check it out!

Leftover Roast Beef Tagliatelle!


  • Left over rare roast beef, cut into cubes
  • 1 tin chopped tomatoes
  • 1 shallot, finely chopped
  • 1 clove garlic, crushed
  • 1 glass red wine
  • 2 red onion, halved and thinly sliced
  • 1/2 tsp red chilli flakes
  • Olive oil to fry
  • 1/2 tsp sugar
  • salt and pepper
  • Pasta to serve
Caramelise the onions...
Over a very low heat, place the sliced onions in a pan, add a glug of olive oil and gently fry. Once they start cooking down add a pinch of salt to stop them burning, and a pinch of sugar to encourage the natural sweetness of the onions. Cook for 30-40 minutes until dark golden and caramelised, adding a little bit of water if required to keep them moist.

Meanwhile... make the sauce...
Heat a glug of olive oil and gentry fry the shallot and garlic until soft. Add the wine, tomatoes, 1/2 tsp sugar and chili flakes. Simmer gently for 25 minutes and turn the heat off. Add the roast beef cubes. You want to keep these as tender as possible - so allow them to be heated by the heat in the sauce - don't allow to boil again.

And the garlic focaccia...
To accompany it I served the remains of the focaccia I made for Taste and Create. I mixed some softened butter with a bit of olive oil, one crushed clove of garlic and a few decent grinds of black pepper. I split the bread in half, and spread the cut side with the butter mixture. I then wrapped it in foil and chucked it in the oven for 10 minutes - opening the foil for the last couple of minutes to let the edges start crisping!


Serve the sauce thoroughly mixed with the tagliatelle - with the garlic bread on the side!

Wednesday 7 May 2008

My first award - the Arte Y Pico!!!

I'm really excited!

Over the weekend I got my first ever food blogging award - the Arte Y Pico!


Even more exciting, it was from PyschGrad and Giz at Equal Opportunity Kitchen - a fantastic blog, which has been on my 'must read' subscription list for quite some time now. It is always great when someone tries one of your recipes - even better when they make a video about it for the world to see!! If you haven't already, get yourself over there to check their blog out! Thanks so much guys!

These are rules that come along with this award:

1) Pick 5 blogs that you consider deserve this award with their creativity, design, interesting material, and also contribute to the blogger community, no matter what language.

2) Each award has to have the name of the author and also a link to his or her blog.

3) Each award-winner has to show the award and put the name and link to the blog that has given her or him the award.

4) Award-winners and the one who has given the prize have to show the link of "Arte y pico" blog, so everyone will know the origin of this award.

5) Display these rules on your blog.


So anyway, I've been considering who I should pass this onto. I've just done a quick check - I have way over 50 food blogs in my google reader - it's tough to pick just 5!

So after some pondering, here are five from me!

  1. Mike of Mike's Table I always love seeing a new post from Mike appear on the reader - he has great recipes and a similar love of chilis!
  2. Francie of Ramblings of a Frantic Home Cook She has such a great style - and such cute pictures - that I'd read her blog even if her recipes weren't to my taste! Which luckily isn't an issue - yummy!
  3. Peter of Kalofagas - Pursuit of Delicious Foods The Canadian Greek Gourmet with an seemingly unending supply of gorgeous Greek recipes... and an interesting taste in t-shirts!
  4. Right - I don't know if this is allowed... but I'm going to have a go anyway... For my 4th pick I'd like to choose both Lisa of Lisa's Kitchen, and Holler of Tinned Tomatoes. They both have superb vegetarian blogs - but the main reason I've chosen them is for the creation of new monthly food event No Croutons Required - what a great addition to the food blog circuit that turned out to be!!
  5. And finally, Sunita from Sunita's World - for having some of the most gorgeous photographs in the food blogosphere.

My First Roast Beef Dinner!

You might remember a couple of weeks ago I broke my store cupboard challenge when I saw the most amazing hunk of sirloin roasting joint at an amazingly low price!

I'm not really a meat, tatties and two veg kind of girl, so very rarely cook up a roast dinner. I made a turkey dinner at Christmas, and the last time before that was at least 3 years ago! Even then - I would only ever cook chicken - I liked being able to use the carcass for stock.

So this was a new venture for me... and definitely one I'll try again! I failed to take pictures of the roast dinner - it was tasty, but I can't help it - I'm just not that inspired by this type of food - it's the leftovers that really turn me on! Though I have to say, the gravy was astounding - I deglazed the pan with red wine and a bit of water, added some flour and a load of freshly ground black pepper. The meat juices, onions and garlic from the roasting process were still in the pan, so I squished and squeezed every bit of goodness out of them. I strained the whole thing through a sieve, and left it to separate so I could skim off the fat. After melting in a knob of butter... it was the richest tastiest gravy ever (if I do say so myself! I'm in a very modest mood today ;)

Meltingly Rare Roast Beef!

Preheat the oven to 240c.

Prepare the meat...
Pat the surface of the meat with paper towel to remove excess moisture.
Mix together a heaped tablespoon of flour, a tablespoon of smoked paprika and rub it all over the joint. Season the joint well with Maldon salt and freshly ground black pepper.

Prepare the pan...
Take 3 similarly sized onions, peel, and cut in half against the grain. Put a little spot of oil into the bottom of a roasting tin and lay the onions in in. We're going to use the onions as a roasting rack. All the juices from the meat are going to go into the onions, and help make the best gravy ever! Try to use as small a roasting tin as possible. Scatter 3 unpeeled garlic cloves around the onions.

Cook the joint...
Place the joint on top of the onions and put the whole thing into the pre-heated oven. Cook at the temperature for 20 minutes, then turn the oven down to 180c. Cook for a further 35 minutes per kilo. This will give you beautifully rare beef. I'm not going to tell you how to make it any other way as I'm a rare beef fascist, and believe that anything other than rare is a waste of the beast's death ;)

Rest the joint...
Do NOT skip the step. If you skip this bit you'd be as well chowing down on a road side cafe 'top quality' rump steak.
The joint will need at least 40 minutes to rest - this is also the bit that finishes the cooking. Remove it from the oven, cover with foil and leave for 40 minutes. Now is probably a good time to prepare your potatoes, veg, yorkies, etc.

Rested and ready to go!

When the meat is rested, remove to a board. Use the pan, juices, onion and garlic to make the gravy, and carve the beef as you will!

Thursday 1 May 2008

Thai Spiced Tuna Cakes

I had some mashed potato left overs a few days ago and was going to use it to make crab croquettes. But then I used the crab meat to make a rather lush Vietnamese Noodle Salad - and my plan for crab croquettes was transformed into these Thai-influenced tuna cakes.

Super quick, super easy and very tasty!


Thai Spiced Tuna Cakes

Made about 12 cakes
  • Left over mashed potato (about 1.5 cups I think!)
  • 1 tin of tuna, drained
  • 1 spring onion, shredded
  • 1" piece ginger, grated
  • 2 cloves garlic, crushed
  • 2 Thai red chillies, finely chopped
  • The zest of 1 lime
  • 3 tbsps white flour, plus extra for dredging
  • Handful cilantro, roughly chopped
  • Oil for shallow frying
How easy is this...?
Mix together all the ingredients, except the tuna (and the dredging flour and oil!) and mix until well combined. Flake the tuna into the mix, and gently combine - try to leave some decent sized bits!

Pinch off a ball of the mixture, flatten with your hands, and dredge in flour - shaking off the excess. Fry in an oiled medium heat pan for 3/4 minutes each side, or until nicely browned.

Serve with the dipping sauce of choice - I used sambal brandal, but sweet chilli sauce,, or even just a squeeze of lime juice would work just as well - it all depends on what you fancy!!