Tuesday, 14 October 2008

Besan Fried Aubergine with Lentil Pilaf

Right, so the kitchen is unpacked, and the living room is clear of boxes. I've no idea where anything is, but at least have managed to find my bed every night, which is always a good thing! Saying that, my bedroom looks like it has been hit by a girl bomb*, but let's just ignore that for now. All in all, I'm getting settled - and hopefully normal blogging services will be resumed shortly!

The dish I'm serving up to you today is a feat of kitchen clearing. I prepared it in my last week at the flat, and was chuffed about using up lots of bits and pieces to actually make a fairly cohesive whole. Not only that - it was quick to make, ridiculously cheap, and damned tasty with it! My quantities are pretty rough - the end of a pack of basmati, finish off a couple packs of lentils, some bits of veg from the back of the fridge, a couple of almost empty jars of sambal...


Besan Fried Aubergine with Lentil Pilaf

Serves 4
  • 1 cup red lentils, washed
  • 1.5 cup basmati rice
  • 0.5 cup broad beans (from the freezer!)
  • Half a broccoli, florets
  • 400g tin tomatoes
  • 1 tbsp garlic and ginger paste
  • 1/2 tsp black mustard seeds
  • 1/2 tsp fennel seeds
  • 1/2 tsp dried fenugreek leaves
  • 1/2 tsp turmeric
  • 1/2 tsp red chili flakes
  • good pinch saffron
  • Vegetable bouillon
  • Salt to taste
  • ghee to fry
Heat ghee in a heavy-based saucepan and add mustard and fennel seeds. When mustard seeds start to pop, add the garlic and ginger, then the fenugreek, lentils and basmati rice. Stir for 3/4 minutes, then add the rest of the spices, and salt as required.

Add the tin of tomatoes, and top up with hot bouillon to about an inch over the level. Bring to the boil and simmer for 5 or 6 minutes.

Chuck in the broccoli florets and broad beans and add more bouillon if required. Continue cooking until rice and lentils are done, checking to make sure it doesn't get too dry, adding more bouillon as necessary.

Besan-Fried Aubergine
  • 1 cup gram flour
  • 1 tsp ground coriander
  • 1 tsp ground cumin
  • 1/2 tsp cayenne pepper
  • 1/2 tsp salt
  • 1/2 tsp baking powder
  • water to mix
  • 1 aubergine (eggplant!)
  • ghee to fry
Mix together the first six ingredients, then mix in just enough water to make a thick batter.

Cut the aubergine into slices about 1cm thick, and coat them in the batter.

Heat the ghee in a frying pan to a medium to hot heat. Cook the aubergine for a minute or two on each side, until golden and crispy - but don't overcook!

Serve the lentil pilaf with slices of fried aubergine on top, and a couple dabs of sambal if you're in the mood for a bit more heat!


* clothes, shoes**, make up, more boxes and some random utterly unnecessary objects... A small stuffed bagpuss mouse that sings "We will fix it". Except the battery is all but dead, so all it actually does is an aphonic "Weeeeeeeeeeeeeeeeeeeeeeeeeeeeee.......". Then snuffles a little before returning to its glass-eyed voiceless state.

** did I mention I halved my shoe collection before I moved? I threw out 42 pairs... :-S

Thursday, 18 September 2008

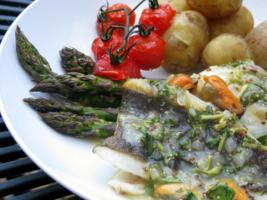
Think Spice: Fenugreek Poached Fish with Saag Aloo

First things first...

Yes, ok, so I haven't been around much this last week or so: I'm woefully slow in my posting, and my google reader ridicules me everytime I turn the computer on, groaning under the weight of unread posts... I have been in the kitchen (a lot!!) but have been sorely limited in non-work pc time.

So apologies if I haven't been by as much as usual - I promise I'll sort it out soon!

I have still been managing to cook - and this post is my entry for this month's Think Spice... this month being hosted by... me!

I chose fenugreek as the spice, either in seed form or as dried leaves. I ended up using both forms in this dish - although the seeds were my main use.

Unusually for me, I have kept the heat in this dish to a minimum - I didn't want to overpower the subtle flavours in the fish. And I was really pleased with the result. It was spicy - but in a flavourful way rather than hot. The saag aloo may not be authentic, but its main ingredients are spinach an potato - so I figured it deserved the name!


There was quite a bit of gravy at the end - next time I would serve this with some lovely naan bread to soak up all the flavour. As it is I just had to drink it out the bowl... ;)

Only 10 days left to get your fenugreek-spiced dishes to me - come on peeps, get cooking!


Fenugreek Poached Fish with Saag Aloo


Serves 2 - with leftovers!

For the Fish and Broth...
  • 1.5 tsp fenugreek seeds
  • 1 tsp fennel seeds
  • 1/4 tsp turmeric
  • 1/4 tsp salt
  • 350ml water
  • 100ml milk
  • 2 fillets firm white fish - I used pollock
For the Saag Aloo...
  • 1 tsp black mustard seeds
  • 1 large pinch dried fenugreek leaves
  • 1.5 tsp ground cumin
  • 1.5 tsp ground coriander
  • 0.5 tsp turmeric
  • 0.5 red chilli, deseeded and finely chopped
  • 1 large clove garlic, crushed
  • 1 large onion, finely chopped
  • 1 tbsp grated ginger
  • 1 bunch spinach, washed, destalked and roughly chopped
  • 4 plum tomatoes, diced (large)
  • 4 medium potatoes, diced (large)
  • 2 tbsp ghee

Prepare the Broth...

In a dry pan, toast the fenugreek seeds for 3/4 minutes until golden brown. Transfer them to a mortar and pestle and give them a bit of a bash. Warning - these little legumes are really hard - so just try to break them up a bit, don't worry about grinding them to powder.

Put the bashed fenugreek and the fennel seeds in a pan, then pour over the water. Bring to the boil, cover and simmer for 5 minutes. Turn off the heat and set aside to cool.


Prepare the Saag Aloo...
Heat the ghee over a low to medium heat and add the mustard seeds. When the start to pop add the onions and dried fenugreek leaves. Fry gently until translucent, don't allow to brown.

Add the ginger and garlic and cook for another minute or so before adding the cumin, coriander, turmeric and chilli.

Add the diced potato to the mix, and top up with cold water to about half way up the potato. Bring to the boil, cover, and simmer for 10 minutes or so, stirring a couple of times through out.

Prepare the fish while the potatoes are cooking...


Cook the Fish...
Once the broth is cool, strain through a fine sieve and discard the seeds. Add the milk, salt and turmeric. Lay the fish fillets in the broth - they should be totally submerged - otherwise top up with water.

Gently bring the broth to the boil. As soon as it reaches the boil, cover and turn off the heat. Leave in the broth for 5-10 minutes - until fish is cooked through (this will depend on how thick the fish is).


Finish the Saag Aloo...
Add the tomatoes and chopped spinach to the potato mix and stir well. Cover the pan, and cook for another 5/10 minutes - until the potatoes are cooked through, the spinach is completely wilted and the tomatoes are softened.

Depending on how much water is released by the tomatoes and spinach you may want to remove the lid for the last few minutes of cooking to let the sauce thicken.


Friday, 12 September 2008

Spicy Marinated Salmon with Raw Bean Salad

Guess what???

I'm moving house soon, having finally managed to lease my place out! I'm happy in some ways, but sad in others - I've had many good times in my wee flat and am sorry to leave it. Even worse, I will no longer be Kittens in the Kitchen... as the cats can't come with me to my new place.* So I guess I'll just need to be Kittie in a Different Kitchen...

But on the positive side, I'm moving for a very good reason (which I'll tell you all about very soon) - and now that I'm moving out, I know that my plans are actually starting to come together!

Anyway, less of the cryptic ramblings and onto the food!

I have about 3 weeks left in my flat - which means three weeks to run down the store cupboard and freezer - I won't be able to take much with me. So I think it is time for another Store Cupboard Challenge! It is something I had been thinking about doing anyway, and seems to be a bit of a theme in the food blogosphere at the minute, what with Judy's clean out, and Heather's purge...

I quite like raiding the pantry and freezer - it makes me feel like I'm on an extended episode of Ready, Steady, Cook! So I started off with this dish - using up some beans and tomatoes from the fridge, 2 almost empty packs of cous cous from the cupboard, and a couple fillets of salmon that I got for a end of day bargain price of £1.20!

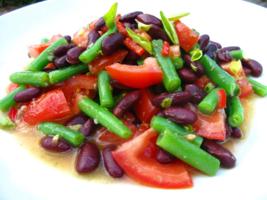
The beans and tomatoes are deliberately all but raw. If you don't fancy raw beans feel free to give them a bit of a steam before adding them - I really fancied the crunch factor of keeping them raw though.

Try eating it hot from the pan - or cold the next day for lunch!


Spicy Marinated Salmon with Raw Bean Cous Cous

I haven't really put specific quantities - add more or less cous cous to pad it out - or more veg to up the health factor!
  • 150g salmon fillet
  • 1 tsp sesame oil
  • 1 tsp hot sauce
  • 2 tbsp light soy sauce
  • Juice of 1 lime
  • 1 tbsp honey
  • 1 clove crushed garlic
  • 12 grated ginger
  • cous cous
  • stock
  • 3 large tomatoes, diced
  • olive oil
  • salt and pepper to taste
  • Various beans, I used dwarf and sugar snap, cut into bitesize pieces!
Prepare the Salmon...
Chop the salmon into bite size pieces and place in a bowl. Mix together the sesame oil, hot sauce, soy sauce, lime juice and honey and pour over the salmon. Mix well, cover and refridgerate for an hour or two.

Prepare the Cous Cous...
Toast the cous cous for a couple of minutes in a dry pan, until it turns golden. Remove into a bowl and drizzle over about a tablespoonful of olive oil and a bit of salt and pepper. Remember the stock is saltly too, don't over season! Use your fingers to mix the olive oil into the cous cous - get it all covered and make sure there are no lumps! Add hot stock onto the cous cous, until it is just covered. Cover the bowl and leave for 10 minutes.

This won't actually cook the cous cous thoroughly - we're going to add more stock in a bit if we need to. I find doing it this way helps make it fluffy - not soggy!

After the 10 minutes are up, fluff the cous cous well and add the tomatoes and beans.

Cook...
Heat some olive oil in a hot wok. Drain off the excess marinade from the salmon and add the fish to the pan. Cook quickly over a hot heat so the outside gets a bit of a crust, leaving the inside not quite cooked. Don't worry if some of the chunks break up, it's all part of the charm!

Remove the salmon to a bowl.

In the same wok heat a spot more oil add the ginger and garlic and cook out for a couple of minute. Throw in the cous cous mix and fry for a couple of minutes, letting the cous cous pick up all the flavours from the salmon. If the cous cous is still al dente, add a bit more stock (remember the tomatoes will release some juices which will continue to soften the cous cous!)

Return the salmon to the wok and combine with the cous cous.


Serve with a smug grin safe in the knowledge that this is delicious and good for you! And maybe a glass of crisp white wine - it is Friday after all!


Left over tip!
I had some leftovers, so mixed them up with a bit of whisked egg to form a pliable mixture. Formed it into a couple of patties and rolled in panko before doing a shallow fry. I forgot to take pictures - so you'll have to take my word for it, but these were fab!!! Which I ended up having for breakfast the next day as I was out of bread!


* Don't worry, they are being looked after by a friend of mine until I'm in a position to get them back...


This recipe is all mine, so I'm sending it over to Lore's Original Recipes event.

I had to double check, but cous cous is a pasta - so it's one for Presto Pasta Night - this week being hosted by Psychgrad and Giz over at Equal Opportunity Kitchen!

Because I got the salmon so cheaply, this worked out to be a very cheap dinner - costing about £2.70 for 2 large portions, plus leftovers! Scale it up to 4 and we're still under £5, so this is my submission to this week's Frugal Friday!


Culinarty Original Recipe RoundupPresto Pasta NightsFrugal Fridays

Thursday, 4 September 2008

Cod-Gette Bites! Or What to do With Leftovers When You're Bored...

This is boredom food. I wasn't even really hungry, having had a big lunch and a snack at the pub on the way home. But I looked in the fridge and noticed a yellow courgette (zucchini!) left over from the Courgette and Lemon Spaghetti, I did for T&T, and a bowl of spicy cod and prawn mousse left over from the trilogy of seafood I prepared for the Royal Foodie Joust last month*. I had a couple of friends coming to share a few glasses of wine, so decided to cook up something random, just for something to do!

Spicy Cod-Gette Bites!

It isn't much of a recipe, so I'll just tell you what I did...

I sliced the courgette into thickish slices, and brushed each one with olive oil. Then I griddled them until just cooked - but still very al dente - no soggy courgette allowed please people! Whilst the first side was cooking, I ground some red chilli flakes and sprinkled some sea salt on the other side.

Meanwhile I shaped spoonfuls of the cod mixture into balls, dipped each one into beaten egg, before coating with panko. I deep-fried them for 5/6 minutes each in moderately hot oil. It took me a couple of goes to get the oil heat/time ratio - the first one was raw in the middle still. Next time I would probably make them a bit smaller and cook them for slightly less time.

Drain on paper towel.

Right, so take one of the cooked courgette slices and spread with some sambal. I used sambal brandal - but be warned it is pretty hot! I like it that way - but if you would prefer it less burny (bah), you could try some chili jam or even sweet chilli sauce here.

Place the spicy cod ball on top - and it's ready to go!


* No, it hadn't been in my fridge for a month - this is just a tardy post :P

Wednesday, 27 August 2008

Nice n' Spicy, Easy Peasy, Leftovers Curry!

I was looking for a space in my bulging freezer the other day when I found a container of dark roast turkey meat - left over from Christmas!!

I had been planning on getting a take out curry that night - but figured with the meat cooked, I could knock one up in the time it would take to deliver. With the added bonus that I could make it exactly how I wanted it and keep it as healthy as possible!

It turned out really really good. The addition of tamarind and fenugreek added a special edge to the other spices. And because the meat was already roasted, it soaked up the gravy and took on a lot of flavour. Best of all - it was ready in 20 minutes!

So here we have it, my nice n' spicy, super-speedy, easy-peasy leftover curry!

Leftover Roast Dinner Curry

Ok, so maybe not the prettiest picture in the world - but it tasted goooooood. And isn't that the important thing?? ;)
  • 1 tsp fenugreek leaves
  • 1 tsp black mustard seeds
  • 3 green cardamom pods, lightly crushed
  • 1 tsp fennel seeds
  • 3 dried red chillies, roughly torn up
  • 1/2 tsp turmeric
  • 1 tsp chili powder
  • 1 tsp ground cumin
  • 1 tsp ground coriander
  • 1 onion, finely chopped
  • 2 cloves garlic, crushed
  • 1" piece ginger, finely grated
  • 1 tin chopped tomatoes
  • 1 tbsp tamarind paste, mixed with 300 ml water
  • left over roast turkey or chicken
  • ghee or oil to fry
  • salt to taste
Heat ghee in a heavy-based saucepan

Add all the seeds and the dried chillies and fry for a minute or two until they smell really good! Add the onion, garlic, ginger and fry for another couple of minutes.

Chuck in the other spices, tomatoes, tamarind water and salt and mix well. Put in the meat and cook for 15 minutes, stirring occasionally. If it starts to reduce too much, cover until ready (or add more water ;)

Serve with rice and a smile!


Not only is this an original recipe - but it's an original recipe conceived in about 3 minutes! So I reckon it fits the bill for Lore's Original Recipes event!

Check out the last round up, great stuff Lore!


Culinarty Original Recipe Roundup

Tuesday, 12 August 2008

Spicy Trout... Waste Not, Want More!

The wine was poured, the curry was almost ready and the rice resting, when I spotted a pack of trout fillets in my fridge. I had bought them for the bargain price of £1 earlier that day - but had totally forgotten them!

After initially cursing myself at the waste - I decided to give myself 10 minutes to turn them into something to go with dinner. (After all, they had to be used that day and couldn't be frozen - I'd be as well trying!)

I remembered I had a courgette* left in the bottom of the fridge from the week before... would it be a pile of mush in the bottom of the veggie bag? Huzzah, it was as green and crisp as the day I bought it.

So... I chopped the trout into bite sized pieces, then tossed them in a mix of garam masala and chilli powder - rubbing it in a bit for maximum flavour. I put them to one side while the courgette was effectively (if not neatly) chopped into similarly sized chunks.

I heated a wee bit of ghee (or it may have been olive oil) in a heavy frying pan and threw in the courgette along with a good pinch of fenugreek leaves. After frying for a couple of minutes, a dollop of ginger/garlic paste followed it in (see I knew there was a reason I kept a jar of that stuff!)

Another minute passed then the trout went in. I fried them all together until the trout was just about cooked, then seasoned with salt and squeezed over the juice of half a lemon.

And y'know something - it was absolutely delicious! I think with a wee dod of yogurt, and this will be on my mid-week menu for some time to come!

Spicy Trout with Lemony Courgette


Less than 10 minutes from finding the trout - howzzat?!?

(edit) * courgette = zucchini! What? I am British, y'know ;)

Wednesday, 6 August 2008

Hot Lemon Asparagus Bucatini with a Scottish Twist!

Have you ever tried bucatini? (At least I think it's bucatini - it could well be maccheroncelli or perciatelli. If anyone knows the difference - check out below and let me know what you think!) It's a long hollow pasta, kind of a cross between spaghetti and macaroni, and it's perfect for eating with smooth sauces.

I picked up a packet of bucatini a few weeks ago, and set about making up a smooth sauce. This is from my backlog - when I constantly had a fridge full of asparagus and had just made my Scottish sausage.

Because I invented this all by myself, I'm sending it over to Lore at Culinarty for her Original Recipes event...

And because it's pastalicious I'm sending it to Michelle at the Greedy Gourmet, who is hosting Presto Pasta Night this week...

And (yes, another one!) because this is cheap as chips (or as close as!) it is going to be my first submission for Frugal Fridays - the whole thing will feed a family of four for less than $10! And it's super healthy!


Hot Lemon Asparagus Bucatini with Crunchy Sausage Topping!

Serves 4 messy people...
  • 4 large tomatoes
  • 12 thick spears of asparagus
  • 1 onion
  • 2 clove garlic
  • 1/2 tsp hot sauce
  • 1 tbsp tomato purée
  • The zest of one lemon
  • 150g Scottish sausage meat (or substitute with another sausage meat. If you have to.)
  • A couple of tbsps of fresh oregano leaves
  • A little olive oil to fry
  • 1/2 tsp sugar
  • salt to taste
  • bucatini to serve
Prepare the veg...
Trim the woody ends from the asparagus, and cut most of the spear into chunks - reserving the tips.
Chop up the onions and garlic - make 'em as chunky as you like - we're going to blitz it in the end anyway!
Chop up the tomatoes, skin, seeds and all.

Make the sauce...
Heat the olive oil over a medium heat, add the onions and garlic, then fry for a few minutes until softening. Throw in the tomatoes (along with any juice), the lemon zest, hot sauce and the tomato puree. Add the sugar and some salt - you can always add more salt later to taste, but it is better to add it as early as possible.

Cover and simmer for 15 minutes - the tomatoes should release enough liquid to make the sauce, but if not, top up with water or stock.

Make the Crunchy Sausage Topping...
Meanwhile, break up the sausage meat into lumps and place into a medium, hot pan. You shouldn't need any oil as the sausage will release plenty. Fry for 5-6 minutes, keeping the sausage moving, breaking it up as it cooks. Once cooked, turn up the heat to high and fry for a minute or two without moving it to give a crunchy edge to the meat.

Finish the sauce...
After the 15 minutes is up, put in most of the oregano and the bits of asparagus stem - reserving the tips. Cook for another couple of minutes, then remove from the heat.

Put the sauce into a liquidiser or use a hand blender to blitz it to a smooth sauce.

Return to the heat, add the asparagus tips and cook for 3-4 minutes.

Put it all together!
Cook the pasta according to the instructions on the packet, then add to the pot of sauce. Mix well, so that the sauce sooks* into the pasta. Place into a bowl, top with the crunchy sausage pieces and the remaining oregano.

Eat!
This was the hardest bit - this is seriously messy pasta to eat! It was on the floor, face, sofa and cat by the time I was done. Worth it though!!


* Although not really a Scottish Scran post - the addition of the square sausage definitely warranted disclosure of another Scottish word!

Sook (v) - to suck
The best way tae eat this is tae sook it a' up an no worry aboot the mess yer makin'

Alternate use:
Sook (n) - a suck up/ brown-nose/ teacher's pet!
See her? She's a wee sook so'n she is!


Culinarty Original Recipe RoundupPresto Pasta Nights

Frugal Fridays

Thursday, 31 July 2008

RFJ: Seafood, Sesame and Cilantro - A Trilogy!

I think I may have mentioned in an earlier post, my weird obsessiveness around the number three...

My alarm goes off at 07:09... or occasionally 06:57. I'm eternally greatful that our time system is base 60... cook for 30 seconds, 15 minutes, 45 seconds, lovely... I even make friends' coffee with three 2/3 teaspoons of coffee instead of just 2!

Now... are you still there? I'm not that weird, honest - it's just one of my little quirks ;) I can skip it if I need to... I'd just rather not!

It's not just me - Chinese people consider the number three to be lucky because it sounds like the word 'alive'. And in many other cultures, it is considered a significant number due to the trinity of mind, body and soul.

So anyway, I love that the Royal Foodie Joust has three ingredients, and this month I decided to propogate the three-love by using the three ingredients to make three fingerfoods and three dipping sauces!

The three ingredients were selected this month by Peter of Kalofagas fame, who won last month's joust with this amazing Apricot and Pistachio Cake. He chose Seafood, Sesame and Cilantro/Coriander - as soon as I read the list I knew I was going to have fun with this one!


Seafood, Sesame and Cilantro - A trilogy!

The first of the three is seared marinated tuna (in the middle!), coated with crushed coriander, szechuan pepper corns and sesame seeds. I served this with a thick tahini dressing, complete with a garlicky cilantro swirl.

Secondly, for your delectation, I present sesame-crusted squid (on the right!) with a cilantro and chili yoghurt dipping sauce.

Last, but by no means least - crispy fried wontons (on the left!) with a spicy fish and prawn mousse filling, served with sweet cilantro chili dipping sauce.

I had so much fun thinking up and making these dishes - I hope you like them!
If you like what I've done here, then head on over to the Joust forum and give me a vote ;) But even if you don't, get yourself over there to see the amazing dishes other people have created!

Seared Coriander And Sesame Crusted Tuna
  • 4 tbsp soy sauce
  • 2 tbsp rice wine
  • 1 tbsp mirin
  • 1/2 tsp sesame oil
  • 1 tsp grated ginger
  • 1 crushed garlic clove
  • 3 tbsp sesame seeds, lightly toasted
  • 3 tbsp coriander seeds
  • 1 tbsp szechaun pepper corns
  • 2 thick tuna steaks
  • ground nut oil for searing
  • 1/3 cup sesame seeds (for the tahini)
  • Extra virgin olive oil
  • Large handful cilantro
  • 2 clove garlic, crushed
  • 1 tsp rice wine
  • salt and pepper to taste
  • Zest and juice of half a lemon
Marinate the Tuna...
Mix together the sesame oil, soy, rice wine and mirin with the garlic and ginger.

Cut each tuna steak into long thick strips (give 'em three, four sides or more - your call!) and add to the marinade. Coat well and refrigerate for 30-60 minutes.

Make the Tahini Sauce...
Take the third of a cup of sesame seeds and toast in a dry pan for 3/4 minutes - being sure to keep them moving and not over-colour.

Once cooled, place them in a mini-blender and blend until smooth. Slowly add the EV olive oil until the sauce is still really thick but not like glue!

Add the lemon juice, 1 tsp rice wine, 1 clove of garlic and salt and pepper to taste. Blend again - it should now be a pourable texture (if not add a little water to loosen).

Make the Cilantro Swirl...
In the mini-blender (time-saving secret - I didn't bother washing mine from the tahini ;) place the cilantro, garlic and lemon zest and blend til smooth. Add olive oil until it reaches a pourable consistency.

Put the Sauce Together...
Put the tahini sauce into the serving dish, then add a dollop of blended cilantro. Attempt some swirly things... probably twice... (I had hoped this was going to come out more 'cheffy' than this - but it wasn't to be! ;)

Cook the Tuna...
Once the tuna has finished marinating, remove it from the fridge.

Pound the coriander seeds and szechuan together until coarsely ground. Place this mixture onto one plate - and the toasted sesame seeds onto another.

Remove the tuna from the marinade and coat each length in either the sesame seeds or the spice mix.

Heat a little oil in a very hot pan, and sear the tuna for no more than a minute on each side - the centre should still be very pink!

Serve!
Slice the tuna and arrange on serving dish with the tahini cilantro dipping sauce.


Sesame Squid With Cilantro Yoghurt Dip
  • 1 medium squid, cleaned
  • oil for deep frying
  • 1 cup milk
  • 3 tbsp sesame seeds, toasted and cooled
  • 4 tbsp cornflour
  • 1 tbsp plain flour
  • 1 tsp ground coriander
  • 1 large handful cilantro
  • 1 green chili
  • 3/4 cup natural yogurt
  • 2/3 drops of sesame oil
  • lemon juice, sugar, salt and pepper to taste

Prepare the Squid...
Cut the squid into strips and gently criss cross the inside to create a hatch pattern.

Place into the milk and refrigerate for 2 hours.

Mix the corn flour, flour and sesame seeds together in a food bag.

Once the squid has soaked, remove from the milk, shaking off the excess, then place in the bag. Shake bag thoroughly until the squid is well coated.

Remove the squid from the bag and place back in the fridge for at least half an hour - this is what makes the batter so crunchy!

Make the Sauce...
In a mixer, blend the cilantro and the chili together until fairly smooth. Turn out to a bowl and add the coriander and the yoghurt. Mix well, then add lemon juice, sugar, salt and pepper to taste.

Refrigerate until required.


Cook the Squid...

Heat the oil until a cube of bread browns in 30 seconds.

Gently drop the squid in - shaking to separate, and being sure not to overcrowd the pan.

Cook for approximately 45 seconds, then remove and drain on some kitchen paper.

Serve with the chili cilantro dipping sauce, and enjoy!


Spicy Seafood Wontons with Sesame Chili Dressing

  • 300g white fish (I used cod!)
  • 100g prawns
  • 1 tsp sesame oil
  • 12 wonton wrappers
  • 2" piece ginger, finely chopped or grated
  • 2 cloves of garlic, crushed
  • 2 tsp fish sauce
  • Zest of 1 lime
  • 2 thai red chillies, finely chopped
  • 2 egg whites
  • 50 ml rice vinegar
  • 50 ml water
  • 75g sugar
  • 1 tsp cornflour
  • 1 tsp sesame seeds, lightly toasted
  • Soy sauce to taste


This made way more fish mousse than required - but can be used for great leftovers!

Prepare the Fish Mousse...
In a food processor, blitz the white fish until pretty smooth. Add one egg white, one chili, half the ginger, half the garlic, the lime zest, sesame oil and half the fish sauce and blitz again until it becomes 'spongey'.

Roughly chop the prawns and mix into the fish mixture with a spoon or your fingers. (Don't blend this time - we want the prawns to remain fairly intact!)

Prepare the Sauce...
In a mini-blender, blend the other half of the ginger, the other half of the garlic, one chili and a handful of cilantro until finely chopped but not totally pureed.

In a small pan, bring the rice vinegar/ water and sugar to the boil and simmer for 10 minutes. Mix the cornflour with a spot of water then add to the syrup, with the ginger/garlic mix and a couple of drops of sesame oil. Simmer for another minute or so and remove from the heat.

Prepare The Wontons...
Whisk together one egg white with a little water.

Place a wonton wrapper on a lightly floured surface and brush with the egg white mixture. Place a small teaspoon of filling in the middle and fold over, gently squeezing out all the air and pressing the edges together. Make into a shape if you want - I just kinda folded the long corners in and stuck them togther... I had a crazy idea about pan-frying the seam with a sesame seed mix. Which didn't work out - more on that in a sec!

Place in a steamer (make sure they aren't touching!!)

Cook the Wontons...
Once they are all prepared, steam for 4-5 minutes, then remove from the heat...

... right, so it was at his point that things started to go wrong... some of my wontons were touching - and when I tried to separate them the wrapper tore...

Emergency re-think required. My original thought had been to coat two side of the wonton in sesame seeds and pan-fry for a minute or two to give a lovely crunchy edge. But that wasn't going to work with my poor little torn wontons... So, noticing that my oil was nicely hot I decided to briefly deep-fry them instead!

Woo hoo - they were delicious! Make sure the oil is really nice and hot - these have already been cooked, we're just crisping them up. Fry for a minute or two then drain on kitchen paper.

Beware - they are still sticky little buggers, don't do too many at once - and keep them moving!

Serve!
With a squeeze of lime juice and sweet chili and cilantro sauce!

Wednesday, 2 July 2008

I'm back! Onion and Fenugreek Pakora Anyone??

Well, hello, hi and howdy doody!!!

This is my first post in an absolute age. First of all I was on holiday in Ibiza for a week... and what a week it was! Have a pic of me swimming at sunrise! It was just beautiful.


Sunrise Swimming in Ibiza!

What wasn't so great was getting sunstroke on the last day (durr - how annoying/stupid was that, I'd had on loads of SPF, and drank plenty of water, but still got ill after 3 hours in the sun. It was HOT!). The upshot was I had to stay at home in bed while my friends went out for the big last night out. And what was even worse than that was that I still felt worse than they did the next day for the journey home - they could at least have had the decency to fake hangovers!!

For the rest of the time, I've been having massive issues with my internet at home - and been busy during the day so not even had much time for lunchtime blogging! I have been doing quite a bit in the kitchen - but because of my internet issues I've had to go to an old entry rather than any of the new exciting things I've been working on this week!

These pakora were the last thing I managed to deep fry before my oil finally gave out! Having this oil for deep frying has been a bit of an education since I first made the Guyanese Bakes - and I'm not sure my waistline has thanked me for it. I am very tempted to refill it immediately - primarily to make this szechaun squid again...

I have blogged pakora once before - though I got slightly snack happy... churning out huge Mushroom pakora, Courgette & Carrot pakora and Onion & Red Pepper pakora - as well as the 'typical' onion variety. We were eating them for days! This time round I made far far less, made each one a bit smaller, and quartered my onions instead of halving them so that they make smaller bundles. Bear in mind that the baking powder causes these to puff a bit - a heaped teaspoon of mixture will give a nice sized pakora... a tablespoon will make you a giant!!

Feel free to fidget about with the spices you use - I stuck to the basics here as I really wanted to emphasis the fenugreek - but make it as plain or as complex as you like!

Onion and Fenugreek Pakora

Makes about 15 pakora
  • 1 large onions, quartered then fairly thinly sliced
  • gram (chickpea) flour
  • 1/2 tsp baking powder
  • water to mix
  • 1 tsp black mustard seeds
  • 1 tsp chili powder
  • 1 tsp garam masala
  • 1/2 tsp dried fenugreek leaves
  • Large handful fresh fenugreek leaves, finely chopped
  • 1 tsp salt, or to taste
Heat the Oil...
As I'm frying these in a pot I don't have a proper temperature gauge - but the last time I made these in a deep fryer I cooked them at 175c.

Prepare the Onion Batter...
Put the onions in a large mixing bowl.

Mix the about 6 heaped tablespoons of flour, the baking powder and the spices together (including the dried fenugreek) and sprinkle over the onions.

Give it a good stir, them add a bit of water to make a fairly thick paste. You want the batter to be thick enough to cling to the onion, but not so thick that it clumps together too much (otherwise it will go stodgey in the middle). And if it's too thin the pakora won't stick together in the fat, and will separate into pieces... You might want to add another bit of flour, then another bit of water if you want more batter.

Tip!
Don't be tempted to make the batter in advance - the baking powder will be activated as soon as it is exposed to liquid. Make it just before use for best results!

Cook the Pakora...
Pick up teaspoonfuls of the mixture and slide into the hot oil. They will take 4/5 minutes to cook - turn them once or twice during cooking to ensure even colouring.

Serve!
Serve with a dipping sauce... or even better with two dipping sauces - one hot tomatoey and tangy sweet - the other creamy and cooling!

Friday, 20 June 2008

That Cookbook Thing II: Julia's Sauce au Cari stars in a Rather Unusual Brunch!

This is my first contribution to That Cookbook Thing II... this time featuring: Mastering the Art of French Cooking by Julia Child. I'm so excited to have been asked to take part!! French cooking is not an area I'm familiar with, so it's great to have the impetus to try something new.

The other members of the Thing are:

The recipe selection for this month was the Sauce au Cari - that's light curry sauce to us plebs! I don't eat very much cream, and generally like my curries hot and tangy. So thinking up something to make with a light creamy curry sauce was something of a challenge. It wasn't until I considered that it was basically a spiced bechamel that an idea began to take hold... also in thinking that egg would go well with the creamy curriness of it all...

And I've often liked the idea of spicy foods for breakfast, though the closest I've really come is some barely spiced kegeree... and leftover hot n' spicy pizza after a girl's night in! Bingo - spicy brunch it was, baked eggs with asparagus and Sauce au Cari*!

But, later that week I started planning a roti recipe for Srivalli's Roti Mela, and another idea began to form...

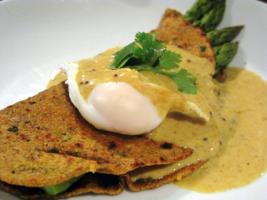
Thick spears of asparagus in a fenugreek spiced roti, served with a soft poached egg and as much Sauce au Curi as you can shake a stick at!

I am so chuffed with the results! The curry sauce was creamy - but because I used stock rather than milk, I didn't feel it was too heavy or rich. It also had just enough spice for a brunch! (Although people less inclined towards chili than me may disagree on this point... ;) The roti were quite heavily spiced, but the creamy sauce, yolk of the egg and crisp asparagus balanced them really well.

I would definitely make this again, either as a brunch or light supper - the whole thing took me less than an hour - including the roti!


A Rather Unusual Brunch: Spicy Roti with Asparagus, Egg and Curry!

Serves 4
  • 1 tbsp flour
  • 2 tbsp ghee
  • 2 tbsp madras curry powder (Rajah variety - my personal favourite when I'm too lazy to grind it all up myself!)
  • 1/2 tsp turmeric (for colour!)
  • 1 cup hot vegetable bouillion
  • 1/2 large onion, grated
  • 1 tsp black mustard seeds
  • 4 tbsp double cream
  • Squeeze of lemon juice
  • Salt to taste
  • 16 thick spears of asparagus
  • 4 eggs
  • 4 roti
  • Cilantro to garnish

Prepare the Sauce...

My take on the curry sauce, adapted from the Julia Child recipe:
  1. I used ghee instead of butter - mostly because I have ghee in the fridge!
  2. I grated the onion instead of finely chopping it - I wanted a smooth finish
  3. I added some mustard seeds, just for fun
  4. Some of the other reviewers had noticed that the sauce was very thick - so I only used a tbsp of flour
Melt the ghee in a small saucepan. Add the mustard seeds and fry for a minute or so. Add the grated onion and any onion juice. Continue to fry on a very low heat for 10 minutes.

Add the curry powder, turmeric and flour to the mix and cook out for 2/3 minutes. Take the pan off the heat and slowly blend in the bouillion and a squeeze of lemon juice. I did a quick seasoning check here and added a touch of salt - the bouillion added quite a bit of seasoning though.

Cook for a further 15 minutes at the lowest possible heat, stirring regularly.

Before serving, stir in the cream, taste and add more lemon juice or salt to taste.

Put the Dish Together...

Take one roti per person and pour a little of the curry sauce inside. Place some lightly steamed asparagus onto the roti and fold in half. Place a lightly poached egg on top of the fold and pour over more curry sauce. Finish with a garnish of cilantro.


* I did briefly consider adding smoked haddock into the mix in a weird French-Indo-Scots fusion... but fear of the wrath of the Greek stayed my wandering mind and I limited myself to a simple two way fusion ;)

Thursday, 19 June 2008

Spicy Roti with Fenugreek and Cilantro

Srivalli at Cooking 4 All Seasons is hosting a fabulous event: Roti Mela! Apparently it's on the back of the huge success of dosa mela - which I missed, but love the round ups!

As you may have guessed by the name, the event is to round up everyone's roti recipes - definitely a roundup to be bookmarked I reckon! Rotis are something which I had never really tried until recently - I think they fell into my fear of yeast/baking category.... yes yes, I know they are generally neither yeasted or baked... I was living in roti-free ignorance!

Then I fell out of my comfort zone when I made Coconut Rotis for my Sri Lankan cookery course. I was astonished that something could taste so nice and match the curry so perfectly... and be so easy to do. Not to mention that they let me to eat with my hands, slurp ;)

So here is another roti attempt from me. Having tried layered paratha last month, I fancied doing some with quite a lot of flavour going on. I'd hoped to have enough time to do a stuffed one too - but that was not to be :(

So here is my third roti attempt:

Spicy Roti with Fenugreek and Cilantro


Makes 4
  • 1 cup wholewheat flour
  • handful chopped cilantro leaves
  • 1 thai red chili, finely chopped
  • 1 small clove garlic, crushed
  • 1 tsp grated ginger
  • 1/2 tsp cumin
  • 1/2 tsp coriander
  • 1/4 tsp turmeric
  • 1/2 tsp dried fenugreek leaves
  • 1/2 tsp garam masala
  • 1/4 tsp aesofotida
  • 1/2 tsp salt
  • 1 tbsp melted ghee + more ghee for frying

Prepare the Dough...
Mix the flour, spices, salt, chili, ginger, garlic and cilantro together in a bowl. Slowly add warm water until the dough is soft but not too sticky.
Knead for a few minutes until the dough feels springy, then add the tbsp of ghee and knead well to incorporate.

Wrap in film and set aside for half an hour.

Cook the Rotis...
Heat a heavy frying pan to high.

Divide the mixture into 4, and roll one of them into a smooth ball. (Keep the other ones covered to stop them drying out!) Gently roll it out into a circle (or weird misshapen blob if your rolling skills are anything like mine ;)

Drop a wee bit of ghee into the pan and swirl it about with the back of a spoon (ok, so I *know* that isn't authentic - but I was starving and it worked for me!) Lay the roti into the pan and cook for a minute or two, or until you can see it's mostly changed colour, then flip... Now this is how I know it wasn't authentic - mid-flip, when it was balanced on my spatula, I reached under and swirl a bit more ghee on the pan!!

Meh - whatever, it worked!

Fry for a minute or two until browned and crispy at the edges.

Serve!
Serve with whatever you like! They are quite flavourful, so would probably work with tarka dhal, plain chana masala or something similar. I used mine as part of a somewhat unusual breakfast dish... I'll be posting it soon!

Friday, 6 June 2008

Something for the Weekend: Corned Beef Hash with Hot Caramelised Onions

Phew - what a hectic week!

I found out this week that I am to start a new position in a new office on Monday - so things have been a little hectic here. I'm looking forward to the change, but I think life is going to be a bit different from now on!

So I'm really looking forward to a relaxing weekend, and was planning out tomorrow's brunch (watch this space!) when I remembered this - the last brunch I made!

Question. What do you do when you are starving hungry on a Sunday morning, there's no bread or milk in the house and you're too lazy to get dressed to go to the shops?

Answer:

Corned Beef Hash with Hot Caramelised Onions

No quantities here - just make up as much as you like!
  • Left over boiled new jersey royal potatoes (They don't have to be left overs - you could always cook them when the onions are caramelising!)
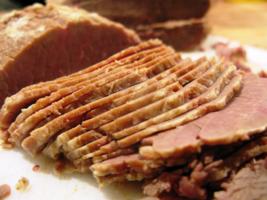
  • corned beef, cut into bite-sized pieces
  • 1 small/medium onion per person
  • 1/2 tsp sugar
  • oil to fry
  • salt and pepper to taste
  • hot sauce to taste
  • 1 soft poached egg per portion
Caramelise the Onions...
Half the onions, and slice pretty finely.
Heat a glug of olive oil in a heavy based frying pan, keeping the temperature low. Add the onions, sugar and a pinch of salt (the salt stops them burning). Cook for 30-40 minutes, stirring often. If they get too dry add a splash of water. They're ready when sticky, sweet and brown. Add as much hot sauce as you like - I added about 1/6 tsp per onion - it's hot stuff!!! Continue to cook for another minute or so and set aside.

Prepare the Potatoes...
Cut up the cooked potatoes, and fry in a hot pan with a little oil/butter until they are browned and crispy at the edges.

Put it Together...
Once the potatoes are crispy, add the onions into the potato pan and stir to mix. Add the corned beef and combine well - the corned beef will start to break up a little in the heat.

Serve with a soft-poached egg on the top and tuck in!

Thursday, 29 May 2008

Tried & Tasted: Tastes Like Home Caribbean Sunday Lunch

Tried and Tasted is a brand new monthly event hosted by Zlamushka of Zlamushka's Spicy Kitchen. Every month Zlamushka nominates one blog - and the entrants recreate and blog recipes from the chosen blog. For the first month the chosen blog is Tastes Like Home. This was a perfect choice for me - I have never cooked Caribbean food before - though have long had it on my list; I had never visited Cynthia's blog before - and now I have another addition to my google reader; and I could indulge my love of hot food... excellent!

It's a great idea - and I've had a great time playing around with these recipes. The hot pepper sauce was something I made outside of the event - though I have decided to include it in my little round up as it was so good it deserved a second mention!

In fact - I ended up using it even more than expected. On Sunday morning I realised I was out of chillies. Seriously - to me that is like running out of salt or something - I always have some in the fridge! So instead, I turned to the hot sauce and walloped a teaspoon into the fried salt fish and half a teaspoon into the buljol. Wow - was it ever good!! The scotch bonnets gave it had an altogether different heat from my usual Thai chillies - and it had a beautiful fruity flavour to back up the burn!

So I present you with....

My Carribean Sunday Lunch!

What a spread!


Fried Salt Fish
This was my favourite of the lot - deeply spicy, lovely chunks of salt cod simmered in tomatoes and onions. And a spoonful of scotch bonnet pepper sauce of course ;) It went absolutely perfectly with the bakes - I will be making this again. And once the fish is desalted, it's super quick to make!

Buljol
This is a cold salad of boiled and flaked salt fish, with peppers, spring onions, onions and tomatoes. (And hot sauce ;) I think I needed to flake the fish more - but I did enjoy the flavours a lot!
Oiled Paratha Roti

I was so impressed with how well these turned out! - I didn't get a picture, but they were beautifully flakey inside, and tasted gorgeous. Not too oily - which I was a little concerned about. In fact not oily at all, just a really nice texture!

Guyanese Bakes

Why are they called bakes when they are deep fried?

Don't care - they're lovely!

Cythia's original!

Thank you Zlamushka for thinking up and hosting this amazing event - I look forward to more!

And many many thanks to Cynthia for her recipes and also for her help when I was making them!

Wednesday, 28 May 2008

Szechuan Squid with Sweet Chilli Sauce

Since I first cooked squid a month or so ago, I've now managed to use it three or four times* But every time I've picked some up from the fishmongers I've always known what I really wanted to do...

...
...
...
yeah baby, dunk it in some spices and deep fry it!

It's taken 29 years, but the true Scot in me is finally coming out! To paraphase one of my favourite bloggers: why sauté when you can deep-fry... And never more so than this past week. In order to prepare one of the dishes** for Tried and Tasted I've converted my broken pressure cooker into a deep fryer for a while. And I can't stop frying things!

I've never really deep-fried anything much before. I made these mixed pakora a few months back - but even then I was using someone else's deep fryer - and had to get him to work it for me! Yet last night I even found myself deep-frying egg noodles - just to see what would happen***.

So, anyway, back to the squid. I'd been wanting to deep fry some squid for ages, and my fishmonger just happened to have some beautiful specimen in the day after I created my impromptu deep fryer...

I went for an Asian twist on the calamari theme, using a fair whack of szechuan pepper in the dredging flour. I also cut them into scored strips - for some utterly bizarre reason I still have a distaste for squid rings. But I do love the tentacles!

Is it big headed to say these were the best calamari I've ever had? The coating was so crunchy and flavourful - I ended up just pigging out on these and passed on my main! Even if you don't try the flavours - have a go at this 'batter' method - it was so effective.


* Yes, I have a bit of a backlog of posts to publish at the moment!
** Yep, that dish ain't up yet either - but it's underway and will be with you soon!
*** As it turns out, dust them with garam masala, chill powder and a wee bit salt and they're lovely... Just don't put too much in. I almost had an oil explosion. Note to self, don't get cocky with boiling fat.


Szechuan Squid with Sweet Chilli Sauce


  • 2 large squid, cleaned and cut into scored strips
  • 100 ml milk
  • 1 crushed garlic clove
  • 5 tbsp corn flour
  • 1 tbsp white flour
  • 1 tbsp szechuan pepper corns
  • 1 tsp black pepper corns
  • 1 tsp chilli flakes
  • 1 tbsp sea salt

Prepare the squid...
Place the squid and the garlic into the milk and set aside in the fridge for at least an hour. Apparently this softens the squid, but I used it mostly to create a self-making batter...

Mix up the flour...
Pound the peppers, salt and chilli in a mortar and pestle, mix with the two flours in a food bag.

Prepare the squid (part deux)...
Pour off the milk from the squid, and shake off the excess - don't worry about being too thorough though.

Put the squid in the bag with the flour/spice mix and shake very well until all the squid is coated.

Remove the squid from the bag and shake off the excess. Leave the squid in the fridge for a further half hour - this will set the milk with the flour - and become your crunchy batter.
That's the most important bit - try not to skip it!

Prepare the chilli sauce...
Put 6 chopped chillies, 1oog sugar, 50ml vinegar and 50 ml water into a sauce pan, bring to the boil and simmer for 15 minutes!

Cook!
Heat the oil so that a cube of bread takes about 30 seconds to brown. (or a cooked noodle - that's how it all started ;). Fry off the squid in a couple of batches, making sure you don't over crowd the pan. I let mine cook for about 45-60 seconds - cook for longer at your peril!


Friday, 23 May 2008

A Noteable Post and The Constant Crowd-Pleaser: Chili Con Carne

Guess what?

No... not THAT, silly...

This is my 100th post!!!

How exciting is that?! I have now been a food blogger for almost 6 months - in which time I have written on average four posts a week, concocted about 90 recipes of varying success, and entered numerous food blog events... Hell, six months ago I didn't even know events even existed!

I spend a lot of time dreaming up recipes and shopping for food, even more time making my 'creations', probably not nearly enough time photographing them (!), and hours cleaning up!

My must-read blog roll now has 14 blogs on it - with another 60/70 on my leisurely read list... (and counting - I added another this morning!) What an amazing community to be part of - I'm so looking forward to the next 100 posts!!

Anyway, reaching a milestone always leads to moments of reflection (as well as expectation!), so it is quite fitting that this post is also my entry to Tastes to Remember hosted by Sarah over at Homemade. It's another last minute entry for me - my third this week. Maybe at some point in the next 100 posts I'll develop some organisation skills?

As I mentioned when I made my Ultimate Chili Con Carne, I always remember the excited anticipation had by me and my sister whenever my mum was working away from home. Not because we were desperate to get rid of her (!) but because it meant my dad would make one of his two staples: chilli con carne or macaroni cheese (with HP brown sauce, of course!). Beloved by the three of us, those were two dishes that my mum just didn't appreciate - so when we were fending for ourselves, there was no choice but to indulge. Now, my mum is a fantastic cook - she's taught me a lot (when she comes to stay with me we spend hours watching cookery shows and deciding what to have for dinner that night!). But... kind of like me... she is pretty experimental and like to try new things - so there isn't the same constancy of dishes. (In saying that, watch this space for the BEST steak pie you'll ever taste... I'm planning a Scottish run of recipes soon!)

So, this recipe is pretty close to the one my dad used to cook for my sister and I - using ground beef and a nice amount of dried chili. And has to be served with plain rice and pita breads -open the pita pockets and stuff in as much chili and rice as you can.

Eat with your hands, in front of the telly. Just don't tell mum!


The Constant Crowd-Pleaser: Dad's Chilli Con Carne


  • 500g ground beef
  • 1 large onion, finely chopped
  • 3 cloves garlic, crushed
  • 1 tin chopped tomatoes
  • 1 carton passata (sieved tomatoes)
  • 1 beef stock cube
  • Salt and pepper to taste
  • 1/2 tsp sugar
  • 1 tsp ground cumin
  • 1 tsp ground coriander
  • 1 tbsp paprika
  • dried chillies - to taste, ground or flaked. I reckon at least 2 tsp though!! I used 1 tbsp of reconstituted holy trinity blend (Pasilla, Ancho, Mulato) and 1 tsp habenero flakes. Hot! Nice!
  • A few drops of tabasco if you fancy it (I usually do!)
  • 1 tin kidney beans

Fry...
Heat a glug of oil over a medium heat in a large saucepan, then add the onions and garlic and fry until soft. Remove to a bowl and fry off the ground beef in batches. Don't do it all at once, or you'll boil the beef instead of browning it - and lose half the flavour!

Mix...
Return all the beef and onion mix to the bowl, crumble in the stock cube and add the spices. Fry off for a couple of minutes before adding all the tomatoes and the sugar.

Simmer...
Bring to the boil, cover and simmer for 20 minutes. Taste it and adjust seasoning. If the tomatoes were very sharp you may want to add a bit of extra sugar here too. If it ain't spicy enough chuck in some more tabasco - or maybe some cayenne pepper. Make it yours baby!

Cover again and simmer for another 20-30 minutes, stirring occasionally. Add the rinsed kidney beans 10 minutes before the end.

Serve...
Like I said, lightly toasted pita breads and steamed long grain rice. Nowt else. Especially no cheese. Yes, I know it's lovely, but not for here. Save that for a huge bowl of chilli nachos with all the trimmings!

EAT!
yum nummm gobble slurp mmmmm..........


Thursday, 22 May 2008

Indian Spiced Tuna Fish Cakes

Following on from the success of my Thai spiced tuna cakes, I was looking forward to having some spare mashed potato to have another go... but in the end I got fed up with waiting (it's almost summer now - why would I mash potato?! Especially when I can cook with gorgeous Jersey Royals!)

So anyway, I toddled out and bought some old floury potatoes. Came home and boiled them whole in their skin before passing through a ricer. Now here's a good tip for you: If you're using a ricer you don't need to peel the potatoes first! Just chuck em in and squish! Yay! And although it's much quicker to dice up the potatoes before boiling... don't do it. The potato gets waterlogged and loses starch, therefore the dough doesn't work as well. And if that wasn't enough, they don't even taste half as good! So - boil whole, then rice without peeling. Easy peasy!

Anyway - on from the mashed potato preparation... Oh, hang on, one last thing! If you do rice them, then spread them out on a chopping boil after ricing and leave for at least 10 minutes. This lets excess water evaporate away, and also lets them cool down. Both these thing will give you better tattie dough!

Riiiight... deep breath, step away from the mashed potato!
So anyway, this time I decided I wanted to go with more Indian flavours - and I used chickpeas to bulk them out into a main meal rather than an appetizer.

Hey, whaddya know - turns out I don't actually have anything else to say!


Indian-Spiced Tuna Fish Cakes

Don't be put off by the long ingredient list - it's mostly spices!
  • 1/2 tsp cumin seeds
  • 1/2 tsp black mustard seeds
  • pinch fenugreek leaves
  • 1/2 tsp ground turmeric
  • 1/2 tsp ground cumin
  • 1 tsp ground coriander
  • 1 tsp chilli powder
  • 1/2 tsp cayenne pepper
  • 1/2 tsp garam masala
  • 1 cup mashed potato - preferably cold
  • 400g tin chickpeas, rinsed and drained
  • 1 tin tuna, drained
  • 1 clove garlic, crushed
  • 1" piece ginger, grated
  • 2 banana shallots, halved and thinly sliced
  • 1 egg yolk
  • 5 heaped tbsp plain white flour
  • Ghee
  • Salt and pepper to taste

Prepare the chickpea mixture...
Heat a tablespoon of ghee over a medium heat and add the mustard seeds, cumin seeds and fenugreek leaves. Fry until mustard seeds start to pop, then add the shallots, ginger and garlic and fry until soft.

Add the rest of the spices and a few tablespoons of water, and continue to fry for another couple of minutes. Add the chickpeas and cook out for 5-10 minutes. Taste and adjust seasoning as required. Once the cooking is finished, lightly crush the chickpeas with a masher - don't mash them though as you want to save some of the texture!

Also, don't let the mixture dry out - but make sure you don't add too much water. This is going to be part of your dough, if it's wet it'll be messy!

This can be made in advance - along with the mashed potatoes to throw together at the last minute. I wouldn't advise preparing the whole dough in advance as it may go sticky...

This is the chickpea mix just before crushing - it was so tasty!! I'd have been quite happy to just have eaten this as it was with naan bread!

Make the dough...
Add the mashed potato to the chickpeas, along with the egg yolk and flour. Mix well, flake in the tuna and mix again. Have a little taste and adjust the seasoning as required. If the mixture is very soggy add more flour.

Cook!
I used cookie cutters to mould my fishcakes - a bit of a palaver, but they looked pretty! Make sure you oil them first!
Heat a dab of ghee over a medium heat and place the ring into the pan. Spoon the mix into the ring and cook for 3/4 minutes. Ease the cake out of the ring, and turn - cooking for another 3/4 minutes on the other side.
Repeat until they're done - keep finished ones in the oven until ready.

Serve!
I served mine with salad - they were flavourful enough not to need a sauce. However, a nice raita and a spicy tomato and chili sace would have worked very well!

Thursday, 1 May 2008

Thai Spiced Tuna Cakes

I had some mashed potato left overs a few days ago and was going to use it to make crab croquettes. But then I used the crab meat to make a rather lush Vietnamese Noodle Salad - and my plan for crab croquettes was transformed into these Thai-influenced tuna cakes.

Super quick, super easy and very tasty!


Thai Spiced Tuna Cakes

Made about 12 cakes
  • Left over mashed potato (about 1.5 cups I think!)
  • 1 tin of tuna, drained
  • 1 spring onion, shredded
  • 1" piece ginger, grated
  • 2 cloves garlic, crushed
  • 2 Thai red chillies, finely chopped
  • The zest of 1 lime
  • 3 tbsps white flour, plus extra for dredging
  • Handful cilantro, roughly chopped
  • Oil for shallow frying
How easy is this...?
Mix together all the ingredients, except the tuna (and the dredging flour and oil!) and mix until well combined. Flake the tuna into the mix, and gently combine - try to leave some decent sized bits!

Pinch off a ball of the mixture, flatten with your hands, and dredge in flour - shaking off the excess. Fry in an oiled medium heat pan for 3/4 minutes each side, or until nicely browned.

Serve with the dipping sauce of choice - I used sambal brandal, but sweet chilli sauce,, or even just a squeeze of lime juice would work just as well - it all depends on what you fancy!!

Wednesday, 30 April 2008

Spicy Crunchy Chana Dal

I went to my local Asian food store a couple of days ago to satiate an urge for some spicy bombay mix. But, for the first time ever... there was none! I walked down to the next store... and again, disappointment. What was I to do - I was starving hungry and my curry wasn't going to be ready for another hour...

I returned to the first store in the hope that my eyes had deceived me, and whilst I didn't find bombay mix, I did find a large bag of fried spiced chana dahl. The lovely gent at the counter asked me if I planned on eating them (confused? What else??!) When I confirmed I was indeed planning on munching my way through the lentilly goodness he warned me they may be rather dry and offered me this recipe instead.

I have made a couple of alterations - using lime instead of lemon (it's what I had in!) and adding some chilli (I was still suffering from underactive taste buds at this point).

I'm so glad they were out of bombay mix!

Spicy Crunchy Chana Dahl


  • 1.5 cups fried chana dhal (I'm going to try making this myself soon - watch this space for a recipe!)
  • 2 red chillis (or to taste)
  • 1 red onion, finely chopped
  • 1/2 clove of garlic
  • A little bit of grated ginger
  • Teeny bit of oil
  • 1 lime

Heat the oil in a frying pan. Add the chilli, garlic, and ginger and fry until soft.

Add the red onion and dhal and fry for a minute or so - keep it moving - you're basically just heating it up right now :)

Serve with the lime on the side, to be squeezed over to taste!