Tuesday, 28 October 2008

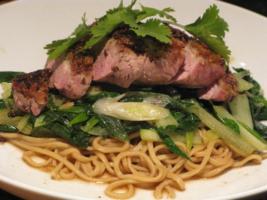
A bit more news... and Coconut Spiced Kangaroo Kebabs

More news!

I have booked my flights for my trip! I leave England on the 30th November, flying to Bangkok. I'm feeling so many mixed emotions right now that I don't know quite what to do with myself. Taking myself to the pub for a calming glass of red is an option!

Anyway, before I do - here is the first of my recipes from my recent international dinner party!

This is the first course I served in my recent 24, 24, 24 meal - an Australia dish for my friend Belinda! (Psst... I'm going there :P )

I had heard a number of times that kangaroo is notorious for being tough, and that it should never be cooked more than medium rare. It is a very lean meat - and so it is easy to dry it out. To help make it as tender as can be, I marinated in in a mixture of orange juice, coconut milk, lemon grass, ginger and garlic.

Coconut Spiced Kangaroo Kebabs

Feeds 6
  • 300g kangaroo fillet
  • 150ml coconut milk
  • 150ml fresh orange juice
  • 2 stalks lemongrass
  • 1" ginger
  • 2 cloves garlic
  • 1 thai red chili - seeds in
Blitz the lemongrass, ginger, garlic and chili to a fine paste - add a bit of OJ to thin it out if required.

Stir in the coconut milk and orange juice.

Dice the kangaroo fillets into 1" pieces, and add to marinade. Allow to soak for at least 3 hours - or overnight.

Thread the marinated meat onto soaked bamboo skewers.

Preheat a grill (or broiler) as hot as it can be. Grill the kebabs for 3/4 minutes on each side - do not overcook!

Allow to rest for 5 minutes before serving. Serve with a scattering of fresh cilantro!

Monday, 20 October 2008

Fancy Mushrooms with Oak Smoked Garlic

This is a fast, simple recipe, which proves that with good quality ingredients little fussing is required*.

I picked up a load of mushrooms on a recent trip to Borough Market. There were loads of types, and I don't know most but they included ceps, autumn chanterelles, horn of plenty and oysters. They cost a forearm and an ankle (really must sign up to that foraging course next year...) and were supposed to be served for breakfast the next day. But a late night and a hangover made a bacon and egg sarnie the only breakfast option!

Later that day, once the hangover abated, I managed to sort myself out enough to prepare this simple supper: mushrooms with oak smoked garlic, served on bulgar wheat with a dash of lemon and a tickle of thyme.

Fancy Mushrooms with Oak Smoked Garlic

Serves 2
  • Various mushrooms, cleaned
  • 1 clove smoked garlic, crushed
  • 1 cup bulgar wheat
  • Vegetable stock
  • Half a lemon
  • Half tsp fresh thyme leaves
  • Extra Virgin Olive Oil
  • Salt and Pepper to taste
Place the bulgar wheat and thyme in a bowl and cover with vegetable stock. Cover bowl and leave for 10 minutes until all the liquid is absorbed. Fluff with a fork, add a good squeeze of lemon juice, adjust seasoning and fluff again.

Heat a little oil in a frying pan and add the mushrooms. Fry gently for 5 minutes until cooked through, adding the garlic and any seasoning for the last couple of minutes of cooking.

Place the bulgar wheat in a bowl, and top with the mushrooms. A garnish of lemon and you're set to go...


* I like fussing. And I like lots of flavours! I'm saying is it isn't necessary.It's kind of like that new pair of toweringly high shoes. Not required... but very, very nice!

Monday, 1 September 2008

Pretending It's Summer... Fusilli with Macerated Tomatoes & Garlic

Phew!

It's just been so warm out there that I can't bear to put the oven on. I've been living on cold beer, salad and ice-cream. Even the thought of turning on the hob bring me out in a sweat.

Nah, not really...

Though we did have a pretty nice day on Saturday - sat out on the beach and didn't even have to put on our sweaters until 7pm! (Actually it was really nice - I even went for a swim!) But that's not the point. When I made this last week, we had barely had a glimmer of sun in weeks (ish...) So I thought I would attempt to bring some sunshine into our lives with this no-cook pasta sauce.

And it worked. It tasted like greenhouses, gardens and lazy bees*... the noise of lawnmowers over the way, and the bbq two doors down. And just so long as I turned up the central heating and put on my SAD light, I was almost able to persuade myself that it was summer after all...


Fusilli with Macerated Tomatoes & Garlic

Feeds 4...
  • 500g fusilli
  • 100g emmental, finely grated
  • 12 large tomatoes, diced
  • 4 cloves garlic, crushed (reduce this if you have a date later ;)
  • handful greek basil
  • 3 tbsp balsamic vinegar
  • 1/4 cup olive oil
  • salt and freshly ground black pepper to taste
Put all the ingredients, except the pasta together. Mix well and leave for a while - ideally about an hour!

Cook the pasta according to the packet. Add the tomato mix to the pasta and toss to mix well.

Taste and adjust seasoning if required.

Serve with a cold beer, in a bikini!


* no, not actually.


Another pasta dish for Presto Pasta Night! This week being hosted by Abby of Eat the Right Stuff!

Presto Pasta Nights

Sunday, 10 August 2008

That Cookbook Thing II: Rapee Morvandelle

It's time for another round of the Cookbook Review II! It's an event dedicated to exploring recipes from Julia Child's Mastering the Art of French Cooking.

The event by initiated by Mike of Mel's Diner, joined by Ruth of Once Upon A Feast, Sara of I Like to Cook, Breadchick Marye, Deborah of What's in My Kitchen?, Mary of Cooking for Five, Elle of New England Kitchen, Shaun of Winter Skies, Kitchen Aglow - and, of course, me!

Last time we recreated Julia Child's Sauce au Cari - a light creamy curry sauce - this time our mission was to make a Rapee Morvandelle - a gratin of potato, onions and ham.

As my mum was on her way down to visit with a vegetarian friend, I decided to substitute mushrooms for the ham - throwing in a bit of porcini too to make sure it had the depth of flavour. I made up the mushroom mix the night before, then put it all together when I got home from work.

When the weary travellers finally got in after 10 hours of travelling (flooded rail tracks in Scotland...) it was just about ready to come out the oven. A crisp green salad and some corn on the cob made this a perfect summer dish.

Rapee Morvandelle
(avec Porcini et les Champignons sans Jambon!)


Ok, so I have quite a few little variations on Julia's recipe - not least the substitution of mushrooms for ham. However, most of these were to do with proportions... Maybe my potatoes were large... or my eggs small - but I had to add an extra egg to give it all a good binding. And a touch more cream. (Though it ended up being a touch more milk - I accidentally knocked the tub of cream all over my cooker... doh!)

The original recipe called for half a clove of garlic. Half. Hmmm... I'm sure it's because modern tastebuds are so desensitised... but this just wasn't going to be enough for me (Plus, what kind of garlic? My local shop sells 4 kinds - of varying strengths and sizes!!) So I used 2, and it was by no means overpowering!

I used two types of cheeses - half gruyere and half emmental... ummmm.... I think next time I might grate some over the top as well. It didn't need it, but I hardly ever treat myself to creamy cheesey dinners, so I want to make the most of it! (I like Ruth's idea of sprinkling some paprika over the top too!)

I used fresh tarragon when preparing the mushrooms, and fresh flat-leaf parsley in the egg mix.

To grate the potatoes quickyl and easily (and stop them going grey!) I peeled them all first, then grated them in my food processor. A quick rinse of water before squeezing them in a tea towel and straight into the egg mix!


  • 100g grated cheese
  • 5 eggs
  • 5 tbsp single cream
  • 3 potatoes
  • 1 medium onion, finely chopped
  • 2 cloves of garlic, crushed
  • 300g chestnut mushrooms, chopped
  • small handful porcini, soaked in hot water for half an hour (reserve the water!)
  • 1 tsp chopped tarragon
  • 1 tbsp chopped flat-leaf parsley
  • butter
  • olive oil
  • salt and pepper to taste (i.e. much more that the original recipe!)
Preheat oven to 375f

Prepare the Mushrooms...
In a heavy based skillet, heat a knob of butter with a tbsp of olive oil. Add the onions and fry over a low heat for a couple of minutes. Now finely chop the porcini and add to the onions, cooking out for another couple of minutes before adding the chestnut mushies.

Now, when the chestnut mushrooms are almost cooked, they will start to release their juices. At this point, add half the garlic, seasoning and a couple of tablespoons of the porcini soaking liqueur.

Cook until the liquid is absorbed and set to one side.

Prepare the Egg Mixture...
Beat the eggs with the cream until smooth. Add the rest of the garlic, salt and pepper and beat again.

Gently fold in the mushroom mix, along with the cheese and parsley.

This is when you should grate your tatties - any earlier any you'll end up with a greytin... boom boom? Ok, so I'm not funny...

Mix the potato into the egg mix - this is where I had to add the extra egg as the potato was still too dry.

Cook!
Heat a knob of butter in the skillet. Once it is foaming, add the potato mix - spread to the edges.

Dot the top of the gratin with some more butter and put into the over for 30-40 minutes.

Take out, slice and enjoy!

I really enjoyed this cheesy, creamy goodness! And it went down well with my guests too. I'd like to try it with ham - although the mushrooms were really good with it.

I have just under half of it left in the fridge... I haven't tried it yet - but I'm guessing it's going to be delicious cold when I get home after cocktails with my mum tonight!!
Tuesday, 8 July 2008

Watercress and Rocket Blue Cheese Pesto

'Pesto' basically means to pound or crush. And traditionally pesto is made by pounding herbs and garlic with a mortar and pestle. But pounding makes me tired, hot and grumpy, so I revert to my old faithful - Mr Kenwood! End result? Gorgeous pesto in 5 minutes!

Typically, the pesto most people know and love is Pesto alla genovese - basil, garlic, olive oil, pinenuts and a hard cheese. My version uses rocket, watercress and creamy blue cheese... really quite different - and I loved it! One of the reasons I don't make pesto too often is because it costs a fortune to buy that much basil here (yes, I have tried to grow it - plants always commits suicide within weeks in my keeping... ;) But I will definitely use this as a way to use up excess herbacious leaves - they usually end up in the bin!

Now I know some people like their pesto chunky - but my personal preference is a full blitzing. If you'd prefer more texture to your pesto, put all the ingredients in at once and blend to desired bittiness!

I'm sending this over to Gay at a Scientist in the Kitchen, who is hosting Presto Pasta Night this week for Ruth at Once Upon a Feast!

Watercress and Rocket Blue Cheese Pesto


Excuse the dark piccy - I took this to a friend's house for dinner, and forgot my camera, so this is a phone camera shot!!
  • 150g watercress/ rocket, washed
  • 2 cloves garlic, crushed
  • 1 small handful pinenuts
  • 3 tbsp blue cheese
  • extra virgin olive oil
  • salt and pepper to taste

Prepare the Pinenuts...
Roast your pinenuts in a hot dry pan for a minute or two - for an extra bit of depth!

Make the Pesto...
Put the garlic and pinenuts into your processors and blend until fairly smooth. Add the watercress and rocket and continue to whizz until the leaves are finely chopped. Incorporate the cheese - as it blends drizzle in olive oil until you reach your desired consistency.

Taste and adjust seasoning.

Serve!
I used mine to make blue cheese spaghetti with asparagus - cook the pasta according to instructions, chucking in the aspargus for the last minute or two of cooking. (Yes, steaming it would be better - but this way is so much easier... less pans to clean too ;) Strain out the aspargus and chop into bite size lengths. Drain the pasta, reserving some of the cooking liquor. Add the pesto to the pasta (I used half of the above portion to feed 4), top with the asparagus and crumble over more of the blue cheese. A sprinkle of roasted pine nuts on the top - and you're ready to slurp!

Monday, 2 June 2008

Slow-Cooked Leg of Lamb with Tomatoes, Garlic and Rosemary

This is a really unusual dish for me... yet still one of my favourites that I return to over and over. Take a look... count the ingredients.... six. Yep, six! Or maybe even just five if you exclude the seasoning. Not a chili or spice in sight!

If I saw this recipe, I would immediately be thinking: hmmm that sounds nice... now if I add a bit of smoked paprika, and maybe a touch of dried chillies... or maybe the teeniest pinch of coriander... but somehow with this dish I have always abstained. The lamb falls from the bone, it shreds as you try to cut it, so no huge lumps of meat here. The garlic and rosemary infuse both the lamb and the tomatoes; the wine and the tomatoes reduce down to a gorgeously rich sauce. This is by no means an uninteresting dish - despite the minimal ingredients... and preparation!

It was first cooked for me years ago by a friend of my parents - and it was actually the first time I really enjoyed eating lamb - up until then it had been too strong a flavour for me. (Except for teeny lamb chops - I've always loved those... drool!)

It is a quick and easy dish to prepare... just make sure you leave enough time for the cooking and resting.

I usually serve this with crispy, garlicky roast potatoes and asparagus, broccoli, or whatever other veg is in season. I couldn't find any decent 'roasty' tatties when I was making this though, so instead served it with fennel-infused rice (basically this without the saffron or turmeric). It worked well, though I probably preferred it with roast potatoes. I always try to make sure I have extra when I make this as it is great for next-day dinners. The flavours develop and mellow - and now is when you can dress it up a bit! Depending on your ratio of meat to sauce, either turn it into a pasta sauce or stuff it into a pita bread with lettuce, red onion, chillies and a sharp cheese.

Apparently simple sometimes is best!

Slow-Cooked Leg of Lamb with Tomatoes, Garlic and Rosemary

Serves 8 - though depends on the size of the leg!
  • 1 leg of lamb
  • 2 tins chopped tomatoes
  • 6 cloves of garlic, cut into thick slivers
  • sprig rosemary
  • 1/2 bottle of white wine
  • Salt and pepper to taste.
Preheat oven to 180c.

Prepare the Lamb...
Wash the lamb and pat dry. Trim off excess fat. Make regular slits into the lamb, and stuff each slit with a sliver of garlic and a leaf or two of rosemary. (Is it called a leaf? I can't think what else to call it!)

The garlic and rosemary studded lamb!

Pour over the two tins of tomatoes and the bottle of wine. Don't season at this point!

The First Cook...
Cover the lamb tightly with foil and place in the oven for 2 hours. Sometimes I turn the lamb half way through, sometimes I don't - doesn't seem to make such difference!

Stage two!
Take the lamb from the oven, put the leg onto a plate, cover and leave to rest for at least 45 minutes. This is important - not only does it incomparably improve the texture of the meat... it is also a lot easier to handle once slightly cooler!

Once rested, cut the meat from the bone. As I mentioned above, the lamb should be falling apart by this time - so don't worry about regularly sized chunks or slices. I like having some bigger pieces and some smaller bits - but it's up to you!

The Second Cook...
Return the chunked meat to the sauce, and season to taste. Return, uncovered, to the oven and cook until the sauce is suitably reduced. I generally find this takes a further 30 minutes, but don't let it dry out!

Serve!

Eat...

Sleep...

Work...

Blog...

Start thinking about dinner...

And I present you with...


Slow Cooked Lamb DAY 2!


  • Left over lamb and sauce
  • one tin cannellini beans, rinsed and drained
  • A handful vittoria tomatoes - or the smallest cherry toms you can find!
  • Some leftover caramelized onions from another dinner!
In a saucepan, reheat the lamb, pulling the lumps apart with forks until it is all shredded and gorgeous. Add the cherry tomatoes and cannellini beans and cook until the cherry tomatoes are soft but still hold their shape - imagine them popping in your mouth when you eat this - lush! Stir in the caramelised onions and serve with jersey royals and corn on the cob!

Wednesday, 30 April 2008

WTSIM... Breakfast... And I think it's a Zebra!

I don't usually blog breakfast - mostly because it's usually fruit and yoghurt... but also because it's my least adventurous meal of the day - even when I do cook! A cooked breakfast is bacon and egg muffins, smoked salmon bagels or mushroom & tomato toast. Now, when I saw these zebra tomatoes for sale yesterday I had to have them and as I have dinner plans for the next few days, I decided to do some mid-week brekkie cooking!

Zebra Tomatoes - how pretty!

Excuse the rubbishness of my photos in this post - it was pouring with rain outside, which was giving off that horrible light which is too dark for taking naturally lit shots, but makes the flash seem... well... a bit odd really! (Can you tell I'm not a photographer?? ;)

Anyway, while catching up on my blog reading I saw that Waiter... There's Something In My... event is breakfasts this month. It must be fate - the only time I've had breakfast food waiting to be blogged about!

Now, this isn't the most exciting recipe in the world - but it is super tasty - and good for you too. I use quite a bit of garlic - so maybe not one to try if you have a lunchtime date ;)

Tomatoes and Mushrooms on Toast

Quantities are approximate and per person!

  • 6 cherry tomatoes
  • 6-9 decent sized chestnut mushrooms, sliced
  • 1 clove of garlic, crushed (!)
  • 1/2 tsp of mixed italian herbs or oregano
  • 1 thick slice of bread - granary or chewy brown are always my favourite - I'd skip white bread for this one!
  • Olive oil
  • Loads of freshly ground black pepper
  • sea salt
Prepare the garlic...
Smoosh up the garlic with a good pinch of sea salt per person, a glug of olive oil and a bit of black pepper.

Prepare the tomatoes...
Cut out the eye of each tomato and place onto grill rack (I used a top heat grill - alternatively, you could roast them!)
Push a little bit of the garlic mixture into each tomato - you should probably have about half the garlic mixture left.

Place under a medium grill for at least 15 minutes.

Prepare the mushrooms...
Heat a glug of olive oil to a low heat in a frying pan. Add the sliced mushrooms and cook slowly until they start to release their juices (probably 10-15 minutes). Add the rest of the garlic mixture, the Italian herbs, a decent pinch of salt, and a load of freshly ground black pepper. Turn up the heat and sauté until the liquid has gone.

Put it together!
Toast and butter your slice of bread, then gently scoop up the tomatoes and place along side. Top with the mushroom, a drizzle of olive oil and some parsley if you have it (I didn't this time).

Enjoy with a strong mug of coffee - didn't you know coffee helps garlic breath??

Monday, 28 April 2008

Vietnamese Crab Noodle Salad

Mmmm... I made this salad last week when I was ill with the cold - I figured I needed something with pretty strong flavours just so I could taste it! And it definitely hit the spot!!

I'm back at work now - feeling loads better. Luckily the cold didn't impact my appetite at all - even though I had days when I couldn't taste anything at all... Y'know - it's really hard to cook when you can't taste or smell!! I made a curry for my mum and dad on Thursday. I was using some new dried habenero chillies - and was really disappointed by how bland they were. Until my mum tried it... after the 2nd glass of water it became apparent that they weren't so bland after all!

But despite the cold and lack of taste, in the end I did manage to do some cooking - I just wasn't up to posting! And not being able to leave the house too much definitely helped me stick to my store cupboard challenge!

I'm sending this over to Ruth at Once Upon A Feast for Presto Pasta Night. I'm so glad you're feeling better now Ruth!

Vietnamese Crab Noodle Salad

Per person, multiply at will!

For the salad:
  • rice vermicelli noodles, soaked according to packet, rinsed in cold water
  • 1 scallion, shredded
  • 1/2 medium carrot, grated
  • 5 radishes, grated
  • 1/4 cucumber, seeds removed, and chopped into chunks
  • white crab meat (mine was from a tin!)

For the dressing:
  • 2 tbsp fish sauce
  • Juice of half a lime
  • 1 Thai red chilli, finely chopped
  • 1 clove garlic, crushed
  • 1" piece ginger, finely grated
  • 2 tbsp sugar
  • 1 tsp rice vinegar (optional!)
Garnish:
  • handful of raw peanuts, roasted and roughly chopped
  • rough chopped cilantro

To make the dressing...
Put all the ingredients in a bowl, and mix until the sugar is dissolved

Put the salad together...
Pour half of the dressing over the drained noodles and mix well. Mix the salad veg together with the remaining dressing.
Put the noodles in the serving bowl and top with the veg, then the white crab meat.

Top with the peanuts and cilantro... and enjoy!

Monday, 7 April 2008

Hummus Bi Tahina and a Discourse

I love hummus! I've tried a couple of times to make it at home - but it hasn't been as good as the stuff I can get from the wee Turkish shop round the corner. Until now!

Some random titbits about hummus for you...

It is also spelt hamos, houmous, hommos, hommus, hummos, hummous, chumus or humus. The most common Turkish spelling is humus - but as that means 'compost' in English, we generally stick to 'hummus'!

'Humus' is the word for chickpea! So if you make a hummus type dip with another legume - you really shouldn't call it hummus...

I got the above from a great post about hummus from Desert Candy. Check out the rest of the blog too - it's fab!

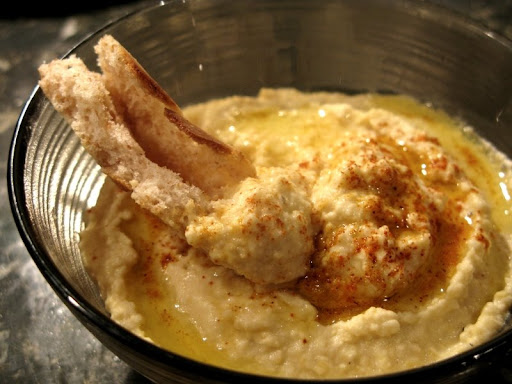
Traditionally hummus should be made with either tahine or olive oil - but not both! You should drizzle olive oil on the top of either when serving though. (Notice I actually did add a little bit of olive oil to mine !)

Someone has written a food blog - all about hummus!!

I think hummus is better the second day - when the flavours have had time to meld. Warning though - the hummus will probably thicken overnight - add some water to loosen before serving!

Hummus will keep for up to a week in the fridge.

Hummus is best made with freshly cooked chickpeas, but canned will work well too!

Hummus bi Tahina


  • 3 cups cooked chickpeas
  • 2 cloves garlic, crushed
  • juice of 1.5 lemons
  • 3 tbsp tahine
  • 2 tbsp olive oil (plus more for drizzling)
  • 1 tsp salt
  • paprika or cumin for serving
In a food processor, blend the garlic, tahine and salt, then add the lemon juice. Blitz til well mixed, then add the chickpeas. With the blender on medium, blend for 3/4 minutes. After the first minute or so, slowly drizzle in the 2 tablespoonfuls of olive oil. You want it to be light and fluffy, and creamy in colour. Add a little bit of water to loosen if required.

Serve drizzled with olive oil, a dusting of paprika or cumin, and pita breads. Though not necessarily the pitas I made that day!!


Hummus, served with one of my few successful pita breads!

Monday, 31 March 2008

Malaysian Rempah Paste

Malaysian Rempah Paste

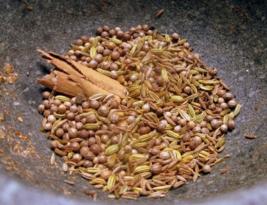
My roasted dry ingredients!

Shallots, galangal and fresh turmeric! If you're using fresh turmeric, watch your hands - this stuff seriously stains!! (I used gloves ;)
  • 2 tbsp coriander seeds
  • 1 tbsp cumin seeds
  • 1 tbsp fennel seeds
  • 1” cinnamon stick
  • 2 tbsp peanuts, ground to a paste
  • 1” piece galangal – peeled, roughly chopped
  • 2” piece fresh ginger – peeled, roughly chopped
  • 2 small pieces fresh turmeric (or 1 tsp ground) – peeled
  • 4 garlic cloves – peeled
  • 9 Thai shallots – peeled, roughly chopped
  • 6 Thai red chillies – stalks removed, seeds in
  • 2 4” lemongrass sticks – inc bulb
  • The zest of 1 lime
  • 1 tsp shrimp paste
  • 1 tbsp fish sauce
  • 1 tbsp soy sauce
  • 1 tbsp groundnut oil
  • 2 tbsp finely grated coconut

In a dry pan, toast coriander, fennel, cumin seeds and cinnamon until they start to release their aromas. Grind in a mortar and pestle.

Take all the fresh ingredients and grind to a smooth paste. I did this in a mini-blender – quick and easy! But feel free to use a mortar and pestle/ spice grinder/ grater if you fancy!

Mix all of the fresh ingredients with the ground spices and sauces. The paste will keep in the fridge for up to two months – store in a glass jar, with a layer of oil to prevent oxidisation.

Monday, 17 March 2008

Moroccan Marinated Chicken with Tabbouleh

I'm a bit late in actually publishing this one - considering I started it at the same time I wrote up my Tabbouleh recipe! And it is barely even a recipe - more just a bringing together of components!

This was my effort for last week's girlie night in - a taste of summer despite the rain that poured down for most of the week...

Moroccan Marinated Chicken with Tabbouleh


  • Chicken breasts - one per person
  • chermoula - one tbsn per person
  • a little olive oil for frying
  • tabbouleh - as much as you want!
  • optional extras - lightly toasted pita bread, hummus, wedge of lemon
Place the chicken breast between 2 sheets of clingfilm and use a rolling pin/ jam jar/ bottle of wine/ shoe to flatten it out to about 2 cm thick. (Though don't really use a shoe...)

Spread the chermoula onto the chicken breasts and massage in. (Garlic and chilli alert: wash your hands straight away! Or try this tip - massage a little olive oil into your hands and nails before you handle the sauce - this will stop the chilli/garlic oil being absorbed into your skin)

Cover and place in the fridge for at least a couple of hours - I left mine overnight.

Heat a little olive oil over a medium heat and fry the chicken for 2/3 minutes each side. Make sure there is no pink left - but be careful not to overcook or it will go tough and stringy!

Serve the chicken on top of the tabbouleh, with a wedge of lemon and some hummus and pita bread.

Wednesday, 12 March 2008

Spicy Moroccan Chermoula

Chermoula is a North African marinade, commonly used to flavour fish in Morocco, Algeria and Tunisia. There seems to be loads of regional variants - I didn't find two recipes the same when I was looking for ideas! The main basis always seemed to be lemon juice, cilantro and garlic - then I took my favourites from the other to make my own Brighton variation... hot, spicy and very garlicky! Feel free to adjust quantities to taste. I also did this using both my mortar and pestle (for the dry) and mini-blender (for the wet) - but it could be done by hand or in a blender - whatever you would usually use to make pesto I guess!

It can be used as a marinade for fish, veg or meat. I also used it as a basis for a sauce (recipe to follow!), and heard the some people use it as a seasoning! If you follow my quantities, be careful though - there is a fair whack of garlic there, and if it isn't cooked out you'll keep more than the vampires away...


Spicy Moroccan Chermoula


  • 1 large bunch cilantro
  • 5 cloves garlic
  • 2 red chillies
  • 1 lemon
  • a couple of glugs of olive oil
  • 1 tsp coriander seeds
  • 1 tsp cumin seeds
  • 1/2 tsp red chilli flakes
  • 1/2 tsp coarse sea salt
  • 1 pinch saffron
  • 1 tsp paprika
In a pan, fry off the coriander and cumin seeds until you can smell the aromas being released. Transfer to the mortar and pestle along with the salt, and grind to a fine powder.

A couple of the recipes I saw suggested picking the leaves from the cilantro, and discarding the stalks, but the Scot in me baulked at this waste - they have so much taste! Instead, I picked most of the leaves from the bunch, then blitzed the stalks to a fine purée in my mini-blender (Add a few drops of olive oil to loosen if required.)

Transfer the blitzed stalks to a small mixing bowl, along with the spices.

Now, pulse the chillies and garlic to a fairly fine purée and add to the mix. I left the seeds in because I wanted it HOT. But feel free to take them out and save your palette!

Grate the zest from the lemon, and add that, along with the juice from the lemon to the bowl.

I then finely chopped the cilantro leaves by hand. I wanted to keep some roughness to the marinade - and it only took a minute - but feel free to do this in the blender to save time :)

Now mix all the ingredients together, adding olive oil until you get the consistency you want. Again - this seems to change depending on recipe - but I decided to make mine to pesto consistency.

Very carefully, taste and adjust seasoning as required.

I read that this should keep for 3 days in the fridge - but that it is also freezable. If I'd had enough left after 2 days I would have tried to freeze it in ice-cube trays for easy defrost!

Tuesday, 11 March 2008

An Accidental dinner: Chermoula Trout with Puy Lentil Veggie Stew

As I had bought a huge bunch of cilantro (just so I could garnish my thai soup) I was determined to not waste it, and went on a cilantro-rich recipe hunt! I typed in "coriander recipe" (having briefly forgotten my lesson) into google, and my googlepedia found me this Wikipedia article on Chermoula.

Yuck, I think that is quite enough links for now...

So anyway, I was initially planning to use a decent piece of white fish with my chermoula marinade, and make a cous cous salad to go with it.

But I saw an amazing piece of Scottish trout at the fishmongers - rich pink with the finest marble lines. And was reminded how much I love trout. I much prefer it to salmon. My grandfather used to be a fisherman, and my childhood holds many memories of whole trout (along with the occasional rabbit - never worked that one out actually). I don't think I appreciated it enough at the time though!

I had a think - and decided that the trout could hold the strong flavours of the marinade - and the unlikely (yet delicious!) combo of Scottish trout with Moroccan marinade was born! If you can't get a hold of trout, I'm sure salmon would work similarly.

I got home, and hit a set back. The cous cous that I need to make my vegetable cous cous side... was gone! No idea where. I definitely don't remember eating a whole packet of cous cous. So I decided to go for bulgar wheat instead.... but was similarly denied. I think there is a grocery thief with very precise requirements at work in my kitchen. Alternatively, it was fate, because although i finally decided on puy lentils through lack of choice - the earthy lentils with the slightly gamey taste of the fish and the super spicy and garlicky flavours of the marinade were really, really good!

What I'm trying to say, is this is not a dish I would have chosen to put together, but it's definitely one I'll put together again!

Chermoula Trout with Puy Lentil Veggie Stew


This gave me enough fish for one big meal - though there was loads of veggie lentils left over - I had that the next day - I added a handful of black olives, and ate with hummus and pita bread. So it may not have been authentic, but it tasted great!

  • 250g piece trout (or salmon!)
  • 1 cup puy lentils
  • 1 small courgette, halved and sliced
  • 1 bell pepper, diced
  • 1 medium carrot, grated
  • 1 red onion, halved and thinly sliced
  • 1 red chilli, sliced
  • a couple of handfuls of mushrooms, quartered
  • 2 tbsp chermoula
  • 2 cups stock - whatever flavour takes your fancy
  • Olive oil to fry
Rinse and drain the puy lentils, before placing in a pan with the stock. Bring to the boil, simmer for 15 minutes. add 1 tbsp of the chermoula and continue to cook until al dente. The stock should not be completely evaporated - we want this to help form a sauce with the vegetables.

Meanwhile, heat a glug of olive oil in a pan, and fry the onion for a couple of minutes. Add 1 tbsp chermoula, the chilli and mushrooms and fry until mushrooms are done. Add the pepper and courgette and cook for a few more minutes - the pepper should still have a bit of bite!

Add the carrots and lentils to the pan and stir to mix. Allow to cook for another couple of minutes. Taste and adjust seasoning as required.

Serve the fish atop the lentils - and enjoy!

Thursday, 28 February 2008

Puttanesca Putapasta

I had the girls around again last night. And what with my parents arriving for a visit today, I had loads of clearing up to do (and there's one corner of my bedroom is stuffed with bags that I can't quite bring myself to unpack).

But I got home from work last night, looked around and decided to ignore the rest of the house, and make a dish for Presto Pasta Night instead! (After all, it is the 1 YEAR BIRTHDAY of Presto Pasta Night - the first blog event I ever participated in. Thanks to Ruth at Once Upon a Feast for her continued efforts and humour in hosting this event!) Anyway, I needed some food therapy, so decided to make the pasta from scratch. From the kneading of the dough, to the repetitive passes through the pasta machine, this was a task to calm my mind, and soothe my soul.

A piquant, spicy pasta sauce was also required - the comfort-food blandness of mac and cheese, mashed potato or chicken soup was just too insipid to tempt me - I wanted something to burn through the fug I've been wandering through for the last few days...

A puttanesca sauce was in order - and as one of the girls doesn't like olives (or too much spiciness!) I decided to make fresh olive and chili papperadelle to go with it.

Puttanesca Puta-pasta!


For the pasta:
  • 250g semolina flour (plus extra for dusting)
  • 250g strong pasta flour
  • 18 kalamata olives - pitted
  • 1tsp ground red chillies - add more or less to taste!
  • 4 whole eggs
  • 4 egg yolks

For the sauce:
  • 50g anchovy fillets, roughly chopped
  • 3 cloves of garlic, crushed
  • 2 red chillies, deseeded and finely chopped
  • 700g ripe tomatoes - cut into quarters, deseeded and the hard core removed, then halved again (a tin of chopped would work just as well, and be much cheaper and quicker!)
  • 2 tbsp caper - rinsed/drained and roughly chopped
  • 75g kalamata olives, pitted and quartered
  • olive oil to fry
  • black pepper
  • handful fresh basil

First of all, to prepare the pasta. I went into more detail on how to make fresh pasta when I posted my Home-made roasted garlic pasta - I'll just put down the quick version here - please refer to my earlier post for details in rolling and cutting!

Blitz the olives with the dried red chili and one egg yolk until very finely chopped - but not quite a purée. You want to be able to see the flecks of olive in the finished dish!

I mixed this by in my food processor - put the flour, olive mix and eggs into a mixer with a dough blade on it, and pulse until well combined - the dough should be coming together into big chunks. If it feels sticky, add some more flour.

Turn out onto a work surface, and knead for 5 minutes until elastic and shiny. Wrap in cling film and put in the fridge for an hour or so.

Meanwhile, prepare the sauce (and this is one of the easiest sauces in the world!).
Heat a glug of olive oil over a medium heat, then saute the chilies, garlic for 1 minute, and the chopped anchovies and cook for a further minute or two until they start to melt.

Now I confess - I've never cooked with anchovies before - I don't really like them... but I do like them in cooking - and it turns out them were wonderful in this sauce - not fishy at all. So if you don't like anchovies, don't be tempted to leave them out - they really make the dish!

So at this point the sauce was smelling very anchovesque - and I was contemplating takeaway options - just in case it all went wrong.

Add the tomatoes, capers and olives to the pan - I also added a splash of water to get it going. (I also removed one portion of the sauce before I added the olives so it didn't get contaminated ;)
Add a few grinds of black pepper - you shouldn't need salt - the anchovies/capers are salty enough!

Allow to simmer for 20 minutes or so - you can tell when it's ready, because the anchovy/fresh tomato smell is suddenly replaced by something that makes you want to eat it NOW!

Take the sauce off the heat, and set to one side until the pasta is ready.


Back to the pasta!

Remove the pasta from the fridge, divide into 4 balls, keep one out, and rewrap the others.
Following the instructions here, roll out and cut the pasta in 3/4 inch widths. One tip that I've picked up since writing that blog, is that once you have rolled the pasta to the desired thickness, you should leave it to dry slightly for 5 minutes or so before cutting (start rolling the next bit!). This definitely seemed to help with the cut pieces unrolling properly.

Cook the pasta in salted water for 1 to 2 minutes then drain thoroughly.

Add the drained pasta to the sauce, and throw in the handful of chopped basil. Mix well and serve!


Wednesday, 6 February 2008

No Croutons Required: Spinach and Garlic Soup

As soon as I heard about the new blog event: No Croutons Required I knew I was going to like it! It is about vegetable salads and soups - and every month is going to have a different theme. Now I love soup (I think it's such a Scottish thing - a huge vat of broth to line your tummy on a chilly day!) and was excited to get an excuse to go home and make some! (Even though what I should have done was go home and do housework as I have a parental visit today... Never mind - my dad likes soup too!)

No Croutons Required is being jointly run Lisa of Lisa's Kitchen and Holler at Tinned Tomatoes and this month we're making... Vegetarian Soup!

I made Spinach and Garlic Soup - hot, thick, filling and healthy! I started making this when I was a student - it evolved from potato and leek soup (!) when I tried to force more nutrients in. I still love it - I ate some of it last night, and have some here at work in a flask for when I've finished writing this. Served with a hunk of crusty bread, it's a meal in itself!

Spinach and Garlic Soup


As always, quantities are approximate - add more potato for a thicker soup, or more stock for a thinner one. I usually make this as a one-pot soup, but because the spinach was really sandy, I decided to cook it separately just to ensure all the grit was removed.

My gorgeous spinach - but how much sand???!
  • 2 big bunches of spinach - I usually use a large bag from the supermarket, but managed to pick some up fresh - yummy!
  • 1 kilo floury potatoes, peeled and cut into large chunks
  • 1 onion, finely chopped
  • 4 cloves garlic, crushed
  • 1 litre of vegetable stock - I made mine from Roast Vegetable Bouillon concentrate
  • Salt and plenty of black pepper
Wash Spinach thoroughly (took me ages!!) Roughly chop, place in a pan and cover in boiling water. Allow to boil for 2/3 minutes, then refresh in cold water. Blitz drained spinach along with a cup or so of water to a purée and set aside.

Gently fry the onion and garlic in a little butter or olive oil until soft, then add the stock, about a teaspoon of salt and a good few grinds of black pepper.

Add the rinsed potato chunks, bring to the boil and cook until soft.

Remove the potatoes from the stock with a slotted spoon and mash. I actually used a ricer to do mine - mostly because it was at the front of my utensil drawer!

Return the potatoes to the stock mix and stir well. Taste, and adjust seasoning as required.

Add the spinach purée, taste again, and serve! You could add a swirl of cream, or a grating of parmesan to the top of this, or leave it bare - it will taste good any which way!

Now how easy was that??

Thursday, 10 January 2008

Home-made roasted garlic pasta

Yum! I made this to use some roasted garlic - and was really please with the gorgeous silky pasta result! I served it with a roast garlic ragu - the flavours were fab together! But I think it would work just as well with very basic sauces - maybe even some good olive oil with some dried red chilli! If you don't have a food processor, you can make this by hand, but make sure you knead it until it's silky!

I love garlic - so was very chuffed to see that
Sunita from Sunita's World blog has chosen "Garlic" as her choice this month for her Think Spice... Think... event. I'm sending this over to her now - hope she likes it!


I think this made enough for about 6. It's always difficult to say how many 'normal' portions it would cover, as Boyfriend always eats enough for at least two and occasionally 3!

  • 500g strong white pasta
  • 4 whole eggs
  • 4 egg yolks
  • 1 head roasted garlic
  • Semolina (durem) flour for dusting

  1. Using a food processor with a dough blade, pulse the flour, eggs, and cooled roast garlic until it resembles large breadcrumbs. At this stage you may want to add a spot more egg white (or water) if the mixture looks dusty, or a bit more flour if it looks too wet.
  2. Turn on the processor and allow to turn for 2/3 minutes until the dough is shiny. (Alternatively do this by hand-kneading)
  3. Turn out the dough and continue to knead by hand for a further 1/2 minutes.
  4. Wrap dough in clingfilm and allow to rest in the fridge for an hour.
  5. Remove dough from fridge and cut into 4 pieces - keep one piece out and make sure you cover up the others so they don't dry out.
  6. I use a pasta machine to make my pasta, but I'm sure you could roll it by hand if you had the time or inclination ;)
  7. Roll the piece of dough into a ball and flatten slightly.
  8. Pass through the pasta machine at it's thickest setting, then fold each end in towards the middle (folding it at the 1/3 way point) to make a rectangle. Lightly dust with durum flour.
  9. Pass this through at the same setting, the repeat folding process.
  10. I usually do this 7 times - it is one of the main techniques to ensure really silky pasta!
  11. After the 7th pass through, don't fold the dough - but reduce the pasta machine setting, lightly dust, and pass though.
  12. Repeat this, reducing the machine setting each time, until you have the thickness you are looking for (Usually 1/1.25mm for tagliatelle type pasta)
  13. To make tagliatelle, cut the length of rolled out dough into sections about 25cm long.
  14. Dust both sides of the the dough and roll up.
  15. Using a sharp knife, cut the roll into the pasta width required, then separate.
  16. If using immediately, place onto a plate, and cover with a damp cloth while you finish the rest of the dough. Alternatively,you can hang it to dry for 6-8 hours (must be brittle and snap easily) then store it in an airtight container for up to one month.
  17. How long the pasta will take to cook depends on how thin you rolled it - remember fresh pasta takes much less time to cook than dried - check it after 2 minutes. Use lots of well salted water and a large pan to give the pasta lots of room to move. I heard on a TV show recently that the Italian rule of thumb is for every 100g pasta, use 1 litre water and 10g salt!

Slow-cooked Roast Garlic Ragu

It's January - and usually a month where I try to avoid pasta... but when I found Ruth's Presto Pasta night over at Once Upon a Feast... my will-power started to crumple. Or crumble... all these carbs have affected my brain!

It all started with the
home-made roast garlic fresh pasta but I needed more... I needed a sauce! After roasting off almost a dozen heads of garlic I set my mind to what else I could use them for...

I eventually came up with this gorgeous slow cooked ragu, with a pork and beef base, finished with 3 bulbs of garlic. It sounds like a lot, but the garlic was slow roasted until there was no sharpness left - just sweet, rich garlicky lushness!


  • 3 carrot
  • 3 sticks of celery
  • 2 onions
  • 3 roasted heads of garlic
  • Some olive oil for frying/drizzling
  • 500g minced (ground) beef steak
  • 500g minced (ground) pork
  • 1 beef stock cube
  • 1 tbsp fish sauce
  • 6 drops Tabasco sauce
  • 1 tbsp paprika (preferably smoked!)
  • 500g carton passata
  • 400g tin of chopped tomatoes
  • 3 tbsp worcester sauce
  • 1/2 tsp sugar
  • 1 tsp salt
  • 2 bay leaves
  • 2/3 bottle decent red wine
I started off by preparing the 'holy trinity' of Italian cooking - onions, carrots and celery. I already had my food processor out for making my pasta - so decided to save time and effort and use it for the veg too. I finely chopped one onion and used the grater attachment for the carrots and celery. Use an ovenproof dish to sweat this mixture off for about 20 minutes, or until soft. I used my Le Creuset casserole dish to do this - after lusting after one for years, I finally bought one last year and get it out whenever I can!

As I was going for sweet, rich favours I decided to caramelise the other onion. I cut the onion in half, then thinly sliced each half. After heating some olive oil over a medioum heat I chucked on the onions and let slowly cook for abotut half an hour until they were golden and caramelised. The kitchen was already starting to smell lovely!


When the onions and veg are cooked, remove to a bowl. If you have lots of lovely burnt bits on the bottom of the onions pan, then use a bit of the wine to de-glaze, and add that to the bowl too.

In the same ovenproof pan, brown off the pork mince - make sure the pan isn't overcrowded so it fries rather than boils! As it's January and I'm trying to be healthy, I strained off the pork and discard the fat, setting the meat to one side. While this was straining I fried off the beef in the same ovenproof pan. Once it was brown I added the strained pork, beef stock cube, Tabasco, fish sauce and paprika and let it fry for a couple of minutes.

Preparation almost done! Still a lot of cook time to go though...

I added the softened veg and onions, the passata, tinned tomatoes, worcester sauce, sugar, salt, bay leaves, and finally the red wine, then brought the whole lot to the boil. I was a bit surprised at how pink it looked - but I guess I'm used to making bolognese ragu with all beef!

I think I let my ragu cook in the oven for about 5 hours - but I think it would probably be ok after 3/4 hours. I stirred it every 30 minutes or so - it was quite easy to see when it all started to come together - initially it looked quite pink and 'bitty', but once it was ready the colour deepened to a dark colour and the texture was much softer.. I didn't need to, but make sure you add some water if it starts looking like drying out.

Right - almost ready - and the kitchen should smell amazing!

I removed the garlic mush from the roasted heads, and mashed it into a rough paste, then stirred it into the ragu. You could probably serve it right then - but I had to finish making my pasta, so it went back into the oven for another 15 minutes!
I served this with my roasted garlic pasta... I know that was probably overkill - and the sauce was definitely enough to stand alone - but it really did taste amazing! I found that I didn't need too much sauce with the pasta - nowhere near the quantity I was put out when making bolognaise. It was really rich, and coated the pasta well.

And it keeps the vampires away!

Sweet, oozy, roasted garlic...

I'm lucky enough to live close to some amazing stores though - one of my favourite is a little turkish shop. I went out to buy some garlic a couple of days ago - but all they had was massive bags bags - each containing about a dozen large heads of garlic! Considering it was the same price as the supermarket would charge for one head, I bought it anyway - decided I'd work out what to do with the rest when I got home!

About the same time I had an urge to make some homemade pasta - and came up with a way to combine the two - roast garlic pasta... yum!


I cut the top 1/4 off the top of each head - and placed each onto a square of foil. I drizzled over some olive oil, a pinch of salt and some white pepper... My eyes were starting to water from the fumes... and the cats kept looking at me expectantly. Any idea why my cats seem to be obsessed with garlic?? The only other food stuff that gets that reaction is bacon!

I folded the foil up to make little roasting packets and put them it into the oven (preheated to 200c (425f)).

About 50 minutes later I brought them out the oven and left to cool in their packets for a bit. When I opened them up they look like this!


And smelt absolutely fab!

I used a fork and the point of a knife to remove the oozy, sweet garlicky lushness from their paper cases - you can eat it as is, spread it on bread, or use it in your recipes. It'll keep for a couple of weeks in the fridge in an airtight container. Make sure it is airtight though or your fridge will stink!