Thursday, 10 January 2008

Home-made roasted garlic pasta

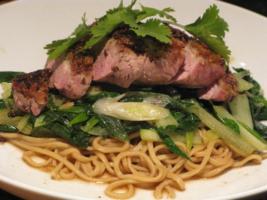
Yum! I made this to use some roasted garlic - and was really please with the gorgeous silky pasta result! I served it with a roast garlic ragu - the flavours were fab together! But I think it would work just as well with very basic sauces - maybe even some good olive oil with some dried red chilli! If you don't have a food processor, you can make this by hand, but make sure you knead it until it's silky!

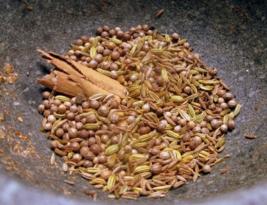
I love garlic - so was very chuffed to see that
Sunita from Sunita's World blog has chosen "Garlic" as her choice this month for her Think Spice... Think... event. I'm sending this over to her now - hope she likes it!


I think this made enough for about 6. It's always difficult to say how many 'normal' portions it would cover, as Boyfriend always eats enough for at least two and occasionally 3!

  • 500g strong white pasta
  • 4 whole eggs
  • 4 egg yolks
  • 1 head roasted garlic
  • Semolina (durem) flour for dusting

  1. Using a food processor with a dough blade, pulse the flour, eggs, and cooled roast garlic until it resembles large breadcrumbs. At this stage you may want to add a spot more egg white (or water) if the mixture looks dusty, or a bit more flour if it looks too wet.
  2. Turn on the processor and allow to turn for 2/3 minutes until the dough is shiny. (Alternatively do this by hand-kneading)
  3. Turn out the dough and continue to knead by hand for a further 1/2 minutes.
  4. Wrap dough in clingfilm and allow to rest in the fridge for an hour.
  5. Remove dough from fridge and cut into 4 pieces - keep one piece out and make sure you cover up the others so they don't dry out.
  6. I use a pasta machine to make my pasta, but I'm sure you could roll it by hand if you had the time or inclination ;)
  7. Roll the piece of dough into a ball and flatten slightly.
  8. Pass through the pasta machine at it's thickest setting, then fold each end in towards the middle (folding it at the 1/3 way point) to make a rectangle. Lightly dust with durum flour.
  9. Pass this through at the same setting, the repeat folding process.
  10. I usually do this 7 times - it is one of the main techniques to ensure really silky pasta!
  11. After the 7th pass through, don't fold the dough - but reduce the pasta machine setting, lightly dust, and pass though.
  12. Repeat this, reducing the machine setting each time, until you have the thickness you are looking for (Usually 1/1.25mm for tagliatelle type pasta)
  13. To make tagliatelle, cut the length of rolled out dough into sections about 25cm long.
  14. Dust both sides of the the dough and roll up.
  15. Using a sharp knife, cut the roll into the pasta width required, then separate.
  16. If using immediately, place onto a plate, and cover with a damp cloth while you finish the rest of the dough. Alternatively,you can hang it to dry for 6-8 hours (must be brittle and snap easily) then store it in an airtight container for up to one month.
  17. How long the pasta will take to cook depends on how thin you rolled it - remember fresh pasta takes much less time to cook than dried - check it after 2 minutes. Use lots of well salted water and a large pan to give the pasta lots of room to move. I heard on a TV show recently that the Italian rule of thumb is for every 100g pasta, use 1 litre water and 10g salt!

Slow-cooked Roast Garlic Ragu

It's January - and usually a month where I try to avoid pasta... but when I found Ruth's Presto Pasta night over at Once Upon a Feast... my will-power started to crumple. Or crumble... all these carbs have affected my brain!

It all started with the
home-made roast garlic fresh pasta but I needed more... I needed a sauce! After roasting off almost a dozen heads of garlic I set my mind to what else I could use them for...

I eventually came up with this gorgeous slow cooked ragu, with a pork and beef base, finished with 3 bulbs of garlic. It sounds like a lot, but the garlic was slow roasted until there was no sharpness left - just sweet, rich garlicky lushness!


  • 3 carrot
  • 3 sticks of celery
  • 2 onions
  • 3 roasted heads of garlic
  • Some olive oil for frying/drizzling
  • 500g minced (ground) beef steak
  • 500g minced (ground) pork
  • 1 beef stock cube
  • 1 tbsp fish sauce
  • 6 drops Tabasco sauce
  • 1 tbsp paprika (preferably smoked!)
  • 500g carton passata
  • 400g tin of chopped tomatoes
  • 3 tbsp worcester sauce
  • 1/2 tsp sugar
  • 1 tsp salt
  • 2 bay leaves
  • 2/3 bottle decent red wine
I started off by preparing the 'holy trinity' of Italian cooking - onions, carrots and celery. I already had my food processor out for making my pasta - so decided to save time and effort and use it for the veg too. I finely chopped one onion and used the grater attachment for the carrots and celery. Use an ovenproof dish to sweat this mixture off for about 20 minutes, or until soft. I used my Le Creuset casserole dish to do this - after lusting after one for years, I finally bought one last year and get it out whenever I can!

As I was going for sweet, rich favours I decided to caramelise the other onion. I cut the onion in half, then thinly sliced each half. After heating some olive oil over a medioum heat I chucked on the onions and let slowly cook for abotut half an hour until they were golden and caramelised. The kitchen was already starting to smell lovely!


When the onions and veg are cooked, remove to a bowl. If you have lots of lovely burnt bits on the bottom of the onions pan, then use a bit of the wine to de-glaze, and add that to the bowl too.

In the same ovenproof pan, brown off the pork mince - make sure the pan isn't overcrowded so it fries rather than boils! As it's January and I'm trying to be healthy, I strained off the pork and discard the fat, setting the meat to one side. While this was straining I fried off the beef in the same ovenproof pan. Once it was brown I added the strained pork, beef stock cube, Tabasco, fish sauce and paprika and let it fry for a couple of minutes.

Preparation almost done! Still a lot of cook time to go though...

I added the softened veg and onions, the passata, tinned tomatoes, worcester sauce, sugar, salt, bay leaves, and finally the red wine, then brought the whole lot to the boil. I was a bit surprised at how pink it looked - but I guess I'm used to making bolognese ragu with all beef!

I think I let my ragu cook in the oven for about 5 hours - but I think it would probably be ok after 3/4 hours. I stirred it every 30 minutes or so - it was quite easy to see when it all started to come together - initially it looked quite pink and 'bitty', but once it was ready the colour deepened to a dark colour and the texture was much softer.. I didn't need to, but make sure you add some water if it starts looking like drying out.

Right - almost ready - and the kitchen should smell amazing!

I removed the garlic mush from the roasted heads, and mashed it into a rough paste, then stirred it into the ragu. You could probably serve it right then - but I had to finish making my pasta, so it went back into the oven for another 15 minutes!
I served this with my roasted garlic pasta... I know that was probably overkill - and the sauce was definitely enough to stand alone - but it really did taste amazing! I found that I didn't need too much sauce with the pasta - nowhere near the quantity I was put out when making bolognaise. It was really rich, and coated the pasta well.

And it keeps the vampires away!

Sweet, oozy, roasted garlic...

I'm lucky enough to live close to some amazing stores though - one of my favourite is a little turkish shop. I went out to buy some garlic a couple of days ago - but all they had was massive bags bags - each containing about a dozen large heads of garlic! Considering it was the same price as the supermarket would charge for one head, I bought it anyway - decided I'd work out what to do with the rest when I got home!

About the same time I had an urge to make some homemade pasta - and came up with a way to combine the two - roast garlic pasta... yum!


I cut the top 1/4 off the top of each head - and placed each onto a square of foil. I drizzled over some olive oil, a pinch of salt and some white pepper... My eyes were starting to water from the fumes... and the cats kept looking at me expectantly. Any idea why my cats seem to be obsessed with garlic?? The only other food stuff that gets that reaction is bacon!

I folded the foil up to make little roasting packets and put them it into the oven (preheated to 200c (425f)).

About 50 minutes later I brought them out the oven and left to cool in their packets for a bit. When I opened them up they look like this!


And smelt absolutely fab!

I used a fork and the point of a knife to remove the oozy, sweet garlicky lushness from their paper cases - you can eat it as is, spread it on bread, or use it in your recipes. It'll keep for a couple of weeks in the fridge in an airtight container. Make sure it is airtight though or your fridge will stink!

Tuesday, 8 January 2008

Pain in the neck pasta!

Well, I had lots of good intentions today of going to my seafront fish monger to buy some lovely fresh fish for tea tonight... but somehow managed to trap a nerve in my neck! So my walk by the sea was changed for an afternoon with the cats, and fresh fish to a larder pasta dish! The key criteria was that it had to be simple to make - with minimal neck movement...

I fancied a smooth sauce, that would cling to the pasta - if you prefer not to blend the sauce, then chop the pepper to an appropriate size. Either way, you may want to roast the red pepper off first for extra sweetness - but that was way too much effort for me today!

  • 1 tin tuna steak
  • 1 400g can of tomatoes
  • 1 red pepper
  • Small handful dried mushrooms
  • 1 clove garlic, crushed
  • 2 tbsp olive oil
  • 1 tsp sugar
  • Salt and pepper to season
  • pasta to serve - I used linguine
I put the dried mushrooms in a cup of warm water to soak for 30 minutes. (Sat down an watched an episode of Barefoot Contessa!)

Once the mushrooms were soaked, I roughly chopped them along with the red pepper. Over a medium heat, fry the pepper, mushrooms and garlic in the olive oil for a couple of minutes. Strain the soaking liquor from the mushrooms to remove grit, then add to the pan. Add the tomatoes, sugar and season.

Let all this simmer for at least 20 minutes - though longer cooking won't hurt it at all. (I had another wee sit down and watched Jamie Oliver!)

Once the sauce has cooked, blend it up to a smooth, thick sauce and add flaked tuna.

Serve with the cooked pasta of your choice!

Spicy Pork and Crab Meatballs

I started making these spicy meatballs to accompany my New Year noodle soup, but decided to put them up as a separate page as they can be included in way more dishes than just this soup. I made a monster batch of them, froze some, used some in the soup, baked and served with dipping sauce. And - one of my new favourites - using fine egg noodles, soy sauce and a beaten egg, created an noodle nest for each meatball - fried until golden and crispy. (I forgot to take pics of this one, but will put it up next time I make it!)


I've just realised I put the soup up before the meatballs and now everything's out of order - between that, forgetting to take pics or note my quantities, and losing my camera cable - this blogging thing isn't quite as easy as I thought ;)

Ingredients

  • 2 cloves garlic - roughly chopped
  • 1 large shallot (or 3 scallions) roughly chopped
  • 2 red chillies (Add more or less to taste depending on how hot you like it, and how hot the chillies are!) - roughly chopped
  • 2 inch piece of fresh ginger - roughly chopped
  • 1 red pepper - cut into large pieces
  • Zest of one lime
  • 1 tbsp dark/thick soy sauce
  • 1 tbsp fish sauce
  • 1 tsp sesame oil
  • Small handful coriander (cilantro) - roughly chopped
  • 1 tin crab meat (or replace with 150g fresh crab meat)
  • 500g minced (ground) pork
  • 1 egg - beaten

  1. Add the garlic, shallot, chillies, ginger, red pepper, zest and coriander into a food blender and blitz until all ingredients are very finely chopped.
  2. Remove from blender into mixing bowl.
  1. Add crab meat to mixture and combine.
  2. Put the pork, egg, soy and fish sauce and sesame oil into blender and blitz until pureed.
  3. Add this to the crab mixture and mix until well combined.
  1. Using damp hands, shape the mixture into small walnut-sized balls. I got about 32 from the quantities above.
  1. Put the balls in fridge for 30 minutes to chill (This is optional - but will help them stay together better!)
  2. Use as you like - but make sure they're cooked through!

Spicy Pork and Crab Meatball Soup

Well, I guess December was a bad time to start a food blog - no sooner had I started to think about it the party season started... then went to visit family for a few days... all in all, not much cooking has been done recently!

January is always a month where I try to cook everything 'from scratch'- in a panic to be healthy and save money! So the first thing I turned to when the excess of Hogmanay and New Year was over was a huge steaming spicy tasty bowl of noodle soup! Left-over pork mince from stuffing the turkey tempted me towards meatballs... and rather randomly a spare packet of brussel sprouts was a somewhat non-traditional veg - but they worked well. Though if you really don't like them, then some sliced cabbage would do just as well!


Apologies for the blurry, messy picture! Just before I made this a friend popped by and we went out for a quick New Year drink... So much for the detox. Then by the time I got home and made this, I was too hungry to stop and take my pics properly. I also forgot to put on the chilli garnish... Still tasted good though!

You will need:

  • 24 pork and crab meatballs - uncooked
  • 1 clove garlic - crushed
  • 1 inch piece ginger finely chopped
  • 1 litre Clear chicken broth
  • 4 baby bok choi,
  • 2 portobello mushrooms - thinly sliced
  • 12 baby sweet corn
  • 2 small handfuls bean shoots
  • Fine rice noodles (I use 100g per person!)
  • Chopped coriander/ wedge of lime and sliced red chilli to garnish
  • Fish sauce and soy sauce to season

Directions
  1. Cook the rice noodles according to the instructions on the packet, drain, rinse under cold water and set aside.
  2. Heat the chicken broth to simmering point - so the bubbles are only gently breaking the surface.
  3. Add the garlic and ginger to the broth.
  4. Gently slide in the pork balls.
  5. Bring the broth back to a gentle simmer.
  6. After 3 minutes, add the vegetables.
  7. Simmer for another 3 minutes.
  8. Check seasoning and adjust with soy or fish sauce as required.
  9. Divide the noodles between 4 soup bowls.
  10. Add the meatballs and veg to each bowl then ladle over the stock.
  11. Garnish with the sliced chillies, coriander and lime.
  12. Serve immediately and enjoy!


Wednesday, 12 December 2007

So this is my blog...

Well - after 3 or 4 aborted attempts I have finally managed to set up my own blog... Since that happening it has also taken me a couple of days before I managed to actually do any writing!

Being a bit of a techie by heart, when I realised I could customise, personalise and otherwise transform my blog page I immediately set to work trying to find out everything I could before starting the all important task of writing... But I realised today that if I waited until I was happy with the look of it before I started actually blogging, then it would never happen!

So I have defaulted back to my original settings and decided to put fingers to typewriter in earnest.

I wanted to start a blog to keep track of my adventures in cooking - which has been my constant passion as long as I can remember. I also just bought a shiny new digital camera with which I will hopefully be able to visually document stuff. If I can work out how to attach it to the computer... (Yes, I know I said I'm a techie - but this counts as hardware...?)

Here are some things you may want to know about me:

  • I live in a small flat (apartment!) in the UK
  • I have two cats who live in my kitchen, though I sometimes let them sleep in the bedroom if I'm feeling sappy.
  • I've been with Boyfriend for 18 months - we live together... but between two houses!
  • Boyfriend is lovely - even though he won't eat anything creamy or cheesy...
  • I really like spicy food - expect to see a lot of it!
Now I hope that will do as an introduction - I'm excited to make a start!!

- kittie