


Friday, 10 October 2008

Think Spice... Think Fenugreek - The Roundup!

Oh dear - my very first time hosting a food event... and I'm late!

Apologies to anyone waiting for the Think Spice... Think Fenugreek round up. Life has been getting in the way of blogging, and I missed my target of the first week in October. But I'm hoping that the lovely selection of fenugreek based dishes will go some way to appeasing you all!

First on the list is this wonderful Punjabi Kadhi by Hitashi from Culinary Hike. It is a yogurt based curry prepared in way I haven't seen before - beating the yogurt with some spices and gram flour to create the base. Can't wait to try it!

Punjabi Kadhi


Priya from Priya's Easy N Tasty Recipes took advantage of the fact that fenugreek is a legume to sprout the seeds and create this Sprouted Fenugreek Onion Gravy. She recommends serving it with hot rice and papads - all I can say is count me in!!

Sprouted Fenugreek Onion Gravy


Who knew making a pickle could be so easy, and look so good! Vijaya from Daily Meals presents this crunchy Cauliflower Pickle. With cauliflower in abundance at the moment, I can't wait to give this a go!

Cauliflower Pickle


Jayasree of Kaila's Kitchen shares with us these unusual Rice wade. Wades are like poori - deep-fried dough balls - in this case flavoured with methi and fennel. I'd love to try these with that moong dal Jayasree!

Rice Wade


Nags from Edible Garden continues her mystery masala series to bring us this fantastically coloured sambhar cum rasam spice blend. Can't you just smell those wonderful fragrances from here?

Sambhar cum Rasam Masala Powder


Psychgrad from Equal Opportunity Kitchen really pushed the boat out with this Sri Lankan Red Shrimp Curry, managing to find pandan leaf (I'm jealous!) and trying cooking with fenugreek for the first time ever! She was a little underwhelmed with the results - but I think it looks wonderful!

Sri Lankan Red Shrimp Curry


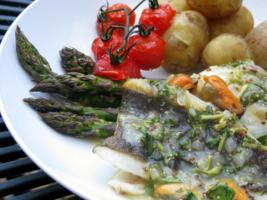
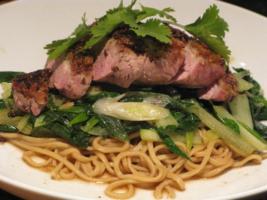
And here is my submission! Fenugreek Poached Fish with Saag Aloo

Fenugreek Poached Fish with Saag Aloo


These went straight onto my to-make list! In fact, why haven't I made them already?? Aparna from My Diverse Kitchen sent over these beautiful baked methi muthias fenugreek crackers. She says they are a modified Gujarati recipe - and perfect to satisfy that savoury craving! I utterly agree!

Methi Muthias Fenugreek Crackers


Our second entry to use sprouted fenugreek is Geetha from The Fragrant Kitchen's Sprouted Fenugreek (Methi) Rice. I am definitely going to try this - it is healthy and sounds absolutely delicious!

Sprouted Fenugreek (Methi) Rice


Geetha also initally sent me this Methi Dal but as it uses fresh rather than dried fenugreek I couldn't count it as a Think spice entry. Then I thought I'd share it with you anyway, as it is a great dal recipe - and I love dals!

Methi Dal


Next, PG from My Kitchen Stories gives us a luscious Chicken Makkhan - also known as Butter Chicken. It is a rich dish, not too hot - doesn't it sound just wonderful?!

Chicken Makkhan


Rupa, from new blog A Virtual Vegetarian, just made it in time with another Gujarat dish - the impressive Methi dana aur papad ki subzi. She also shares another couple of health benefits of fenugreek - did you know it is highly recommended for diabetics as it aids the absorption of sugar?

Methi dana aur papad ki subzi


Thanks to everyone for these wonderful submissions - and thanks to Sunita for allowing me to host this great event!

Thursday, 18 September 2008

Think Spice: Fenugreek Poached Fish with Saag Aloo

First things first...

Yes, ok, so I haven't been around much this last week or so: I'm woefully slow in my posting, and my google reader ridicules me everytime I turn the computer on, groaning under the weight of unread posts... I have been in the kitchen (a lot!!) but have been sorely limited in non-work pc time.

So apologies if I haven't been by as much as usual - I promise I'll sort it out soon!

I have still been managing to cook - and this post is my entry for this month's Think Spice... this month being hosted by... me!

I chose fenugreek as the spice, either in seed form or as dried leaves. I ended up using both forms in this dish - although the seeds were my main use.

Unusually for me, I have kept the heat in this dish to a minimum - I didn't want to overpower the subtle flavours in the fish. And I was really pleased with the result. It was spicy - but in a flavourful way rather than hot. The saag aloo may not be authentic, but its main ingredients are spinach an potato - so I figured it deserved the name!


There was quite a bit of gravy at the end - next time I would serve this with some lovely naan bread to soak up all the flavour. As it is I just had to drink it out the bowl... ;)

Only 10 days left to get your fenugreek-spiced dishes to me - come on peeps, get cooking!


Fenugreek Poached Fish with Saag Aloo


Serves 2 - with leftovers!

For the Fish and Broth...
  • 1.5 tsp fenugreek seeds
  • 1 tsp fennel seeds
  • 1/4 tsp turmeric
  • 1/4 tsp salt
  • 350ml water
  • 100ml milk
  • 2 fillets firm white fish - I used pollock
For the Saag Aloo...
  • 1 tsp black mustard seeds
  • 1 large pinch dried fenugreek leaves
  • 1.5 tsp ground cumin
  • 1.5 tsp ground coriander
  • 0.5 tsp turmeric
  • 0.5 red chilli, deseeded and finely chopped
  • 1 large clove garlic, crushed
  • 1 large onion, finely chopped
  • 1 tbsp grated ginger
  • 1 bunch spinach, washed, destalked and roughly chopped
  • 4 plum tomatoes, diced (large)
  • 4 medium potatoes, diced (large)
  • 2 tbsp ghee

Prepare the Broth...

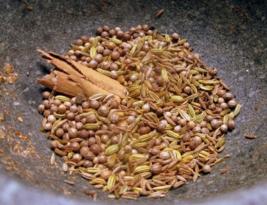
In a dry pan, toast the fenugreek seeds for 3/4 minutes until golden brown. Transfer them to a mortar and pestle and give them a bit of a bash. Warning - these little legumes are really hard - so just try to break them up a bit, don't worry about grinding them to powder.

Put the bashed fenugreek and the fennel seeds in a pan, then pour over the water. Bring to the boil, cover and simmer for 5 minutes. Turn off the heat and set aside to cool.


Prepare the Saag Aloo...
Heat the ghee over a low to medium heat and add the mustard seeds. When the start to pop add the onions and dried fenugreek leaves. Fry gently until translucent, don't allow to brown.

Add the ginger and garlic and cook for another minute or so before adding the cumin, coriander, turmeric and chilli.

Add the diced potato to the mix, and top up with cold water to about half way up the potato. Bring to the boil, cover, and simmer for 10 minutes or so, stirring a couple of times through out.

Prepare the fish while the potatoes are cooking...


Cook the Fish...
Once the broth is cool, strain through a fine sieve and discard the seeds. Add the milk, salt and turmeric. Lay the fish fillets in the broth - they should be totally submerged - otherwise top up with water.

Gently bring the broth to the boil. As soon as it reaches the boil, cover and turn off the heat. Leave in the broth for 5-10 minutes - until fish is cooked through (this will depend on how thick the fish is).


Finish the Saag Aloo...
Add the tomatoes and chopped spinach to the potato mix and stir well. Cover the pan, and cook for another 5/10 minutes - until the potatoes are cooked through, the spinach is completely wilted and the tomatoes are softened.

Depending on how much water is released by the tomatoes and spinach you may want to remove the lid for the last few minutes of cooking to let the sauce thicken.


Tuesday, 2 September 2008

My Turn! Think Spice... Think.... Fenugreek!

Oooo - exciting for me - I'm hosting my very first food event!

Well, technically it isn't my food event, Think Spice... is the brain child of the wonderful Sunita of Sunita's World. But I do get to choose the spice... and do the round up... so I think maybe this month it is mine, just a little!*

The spice I have chosen for this month's entry is fenugreek. Also known as methi, fenugreek is a common spice in Indian cooking - and one of the oldest medicinal spices. It was used by the ancient Egyptians for embalming - but I really would prefer no entries of that order!


Fenugreek seeds can be bitter, and should be roasted before grinding to deepen the flavour and knock off the bitter edge. The flavour is powerful and bittersweet - and can be used in sweet as well as savoury dishes. (Apparently it is the main ingredient in imitation maple syrup, though I can't vouch for that one myself!) It is also a popular addition to baked goods.

Healthwise, fenugreek is packed full of protein - it's actually a legume as well as a spice! It's a digestive aid, and often taken by breast-feeding women to encourage milk production. And speaking of breasts - apparently it is also taken as a breast enlarger (sorry guys!!) and there are links to it actually working to prevent breast cancer!

Oh yes, and it is known to ease menstrual cramps and act as an aphrodisiac!! Common people, what are you waiting for??

I've been using fenugreek for years when creating curries - but it has only been in the last year or so that I have come to appreciate its individual flavour, and allowed it to take more of a front seat in my cooking. Now I admit - my reasons for choosing fenugreek are twofold. First of all, I want to bring this lovely spice some more publicity... but secondly... and more sneakily... I really want to see more recipes using fenugreek - and can't wait to see the round up!

Right, so here we go with the rules!

  1. Post your fenugreek recipe on your blog before the 28th September. Ideally the fenugreek with be a dominant flavour in the recipe - not just part of a blend!
  2. You can use fenugreek seeds, ground fenugreek or dried fenugreek leaves in your dish.
  3. Include a link back to this post.
  4. Email me your entry with your name, a picture,if any (250 pixels wide, height does not matter) of your dish and the permalink of your recipe by or before the announced deadline to kittieskitchen [at] googlemail [dot]com.
  5. Non -Bloggers are also welcome to join in the fun. E-mail me your entry with a picture to kittieskitchen [at] googlemail [dot]com
  6. The round ups will be posted during the first week of October.

Can't wait to see your entries!


* I do actually have a food event in mind that would be all mine! And obviously fabulous! So as long as this doesn't put me off... watch this space :)

Monday, 16 June 2008

Think Spice: Wasabi Fried Beef with Ginger Crisps

This month Think Spice is hosted by Krishna of Cooking from A to Z and features wasabi. It's a great choice - I can't wait to see the different dishes that come out of the round up! Since the first time I ate sushi I've loved wasabi - but I've never really used it in cooking. Krishna gave us a couple of vital wasabi hometruths:

Wasabi isn't horseradish!
I did know that one! Although... it is from the same family (the Brassicaceae if you're interested) and is often called Japanese horseradish!

And not only isn't wasabi horseradish - often it isn't even wasabi!! The worst of the pretenders (supermarket tubes!) is no more than a mix of horseradish+mustard+food colouring - and even the restaurants generally cheat away from the real thing.
Nice! I did not know that!! Apparently it's because wasabi loses its potency very quickly - so horseradish is added to give the 'nasal burn'... And true enough - I check my wasabi powder - only 10% real!!

I have another wasabi fact to add to the mix:

Wasabi is neturalised by ginger.
Yep, so you can get a huge lump of it, mix it in with your sushi and soy and feel your brains explode for as many seconds as you can bare... Through streaming eyes, find a few slices of pickled ginger and ease them past your burning lips. Chew, relax and feel the wave of ginger juice calm the burn!

So the next time you're eating sushi - don't add the ginger to the sushi 'bundle', but use it as a palette cleanser between pieces!

Anyway, with this month's offering I couldn't resist a return to my deep fryer. Beef marinated in ginger, mirin and soy, with a crunchy wasabi coating. Served with crispy ginger slices to protect against the wasabi! (Not that it was needed - I think next time I'd probably double the wasabi powder used... But I do like my food hot, so let personal taste drive your choice on this one!)

This made a great appetiser - but would also work well as a light lunch with a salad!

Wasabi Fried Beef with Ginger Crisps


  • 4 tbsp corn flour
  • 1 tbsp plain flour
  • 1 tbsp wasabi powder
  • 200g thick beef steak
  • 3 tbsp soy sauce
  • 3 tbsp mirin
  • 1 tsp toasted sesame oil
  • 2 tbsp finely grated fresh ginger
  • 1" fresh root - very finely sliced
Mix the marinade...
In a bowl big enough to take the steak, mix together the mirin, soy, sesame oil and ginger

Prepare the steak...
Slice the steak against the grain into slices about 5mm each. Add the beef slices to the marinade, cover and refrigerate for at least an hour.

Lovely steak!

In a food bag, mix together the two flours and the wasabi powder. Once the steak has marinated, strain the beef to remove the excess marinade (I was happy leaving the grated ginger in the meat - feel free to get rid of it if you want :)

Put the strained beef strips into the bag and mix thoroughly so that the meat is completely covered with the flour wasabi mix. Shake off the excess and leave the beef to sit for 10-15 minutes to allow the flours to bind with the marinade.

Heat the Oil...
Eeek! I don't have a real deep fryer, or a thermometer... so I can't give you an exact temperature. You want it really pretty hot though - ideally we are just crisping up the corn flour mix - not cooking the beef through!

Make the Ginger Crisps...
Carefully drop the ginger slices into the hot oil. Watch for them to turn golden, stirring occasionally. Remove from the oil and set onto some kitchen roll to drain.

Fry up the Beef...
Cook the beef in two batches to ensure there is enough space for it. Gently drop the beef into the hot oil, stirring immediately to separate the slices. Cook for 30-40 seconds - until the flour is crispy, remove from the heat and drain on kitchen roll. Give the oil a minute to come back up to heat before going the second batch. Don't over cook these - as they will continue to colour when drained... But if you *really* hate pink meat then give them up to a minute to ensure brownness!

Serve!
Serve with the ginger crisps scattered on top. I didn't feel that they needed dipping sauce, but if you really want to then keep it simple - there are already a lot of strong flavours going on in there!

Friday, 25 April 2008

Think Spice: Spiced Peach Cobbler

My submission to this month's Think Spice, which is being hosted this month over at Canela and Comino. The first time I ever entered Think Spice (ok, ok, so this is only the second time!) it was Think Spice, Think Garlic - and an easy one for me - I go through bulbs of the stuff every month. But this month it is Think Cloves - a much trickier theme!

In keeping with my store cupboard challenge, I decided to make a spiced fruit cobbleresque pudding to use up the tins of mango, peaches and apricots I had in my cupboard... It was not to be however... two out of three of my tins were out of date. (One by over a year... oops... I didn't even realise tinned fruit went out of date!!) So instead this became a mini-cobbler (cobblerini?) spicy with cloves and red chilli, with a crunchy, not-too-sweet topping!

Spiced Peach Cobbler(ini)


This made one small cobbler - enough for two. But there wasn't enough fruit in it for me, so I would add a lot more!!

For the filling:
  • 1 tin peaches in light syrup
  • 1 red chilli, cut in half
  • 3 cloves
  • Zest of 1 lime
For the topping
  • 1/4 cup brown sugar
  • 1/4 cup rolled porridge oats
  • 1/4 cup wholewheat flour
  • 1/4 cup almonds, roughly chopped
  • 1/2 tsp baking powder
  • 50g butter, very cold, cut into cubes
  • 1 egg
  • a splash of milk
  • 1/2 tsp cinnamon
To make the filling...
Strain the peaches from the syrup, and place the syrup into a saucepan. Add the chilli and cloves, bring to the boil and leave to simmer for 15 minutes. Add the peaches and lime zest and simmer for another 5 minutes.

Remove the peaches and place into a large ramekin, then spoon over some of the syrup - making sure not to add any of the cloves or chilli!!

Prepare the topping...
In a food processor, blitz all the ingredients together until the butter is in small pieces.

Spoon this mixture over the peach filling.
Make it up!
Place ramekin into a preheated oven (180c) for 40-45 minutes - until a skewers comes out clean from the middle.

Serve with custard!


Thursday, 10 January 2008

Home-made roasted garlic pasta

Yum! I made this to use some roasted garlic - and was really please with the gorgeous silky pasta result! I served it with a roast garlic ragu - the flavours were fab together! But I think it would work just as well with very basic sauces - maybe even some good olive oil with some dried red chilli! If you don't have a food processor, you can make this by hand, but make sure you knead it until it's silky!

I love garlic - so was very chuffed to see that
Sunita from Sunita's World blog has chosen "Garlic" as her choice this month for her Think Spice... Think... event. I'm sending this over to her now - hope she likes it!


I think this made enough for about 6. It's always difficult to say how many 'normal' portions it would cover, as Boyfriend always eats enough for at least two and occasionally 3!

  • 500g strong white pasta
  • 4 whole eggs
  • 4 egg yolks
  • 1 head roasted garlic
  • Semolina (durem) flour for dusting

  1. Using a food processor with a dough blade, pulse the flour, eggs, and cooled roast garlic until it resembles large breadcrumbs. At this stage you may want to add a spot more egg white (or water) if the mixture looks dusty, or a bit more flour if it looks too wet.
  2. Turn on the processor and allow to turn for 2/3 minutes until the dough is shiny. (Alternatively do this by hand-kneading)
  3. Turn out the dough and continue to knead by hand for a further 1/2 minutes.
  4. Wrap dough in clingfilm and allow to rest in the fridge for an hour.
  5. Remove dough from fridge and cut into 4 pieces - keep one piece out and make sure you cover up the others so they don't dry out.
  6. I use a pasta machine to make my pasta, but I'm sure you could roll it by hand if you had the time or inclination ;)
  7. Roll the piece of dough into a ball and flatten slightly.
  8. Pass through the pasta machine at it's thickest setting, then fold each end in towards the middle (folding it at the 1/3 way point) to make a rectangle. Lightly dust with durum flour.
  9. Pass this through at the same setting, the repeat folding process.
  10. I usually do this 7 times - it is one of the main techniques to ensure really silky pasta!
  11. After the 7th pass through, don't fold the dough - but reduce the pasta machine setting, lightly dust, and pass though.
  12. Repeat this, reducing the machine setting each time, until you have the thickness you are looking for (Usually 1/1.25mm for tagliatelle type pasta)
  13. To make tagliatelle, cut the length of rolled out dough into sections about 25cm long.
  14. Dust both sides of the the dough and roll up.
  15. Using a sharp knife, cut the roll into the pasta width required, then separate.
  16. If using immediately, place onto a plate, and cover with a damp cloth while you finish the rest of the dough. Alternatively,you can hang it to dry for 6-8 hours (must be brittle and snap easily) then store it in an airtight container for up to one month.
  17. How long the pasta will take to cook depends on how thin you rolled it - remember fresh pasta takes much less time to cook than dried - check it after 2 minutes. Use lots of well salted water and a large pan to give the pasta lots of room to move. I heard on a TV show recently that the Italian rule of thumb is for every 100g pasta, use 1 litre water and 10g salt!