Wednesday, 27 August 2008

Nice n' Spicy, Easy Peasy, Leftovers Curry!

I was looking for a space in my bulging freezer the other day when I found a container of dark roast turkey meat - left over from Christmas!!

I had been planning on getting a take out curry that night - but figured with the meat cooked, I could knock one up in the time it would take to deliver. With the added bonus that I could make it exactly how I wanted it and keep it as healthy as possible!

It turned out really really good. The addition of tamarind and fenugreek added a special edge to the other spices. And because the meat was already roasted, it soaked up the gravy and took on a lot of flavour. Best of all - it was ready in 20 minutes!

So here we have it, my nice n' spicy, super-speedy, easy-peasy leftover curry!

Leftover Roast Dinner Curry

Ok, so maybe not the prettiest picture in the world - but it tasted goooooood. And isn't that the important thing?? ;)
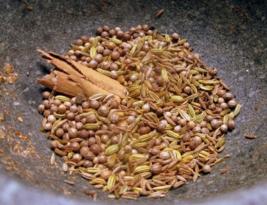
  • 1 tsp fenugreek leaves
  • 1 tsp black mustard seeds
  • 3 green cardamom pods, lightly crushed
  • 1 tsp fennel seeds
  • 3 dried red chillies, roughly torn up
  • 1/2 tsp turmeric
  • 1 tsp chili powder
  • 1 tsp ground cumin
  • 1 tsp ground coriander
  • 1 onion, finely chopped
  • 2 cloves garlic, crushed
  • 1" piece ginger, finely grated
  • 1 tin chopped tomatoes
  • 1 tbsp tamarind paste, mixed with 300 ml water
  • left over roast turkey or chicken
  • ghee or oil to fry
  • salt to taste
Heat ghee in a heavy-based saucepan

Add all the seeds and the dried chillies and fry for a minute or two until they smell really good! Add the onion, garlic, ginger and fry for another couple of minutes.

Chuck in the other spices, tomatoes, tamarind water and salt and mix well. Put in the meat and cook for 15 minutes, stirring occasionally. If it starts to reduce too much, cover until ready (or add more water ;)

Serve with rice and a smile!


Not only is this an original recipe - but it's an original recipe conceived in about 3 minutes! So I reckon it fits the bill for Lore's Original Recipes event!

Check out the last round up, great stuff Lore!


Culinarty Original Recipe Roundup

Thursday, 14 August 2008

Orzo with Chicken, Chorizo and Aubergine

This is yet another spur of the moment dinner, inspired purely by what I had left in the fridge - namely a pack of chicken thighs and an aubergine. I had to be out the door within the hour too - so it had to be ready in half an hour... and it was!

After the slight confusion from Tuesday's use of the word courgette (zucchini!), I think it may well be wise to explain up front that an aubergine is none other than the North American eggplant. What I didn't know, is that brinjal also means aubergine in India and South African English! (I always assumed it was an Indian ingredient that I couldn't get here!!)

Want more? Well, aubergine and brinjal have etymological similarities, both deriving from Arabic/Sanskrit. (The Sanskrit vatin-ganah begat the Persian badin-gan and badin-gan begat the Arabic al-badinjan and al-badinjan begat the Catalan albergínia and albergínia begat the French aubergine... which us Brits basically stole for our own!)

The North American/Australasian use of eggplant started in the 18th century - when some fruits* were white or yellow, and resembled goose or hen eggs!

Language lesson over for the day - let the recipe begin!

Orzo with Chicken, Chorizo and Aubergine

Makes loads!!
  • 6 chicken thighs, bone in and with skin
  • 1 aubergine (eggplant!)
  • 100g chorizo, chopped into smallish chunks
  • 1 tin chopped tomatoes
  • 1 clove garlic, minced
  • 250g orzo
  • 1 tsp paprika
  • cayenne pepper for seasoning chicken
  • 250ml water or chicken stock
  • oil to fry
  • salt and pepper to taste
Prepare the Meat...
Heat oil in a hot pan. I used olive oil, tempered with some ground nut to reduce the smoke point. Throw in the chorizo and fry for a minute or two. Keeping it moving so it doesn't burn. Ideally we want some crispy edges... and for some of the tasty spicy oil to be released. Remove the chorizo from the pan and turn up the heat to very hot

Cut off any excess fat or skin from the chicken, leaving enough on protect the meat when searing. Season with salt and cayenne pepper.

When the oil is hot, carefully lay in the chicken thighs, skin side down. Allow to sear for 2/3 minutes - the skin should be nicely crisped and browned, but not burnt. Remove to a plate and reduce the heat to medium.

Prepare the Pasta...
In a saucepan, mix the orzo with the tomatoes, garlic, paprika and seasoning. Top up with the chicken stock or water and bring to the boil. Place the chicken thighs into the pan skin-side up, cover and simmer for 10-15 minutes - or until the chicken is cooked through.

Prepare the Aubergine...
Meanwhile, cut the aubergine into 1" chunks and add them to the frying pan that the chicken/chorizo was cooked in. Fry until browned, but don't overcook!

Serve!
When the pasta/chicken is ready, mix in the aubergine and serve. Preferably with a large glass of red!


Oh - I seem to have a three in one foodie event situation again!

As it cost about £3.70 (just over $7 ?) for the whole thing, I'm going to make this my second submission to Frugal Fridays! And if it's not quite as healthy as last week's entry - I still don't think it's doing too bad!!

Although almost all of my recipes are my own, I've singled this one this week to send to Lore at Culinarty for her Original Recipes event... It was just so yummy, I felt it had to be shared!

It's the first time I'd cooked with orzo - and I'm definitely going to be stocking up. I'm sending it to Ruth at Once Upon a Feast, who is hosting Presto Pasta Night this week!


Culinarty Original Recipe RoundupPresto Pasta Nights

Frugal Fridays


* oh yeah, did I mention they are fruits not vegetables?!

Friday, 18 April 2008

Thai Green Curry with Chicken and Peppers!

Well, here we go - that ubiquitous favourite, popular in restaurants, gastropubs and even my local Chinese takeaway...

Ladies and Gentlemen, won't you please pick up your cutlery for...

Thai. Green. Chicken. Cuuuurrrrrrrrry!!!!!!!!!

But seriously - this is one of those dishes where there is a reason why it is so popular. It is gorgeous, a perfect fit for the four fundamentals of Thai cuisine: hot, salty, sweet and sour.

And ever so easy to make (especially with the help of my old friend Mae Ploy!) With a food processor, making curry paste is one of the easiest and quickest things in the world. However, it can also get expensive if you have to buy all the ingredients from scratch, and many pre-made Thai curry pastes are excellent, quick and cheap! (I'm starting to feel like Delia now... must shut up!) Anyway, enough of the self-justification for buying something that isn't completely 'from scratch' ;)

Thai Green Curry with Chicken and Peppers!


Serves 4-6 depending on portion size!
  • 4 chicken breasts, diced
  • 1 red pepper
  • 1/2 courgette, cut into chunks and fried over a very hot heat for a few minutes
  • 1/2 aubergine, cut into chunks and fried over a very hot heat for a few minutes
  • 3 lime leaves, shredded
  • 1 clove garlic, crushed
  • 1" piece ginger, grated
  • 3 tbsp curry paste
  • 1 400ml tin coconut milk, or two small ones
  • Oil to fry
Heat oil in a hot wok, add 2 tablespoons of curry paste and fry for about 30 seconds. Add the chicken and fry until opaque. At this point add the ginger, garlic, lime leaves, any solids from the coconut milk and the remaining paste. Fry for another couple of minutes.

Stir in the remaining coconut milk and the red peppers, then turn to a simmer. Allow to simmer uncovered for about 6 minutes - until the peppers are slightly softened, but still have a good 'bite'.

Add the aubergine and courgette, simmer for another couple of minutes and serve over steamed rice.

How easy was that!


Tuesday, 1 April 2008

My First Daring Bakers Challenge: Peter Reinhart's Pizzas!

My first Daring Bakers challenge - and what a week for it to be in! I've been hectic trying to sort out my itinerary and organising work stuff. So I'm a day late in getting this posted - apologies Rosa!

Rosa of Rosa's Yummy Yums is the host of Daring Bakers this month, which is to make Reinhart's Basic Pizza dough with our own toppings. This idea was originally from Sher who tragically died earlier this year. She was supposed to be co-hosting with Rosa for this October challenge. Rosa honoured Sher by using her idea, and hosting the challenge alone.

I have completed the challenge - and, wow, I did love it. The crispiest pizza crust imaginable, with just enough of a chew. And so easy to make - a bit of prep the night before, a couple of hours rest, then only minutes to prep and cook each pizza at the very top of my oven.

The tossing took a bit of practice. I would say probably more practice than I've given it so far. I draped it over my fists, and did a few tentative moves... by which point it was basically ready! Paper-thin in the middle, but with no tears. The edges were a fair bit thicker - I evened this out by picking up the edges and gently shaking the dough towards the middle. Scientific? Maybe not... but it was successful! I loved this dough - it was as good as any pizza I've paid money for. And substantially better than my last attempt - which was about an inch thick when it came out the oven!!

I had a mini-pizza party with a few friends, and decided to go down the traditional route. A slow cooked tomato sauce, made with smoked garlic and passatta, a touch of dry herbs for depth, and a dab of sugar for balance. Soft jamon serrano, crisped up at the exposed edges; spicy salami against the crunch of sweet red peppers; caramelised red onions, finished with a dash of balsamic truffle syrup; and herby roasted chicken thighs, crispy skins sneaked into hungry mouths before the dough was ready. A mix and match of pizza toppings, each pizza different from the last.

Five pizzas, several beers and a couple of bottles of wine later - satiated and full, we fell asleep on the sofa. A success, methinks!

Spicy Salami with Sweet Red Pepper


Roast Chicken with Caramelised Onions and Mushrooms


Jamon Serrano with Mushrooms, Rocket & Slow Roast Tomatoes


BASIC PIZZA DOUGH
From The Bread Baker’s Apprentice by Peter Reinhart Makes 6 (25cm) pizza crusts

I couldn't find my instant yeast, so I improvised by activating dried yeast before chilling.
  • 4 1/2 cups of flour, chilled
  • 1 3/4 teaspoons of salt
  • 1 teaspoon of dried yeast
  • 1/4 cup of olive oil
  • 1 cup of ice water
  • 3/4 cup tepid water
  • 1 tablespoon of sugar
  • cornmeal for dusting
DAY ONE
1. Mix together the yeast, tepid water and sugar, and leave for 10 minutes until foaming. Pop in the fridge until cold. Mix together the flour, and salt in a big bowl. Add the oil and cold water and mix well in order to form a sticky ball of dough. On a clean surface, knead for about 5-7 minutes, until the dough is smooth and the ingredients are distributed. Cut the dough into 6 equal pieces. Sprinkle some flour over the dough. Make sure your hands are dry and then flour them. Gently roll each piece into a ball.

2. Transfer the dough balls to the lined jelly pan lined with parchment paper and coated with cooking spray and mist the tops generously with cooking spray. Cover with plastic. Put the pan into the refrigerator and let the dough rest overnight or for up to three days.

DAY TWO
3. Remove the desired number of dough balls from the refrigerator. Place the dough balls on a floured surface and sprinkle them with flour. Dust your hands with flour and delicately press the dough into disks about 1.3cm thick and 12.7cm in diameter. Sprinkle with flour and mist with oil. Loosely cover the dough rounds with plastic wrap and then allow them to rest for 2 hours.

4. At least 45 minutes before making the pizza, preheat the oven as hot as possible (500F/260C).

5. Generously sprinkle the back of a jelly pan with cornmeal. Flour your hands. Take 1 piece of dough by lifting it with a pastry scraper. Lay the dough across your fists in a very delicate way and carefully stretch it by bouncing it in a circular motion on your hands, and by giving it a little stretch with each bounce. Once the dough has expanded outward, move to a full toss until it reaches the shape you want (about 9-12 inches/23-30 cm in diameter) place it on the back of the prepared jelly pan.

6. Lightly top it with the toppings of your choice. Slide the garnished pizza into the oven and bake for about 5-8 minutes.

7. Once the crust is cooked and the cheese is browned, take the pizza out of the oven and transfer it to a cutting board or your plate. Allow them to cool 3-5 minutes before slicing or serving.

Tossing!

Oh yes! And we were supposed to get some pics of us tossing the dough. Well. I've never seen so many awful photographs of me in my life...


Tossing the dough? Or dropping it... It's an action shot one way or t'other ;)

As you can see, I'm communing with my dough in a big way.... Mmmmmmm.... I luuurve my pizza...........

Hey, who cares - they tasted fab!

Thanks to the awooga man for being photographer extraordinaire - and hi to the awooga man's mum - thanks for reading!
Monday, 17 March 2008

Moroccan Marinated Chicken with Tabbouleh

I'm a bit late in actually publishing this one - considering I started it at the same time I wrote up my Tabbouleh recipe! And it is barely even a recipe - more just a bringing together of components!

This was my effort for last week's girlie night in - a taste of summer despite the rain that poured down for most of the week...

Moroccan Marinated Chicken with Tabbouleh


  • Chicken breasts - one per person
  • chermoula - one tbsn per person
  • a little olive oil for frying
  • tabbouleh - as much as you want!
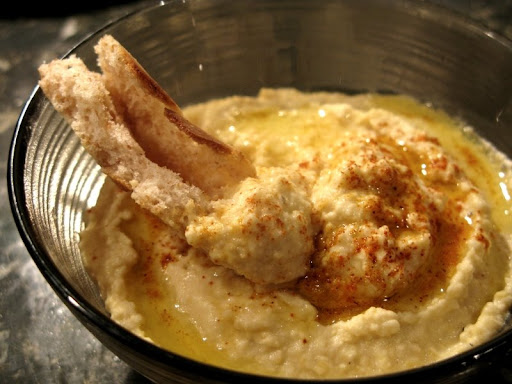
  • optional extras - lightly toasted pita bread, hummus, wedge of lemon
Place the chicken breast between 2 sheets of clingfilm and use a rolling pin/ jam jar/ bottle of wine/ shoe to flatten it out to about 2 cm thick. (Though don't really use a shoe...)

Spread the chermoula onto the chicken breasts and massage in. (Garlic and chilli alert: wash your hands straight away! Or try this tip - massage a little olive oil into your hands and nails before you handle the sauce - this will stop the chilli/garlic oil being absorbed into your skin)

Cover and place in the fridge for at least a couple of hours - I left mine overnight.

Heat a little olive oil over a medium heat and fry the chicken for 2/3 minutes each side. Make sure there is no pink left - but be careful not to overcook or it will go tough and stringy!

Serve the chicken on top of the tabbouleh, with a wedge of lemon and some hummus and pita bread.

Sunday, 9 March 2008

Home Coming Thai Noodle Soup!

I survived!

I have just returned from a week's skiing in Obertauern, Austria - and have made it home pretty much in tact... although I do have some very attractive bruises. Especially on my butt from where A pushed me off the chairlift... (apparently it was an accident...)

So now I'm home, washing done, cats treated and mollycoddled to make up for the neglect. It's after midday, and I'm in my PJs, about to start looking through my Google reader to see what new fabulous recipes have been concocted in my absence. (Current unread sat at 237!)

But before I do, here's a quick post of some thai noodle soup I made last night when I got home. After the stodge of Austrian cuisine, I was desparate for something light and spicy! Which isn't to say I didn't enjoy the stodge - more to follow on that later (homemade cheese spatzel with roast onions anyone??)!
...
...
...
Oops... I got sidetracked! And now it's no longer Sunday, but Monday night - and I have even survived the first day back to work! Still not had a chance to catch up on my food blogs though...

Anyway - back to the recipe... and I'm going to send this over to Ruth at Once Upon a Feast for Presto Pasta Night!


Thai Chicken Noodle Soup


Makes one huugge bowl - or two normal sized ones...
  • 1 large banana shallot, halved and finely sliced
  • 1 small clove garlic, crushed
  • 1/2 teaspoon ginger, grated
  • 1 tbsp thai curry paste (I used green, but anyone would do!)
  • Half a red pepper, sliced
  • 1 chicken breast, finely sliced
  • Handful of mushrooms, quartered
  • 1 small courgette, sliced and halved!
  • 165ml tin coconut milk
  • 350ml chicken stock
  • 1 portion rice noodles
  • 1 thai red chilli, sliced
  • Small handful cilantro, roughly chopped
  • fishsauce to taste
  • light soy sauce to taste
  • lime juice to taste
Heat a small glug of olive oil in a pan, then gently fry the shallot, ginger and garlic for a couple of minutes, then add the mushrooms and thai curry paste and fry til done.

Meanwhile, cook noodles according to packet, drain and rinse.

Chuck in the rest of the veg, the stock, coconut milk and the chicken. Bring to the boil, reduce heat to a simmer, and cook for 5 minutes, or until chicken is done.

Add noodles, taste and adjust seasoning with fish sauce and soy sauce. Dish up and garnish with the red chilli and cilantro and a squeeze of lime juice!

Thursday, 21 February 2008

Chicken & Balsamic Caramelised Onion Risotto

I couldn't think what to cook for the girls coming round last night, then writing up my recipe for Soup Aux Moules somewhat randomly inspired me to make risotto! It was perfect - I could adjust the quantity as required, and I could use the creamy, cheesy ingredients which are usually out of bounds!

I pondered what to make - A doesn't eat anything orange (!) so butternut squash risotto was out of the question and V doesn't do seafood. Two of my standbys were struck down! I thought about something with chorizo, but couldn't make it click into a whole meal. So in the end I decided to make something completely different...

Chicken & Balsamic Caramelised Onion Risotto
Served 4 hungry gals!
  • 1 rotisserie chicken, meat taken off the bone and chopped into bitesize pieces
  • 2 large onions
  • 2 cloves garlic, crushed
  • 1 tspn sugar
  • 100 ml balsamic vinegar
  • olive oil to fry
  • 500g risotto rice - I usually use Carnaroli, but the store was out do I used Arborio instead - with good results!
  • 1 litre stock - I used some of the stock I made from the roast turkey we had for Christmas - its flavour was perfect for this!
  • 200 mls white wine
  • 100g finely grated parmigiana - plus extra for shavings
  • 1 tbsp chopped fresh tarragon
  • salt and pepper
Half the onions, and thinly slice 3/4 of them. Pour a decent glug of olive oil into a frying pan, and heat over the smallest heat possible. Chuck in the onions and toss to coat. Fry slowly, slowly, slowly, stir every 5 minutes or so. After the first 5/10 minutes sprinkle over a good pinch of salt. This helps draw the moisture from the onions. When they start getting brown and sticky (after half an hour or so), pour in a couple of tablespoons of balsamic vinegar, and sprinkle the sugar over. Continue to cook til absorbed. Repeat this step as required. In the end I think I used about 100ml BV, and let them caramelise for over an hour. But the end result was gorgeous, sweet, sticky onions which matched the risotto perfectly!

Right - hope you're still with me!

You can make the caramelised onions in advance - just keep them in the fridge for up to a week until you need them. They are also fabulous with cheese, or spread on garlicy crusty bread... so beware them may not last long enough to make it into the risotto!

In a saucepan, heat the stock thoroughly and keep it at a simmer - when you ladle it into the risotto it should not be cold.

You should have 1/2 onion left from the caramelising process. Finely chop this.

Heat a glug of olive oil over a medium heat, then sauté the onions for 3/4 minutes. Add the crushed garlic and fry for another minute.

Add the risotto rice, and continue to fry, ensuring you keep the rice moving at all times. After a few minutes it will start to go translucent round the edges, and also makes a slight cracking sound. (Which sounds a bit weird, but you can hear the tone of the frying change!)

Add the white wine to the pan, and keep stirring until all the alcohol has evaporated off/been absorbed.

Add a ladle of the stock and stir until it is absorbed. Repeat. After 15 minutes, test the rice for doneness - it should still have a bit of bite, but have lost its chalkiness. Add the tarragon now. If the rice still isn't cooked, when the stock runs out, use boiling water to finish it off.

Once the rice is done, turn off the heat, mix in the chicken, grated parmesan, and caramelised onions. Put a lid on it and leave it to sit for at least 5 minutes. This is similar to resting meat - and gives the rice a chance to relax and absorb excess liquid.

Serve in big bowls with parmesan shavings on the top!

Tuesday, 29 January 2008

Baked spicy saffron macaroni!

I can't believe I've got yet another pasta dish for Ruth's Presto Pasta Night over at Once Upon A Feast! I'm sure I've cooked more pasta this month than usual :) But it tastes so good, and is so comforting on a cold January evening!

Anyway, as a variation on a theme, this week I've prepared a spicy pasta bake. It was based on an episode of Come Dine With Me (one of the best Sunday afternoon reality/cookery shows EVER! If you haven't seen it, you're missing out...!) I think the woman decribed it as a baked pasta paella!

Oven baked spicy macaroni


  • 500g cherry tomatoes
  • 1 red onion, halved and sliced
  • 2 cloves of garlic - crushed
  • 2 tablespoons olive oil
  • 11 oz small macaroni
  • 4 boneless, skinless chicken thighs, quartered
  • 6 merguez sausages (original recipe specified chorizo - but when I saw these in my local sausage shop, I had to have them!)
  • Small handful fresh chopped rosemary (I got mine from my garden - yay!)
  • 300ml chicken stock
  • Pinch of saffron
  • 200g cooked prawns - the original recipe used large raw prawns - but these were what I had!
  • Handful of basil leaves, torn, ready to serve
  • Salt and pepper

Put the cherry tomatoes into a casserole dish and sprinkle with olive oil. Roast in a preheated oven at 220c for 15 minutes. Then add the garlic and red onions, and place the sausages on top then cook until the tomatoes are soft.


Remove from the oven. Take out the sausages, and cut into chunks. Add the macaroni, chicken, and sausage pieces rosemary, stock, saffron, salt and pepper. Mix well and return it to the oven to bake for 30 minutes.

Add the prawns, stir and allow the prawns to warm through for 3/4 minutes. You don't want to put it back in the oven at this point or the prawns may go tough.

Sprinkle with basil and serve.

Tuesday, 15 January 2008

Lemony spiced chicken!

Now, I usually like to take my time about cooking.... and love dishes that take a while to cook. I don't think it's because I have so much free time on my hands (I don't!!) but because I generally end up in trouble if I have to think about my timings too much ;) So I prefer slow cook meals where an extra half hour or so really doesn't make any difference!

Last night - inspired by a recipe I saw in a magazine, I decided to have a go at this speedy dinner - 20 minutes from getting through the door to sitting down!

Lemony Spiced Chicken


  • 400g chicken breast meat (I bought mine ready diced, thereby saving even more time!)
  • 400g tin chickpeas
  • 1 lemon
  • 1 onion
  • 1 tsp cumin
  • 1 tsp coriander
  • 1 tbsp tomato puree
  • 250ml chicken stock
  • 200g fine green beans, cut into quarters
  • 250g spinach
  • 2 tbsp olive oil
  • Bread to serve

Use a pot big enough for all ingredients!

I started by halving and finely slicing the onion, then frying over a moderate heat for 5 minutes.
Turn up the heat and add the chicken and fry for another 3/4 minutes until golden.
Add the cumin and coriander and the zest from the lemon, and fry for another minute.
Add the stock, chickpeas and tomato puree, cover and simmer on a low heat for 3 minutes.
Add the green beans and simmer for another 2 minutes.
Add the spinach, recover and allow to wilt for 2 minutes.
Remove from the heat, stir, then add the juice from the lemon.
Serve with crusty bread to mop up the broth!

So what did I think of my speedy effort?? Well, it was very tasty, filling and healthy. And it was a nice change to have something different for a quick meal (my quick meals are usually pasta or beans on toast!).

But I do think the chickpeas would have tasted better if they had had longer in the stock! ;)