




Tuesday, 30 September 2008

RFJ: Sambuca Orange Salmon with Spelt Crackers

Last month Peter won the Royal Foodie Joust with his Halvas, and selected fennel, parsley and dairy for his three ingredients.

I loved Peter's choice - and it took me a while to choose what to make, but in the end I decided on an appetiser of home cured salmon, with crackers and a chunky fennel sauce.


The salmon I cured with orange juice, sambuca and ground fennel seeds. It was the first time I have done anything like this, and I was really impressed by how easy it was - not to mention how tasty the final product was! I used two skinless salmon fillets, that had been lightly smoked.

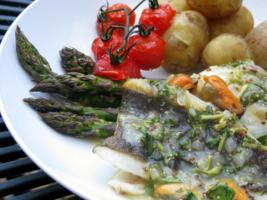
I served the salmon with spelt crackers topped with parsley salt, and a chunky sauce of fennel, orange zest and yogurt. I was a bit concerned about the yogurt sauce as I'm not a big fan of raw fennel. However, the orange zest tempered the anise beautifully - I was really happy with how the flavours came together.

Orange and Fennel Cured Salmon


Inspired by Pixen's recipe here.
  • 2 large fillets of lightly smoked salmon, skinned and deboned
  • 1 tbsp fennel seeds
  • 1 tbsp black peppercorns
  • 2 tbsp coarse sea salt
  • 2 tbsp sugar
  • A shot of Sambuca (or any other anise liquor)
  • 1 orange, halved
Prepare the Rub...
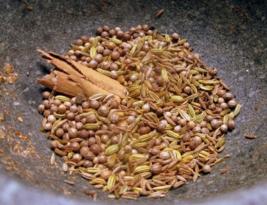
Dry toast the pepper and fennel for a couple of minutes - keep the pan moving, and turn the seeds into a mortar and pestle when they start to smell good!

Let cool for a couple of minutes.

Bash them up until pretty fine, then add the salt and sugar. Give it a bit of a bash - but don't obliterate the salt entirely - leave some bit chunky!

Prepare the Salmon...
Wash and dry your salmon thoroughly - removing any wee bones that are left in there.

Put the spice rub out onto a flat surface, and coat each fillet well. Give it a bit of a rub to get the flavours going!

In a bowl, mix any left over salt mix with the sambuca - and the same quantity of orange juice from one of the orange halves.

Lay one fillet out, and top with slices of orange from the other half orange. Lay the other fillet on top.


Place into a small food bag, and pour in the orange sambuca mix. Squish out excess air, and tie. Now tightly wrap in clingfilm, place in a bowl in case it leaks! And put something heavy on top. I used my mortar... or pestle... whichever part the base is anyway - it's one of those huge thai stone jobs, so pretty heavy!

Cure...
Leave for at least 24 hours - I left mine for about 36, though I probably wouldn't recommend much more than 48.

Turn every 12 hours or so, replacing the weight when you do.

Cured!
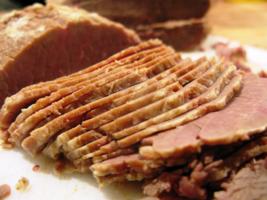
Remove from the food bag, and wash off the salt mix in cold water. Pat dry with paper towel and use a sharp knife to cut finely across the grain.


Parsley Salt

  • 5 tbsp coarse sea salt
  • small handful parsley leaves
  • 1/2 clove garlic, crushed
Preheat oven to 140c.

Put the garlic and parsley into a mini-blender and blitz til smooth. Scrape into a mortar and pestle, then add the salt. Pound until the salt is fine to medium ground, and the parsley mix is thoroughly incorporated.

Tip the mixture onto an oven sheet and spread it out. Put in the oven for 6 minutes, then give it a bit of a stir. Put it back in for another 6 minutes, or until it has dried out, but still green.

Allow to cool, then put back into mortar and pestle, and grind.


Parsley Salt Crackers


 Inspired by Helen's recipe here.

  • 0.5 cup plain white flour
  • 0.5 cup spelt flour
  • 1/2 teaspoon baking powder
  • pinch salt
  • 25ml olive oil
  • water to mix
  • parsley salt
  • 1 egg, beaten
Preheat over to 140c.

Sift together the flour, salt and baking powder, then mix in the oil. Add enough water to make a dough.

Knead for a minute or two, then leave to rest for 15 minutes.

Cut the dough in two, then roll one piece out as thin as you can. Poke marks in it with a fork to stop it puffing up. Brush with beaten egg, then sprinkle with parsley salt to taste.

Cut into what ever shape you like and lay onto a non-stick baking sheet.

Bake for 30-40 minutes, until golden and crispy!


Chunky Fennel Sauce

  • 1 bulb fennel
  • 150ml yogurt
  • 1 tsp orange zest
  • parsley salt, to taste
Strain the Yogurt...
Place a couple of sheets of strong tissue in a sieve and balance on a bowl. Tip in the yogurt and leave to sit for as long as possible to let the liquid strain off. ideally overnight, but at least a couple of hours. If you don't have as long, then spread out the yogurt as thinly as possible to accelerate the process.

Prepare the Fennel...
Remove the fronds from the bulb, finely chop and set aside. Remove any discoloured outer leaves and discard. Finely chop the rest of the bulb.

Put the Sauce Together...
Mix together the fronds and the fennel flesh, and mix with the orange zest. Mix in enough strained yogurt to hold the sauce together. Mix in the parsley salt to taste.


Serve!


Thursday, 25 September 2008

Banana Cupcakes with Chocolate Goo!

I've got a bit of a story behind these cupcakes!

I had some friends round to dinner a few weeks ago and had made some of my 'special' chocolate sauce to go with caramelised bananas and ice cream. However, due to various reasons... (including plastic meltage, and my utter inability to find decent ice cream anywhere!) we decided to go with banoffee pie instead... leaving me with a glut of gooey chocolatey lushness tempting me from the fridge.

My special chocolate sauce is incredibly simple, and sounds a little horrific... but I haven't met anyone yet who doesn't like it. It's perfect for a quick dessert on top of ice cream. Or dip pears in it to pretend you're healthy... ;)

So, the following day I had some bananas going just past ripe and a pot of chocolate goo. Inspired by Dee's banana loaf, I decided to knock together some cupcakes before I went to the pub to meet some friends. And being the good friend that I am, it would have been churlish not to take along a few for them to sample. (Note, banana and chocolate don't go too well with beer ;) So eat 'em first, drink later!)

Anyway, beer drinking tips aside, we were happily sat at the pub and onto our second pint when I remembered about my cupcakes. I handed them out... we had one each... when a guy across the table asked for a taste! As I was feeling slightly sick from all the requisite tasting (see below) I was quite happy to give up mine. Just as well really, as it turns out he has just taken over a nearby cafe and was looking for someone to help out with some real home cooking!

So for the last couple of weeks I've been baking up a storm - and have a whole load of stuff to show you. It's been fun - but I can't tell you how tough it is to bake up a whole gooey chocolate cake, then give it away with barely a taste... Well, except from the bowl, of course! ;)

Chocolate Banana Cupcakes

Makes 12 cupcakes!
  • 3 ripe bananas - this is not the place for green or hard nanas!
  • 1 cup plain white flour
  • 0.5 cups wholewheat flour
  • 0.5 cup soft brown sugar
  • 1 tsp baking powder
  • 1 tsp baking soda
  • 6 tbsp groundnut oil
  • 6 tbsp yogurt
  • 1 tbsp honey
  • 2 eggs
  • 1 tsp vanilla extract
  • pinch salt
Preheat oven to 165c.

Prepare the Batter...
Sift together the flours, baking powder and baking soda, then mix in the salt.

Whisk together the oil and sugar, then beat in the eggs, one at a time. Smoosh up the bananas with a fork and add to the egg mixture along with the vanilla extract.

Add a third of the flour mix, then a third of the yogurt and mix until just moistened. Repeat until flour and yogurt finished!

Line muffin tray with cases, and divide the mixture between them.

Bake!
Bake for 15 minutes, or until a skewer comes out clean when inserted into the middle of one.


For the 'frosting'...
  • 1 tin condensed milk
  • 150g plain chocolate
  • 1 tbsp butter
Put the condensed milk into a bowl over a pot of simmering water. Gently bring to the boil and cook gently for 5 minutes.

Taste a wee bit of the condensed milk to make sure it's ok. Is it? Best check again, just to be sure...

Break up the chocolate and add to the milk. Melt it up until you have a gorgeous gooey chocolatey mess.

Probably should taste it again - make sure it's chocolatey and gooey enough. It is? Sure?? Go on, check again...

Add the butter and stir gently until combined. Have another couple of taste tests. Maybe dip in a strawberry or marshmallow... if you happen to have any lying around...

Let it cool a bit, then smear on top of cooled cupcakes.

There should be some left to have with ice cream. Or straight from the bowl - it's your call ;)


I'm sending these cupcakes to three events - two of them new ones to me:
Ben's I Love Baking event, and Fanny's Sugar High Friday!

The third is Lore at Culinarty's Original Recipe event!

I Love BakingCulinarty Original Recipe RoundupSugar High Friday

Thursday, 28 August 2008

RFJ: Double-Dipped Ginger & Orange Oaty Bites

I won, I won, I won! :D


And this morning I got my apron in the post! No pics of me in it as yet (and definitely not in the Greek style!) but I'll see what I can rustle up over the weekend!

The Royal Foodie Joust is a monthly event hosted by Jenn the Leftover Queen. Last month the selected ingredients were Sesame, Seafood and Cilantro - and my submission was voted top - an incredible honour.

As well as the prize of an apron, I was allowed to select the three ingredients to be used for the following month's event. I chose whole grains, ginger and citrus.

Check out all the submissions here - and if you have a food blog, be sure to vote next week!

And here is my submission!

Double-Dipped Ginger & Orange Oat Cookies

  • 1 orange, juice and zest
  • 2 tbsp runny honey
  • 2 cups rolled oats
  • 2 cups wholemeal flour
  • 2 cups sugar
  • 225g butter
  • 0.5 tsp bicarbonate of soda
  • 1 tsp baking powder
  • 1 tsp ground ginger
  • 75g crystalised ginger, chopped
  • 100g plain chocolate
Heat your oven to 175c.

Prepare the Cookies...
Mix together the oats, flour, sugar, baking powder, ground ginger and chopped crystalised ginger.

In a pan, melt the butter with the honey, orange zest and juice. Once completely melted, add the bicarbonate of soda, stir to mix in, then add to the dry ingredients. Mix well - the mixture should be crumbly, but hold form when squeezed.

I wanted to make small bites rather than huge cookies, so I rolled these into small balls about an inch an a half across. I put them on a lightly greased baking sheet and pressed to flatten slightly. Make sure you leave room for them to spread!

Bake the Cookies...
Pop in the oven and bake for 12-15 minutes - do not allow to colour too much!

Take them out of the oven and allow to cool before attempting to move them.

Dip the Cookies...
Meanwhile, melt the chocolate in whatever manner you see fit. (Not by chucking it in a pan over direct heat. Trust me - this never works!)

Once the cookies are cooled, dip their bases into the chocolate. Drip off the excess and put onto a flat surface. Put into the fridge until set.

I wasn't happy by the amount of chocolate that clung to my cookies - so I repeated this step - hence double-dipped!

Serve with a good strong coffee. Not for children!

Thursday, 19 June 2008

Taste and Create: Cinnamon Sugar Donut Muffins

Now this is food blogging commitment! It's almost midnight and I've just finished packing to go on holiday tomorrow. Earlier today I realised that the deadline for Taste and Create is whilst I'm away... Q mad kittie rush to find a recipe that a) I can make in less than an hour and 2) I can make with all the ingredients I already have at home. The fact that 3) it tasted great was a fantastic bonus!!

My challenge was easier in that I was paired with KJ from A Cracking Good Egg - who was my match last time I joined in! So I had already had a good look through her blog! The thing I really wanted to make - crumpets - was outside of my time possibilities, so instead I chose these gorgeous Cinnamon Donut Muffins. They are so tasty - I've just devoured two with a cuppa - the perfect wind down after a manic evening!

Following KJ tip I adjusted the baking powder down to 1 heaped teaspoon. And as I was out of brown sugar I used white. And the results were well worth the rush! Moist, squidgey muffin with a crunchy cinnamon topping. All in 25 minutes - and hardly any washing up!

Thanks for another great recipe KJ!

Cinnamon Sugar Donut Muffins


Look at these - how much will my workmates love me tomorrow!!

But this one was all mine!

Tuesday, 22 April 2008

Taste & Create: Focaccia

This is my entry for this month's Taste and Create, which is hosted by the lovely Nicole over at For The Love of Food! This month I have been matched with KJ over at A Cracking Good Egg. I spent a fun couple of hours looking through her archives, and eventually narrowed my choices down to the luscious Flourless Chocolate Cake, her take on French Onion Soup, homemade crumpets, or Fantastic Focaccia. Due to serious overindulgence at the weekend, I've had to forgo the chocolate cake, I couldn't find my crumpet rings (I'm sure I had something like this before!), then arbitrarily decided on Focaccia between the last two! I'm definitely keeping these other recipes in my to-make list!

(I've got a rotten head cold just now - which seems to be adversely affecting my writing ability. Apart from the fact that I need to retype every other word due to misspelling (do colds cause the hapless victim's fingers to swell??) I also can't think of anything remotely interesting to say! I'm off work and watching daytime telly - right now, I'm watching a 6ft tall nanny being transformed into SJP. Oh dear, has it really come to this - I'm regaling you with what I'm watching on TV??? I should probably delete it, but bet I probably don't ;)

Ok, ok, stream of consciousness typing ends here!

Focaccia


This recipe was really easy to use. I had to make a couple of alterations - I used 1.5 tsp of active dry yeast, activated in the tepid water with 1.5 tsp of sugar instead of the fresh yeast.

I also let it rise slighty differently - I placed the runny dough into the greased baking tin before a first prove for 40 minutes or so. I then used an oiled spoon handle to push down the dough and create indents in which the olive oil would run. I then recovered it and left it for another half hour. Just before baking I drizzled some extra virgin olive oil over the surface and sprinkled with maldon sea salt.

The resulting bread was really tasty - with a lovely open springy texture - I'm looking forward to trying it again with some different toppings!


Monday, 7 April 2008

The Intrepid Baker Continues... Pita Breads!

Hmm...

Good start to a post?? Maybes not.

Hmmmm... Ok, so it appears this is how my post wants to start!

Well, following the success of my naan bread and berber pizza crust, I do believe I was starting to get, well, a bit cocky really! And following a craving for home-made hummus, I decided to go the whole hog and make the pitas from scratch too!

I checked out a few recipes, then decided on the amalgamation of recipes I was going to use to bake my pitas. (Hmmm... the Intrepid Baker suddenly realises that her inability to follow any recipe as it stands may be at least partially to blame for baking related issues!)

I got my huge tub of yeast from the fridge and activated it as I had before. I decided on a mixture of whole-wheat and white flour - attempting to be healthy? I did read somewhere that there is nothing special about pita bread recipes - it is the manner of baking that causes them to puff and swell in that fabulous way.

So the yeast was activated; the flour sieved; dough kneaded for 12 minutes (!!!), and left to double. So far so good! Once dough was doubled, I rolled them into thin oblongs, covered with a damp cloth and left to rise for another 15 minutes.

It all seemed to be going according to plan... until it came to the baking of the breads. They are supposed to be cooked in a very hot oven, on hot baking sheets (I think a oven stone would be ideal - but I don't have one...)

So the oven was smoking hot, when I realised I had already put the breads onto the cold baking tray. Doh. No worries, I had used parchment paper, so lifted them off, heated the trays before putting thim into the oven. However, hot oven, hot trays, small kitchen and no available work-surface resulted in several burns to the wrists... Note to self, get bigger kitchen. Or oven gloves.

I popped them in and left them for a few minutes. I could hear a really strange noise... The pitas were stuck to the parchment paper... eek! and as they puffed, the paper curled round the pita, the paper was touching the exceedingly hot back of the oven, and burning up!

They all had to go in the bin...

That was two-thirds of my dough, gone in 4 minutes ;) I only had four pitas left to attempt to create something edible!

I'm happy to report, that I did manage to get four, fairly successful pita breads in the end. They puffed up, and tasted good - but I maybe baked them for a minute or two too long, so they were a wee bit brittle at the edges.


This has been a bit of a stream of conscious post, so I won't bother posting the recipe I used. I don't think I have successfully tested it ;) But I test it again, and with some tweaks, hopefully be able to present you with some fabulous pita bread soon!

See, it did puff up in the end!

Friday, 28 March 2008

Naan Bread - from scratch!!

I am not a baker. I've tried, but it really just doesn't come naturally to me. My first ever home-made bread tasted of beer. My bread machine bread could probably be used as a weapon to kill small animals. Flat breads seemed to be just about acceptable - but I wasn't sure if that was due to the lack of yeast, or because I was being supervised by a chef!

Yet, last week, when I was preparing my dough for the berber pizza, something felt a bit different. It started to make a bit more sense. So last night, I put my neck out and decided to make some naan bread... and it worked! It just worked!! No beer smell. It rose as I wanted it to. I burnt a couple... but that's because I got distracted...

I don't know if it is using active dried yeast instead of the sachets. When I see the yeast foaming at least I know something will happen! Or maybe I'm just getting more used to cooking in general...

And so, the intrepid baker presents you with...


Naan Bread


  • 1 1/2 tsp active dried yeast
  • 1 1/2 tsp sugar
  • 1 cup hot water
  • 3 cups white bread flour
  • 1 tbsp salt
  • 3 tbsps ghee - room temperature, so liquid form!
  • 3 tbsps natural yoghurt
  • 3 tbsps melted ghee for brushing
  • garlic salt (optional)
Mix the sugar and yeast with the hot water until dissolved, then leave to stand for 10 minutes until foamy. (Woo hoo - I now know that the hot water wakes the yeast up - and that the sugar is its breakfast!)

Meanwhile, sieve the flour and salt together, add the ghee and yogurt and the activated yeast mix. Mix with a spoon, then by hand until it forms a soft dough, then turn out and knead for 10 minutes. (I even like kneading! It's great seeing the ingredients form a dough... that you just know will work!)

Place dough in an oiled bowl, cover with film and place in a warm place for an hour or so until doubled in size.

Remove from bowl, divide into eight pieces and flatten each one into a round circle - I just used the palm of my hand to do this - you want an uneven surface!

Now, I worked this out as I went through the eight pieces, but I think the best thing to do here, is to make the circles, then cover with a damp cloth for 15 minutes. Oil a baking tray, then take a circle and gently tug it downwards - ideally you want a teardrop pattern. Place this on the tray (you might be able to fit a couple on!). Brush with ghee and sprinkle on a little garlic salt if you like. (Or you could mix a bit of crushed garlic into the melted ghee!) Put it under a medium/hot grill for 2 minutes until puffy and browned. Bring it out, turn, brush with ghee and grill for another 2 minutes on the other side.

Serve immediately!

Anyway, I think I'm getting a bit over-excited with all this baking stuff - stand by for my next baking post... if it stinks of beer, or weighs more than I do, then it could well be the end of the intrepid baker!

Wednesday, 26 March 2008

Taste & Create: Buttermilk biscuits... or scones!

Hello! Happy Easter! I'm back!!!

I actually started this post on the 20th March at 11:47, then decided to finish it over the Easter long weekend... However it was not to be and I ended up achieving exactly ZERO over the whole holiday. Well except a fair amount of whinging... it's fair to say I am not very good at being sick - I may well have had man-flu ;)

I missed Monday's deadline for Taste and Create - but Nicole was lovely and understanding, so here's my entry for this month!

Nicole's blog made for enjoyable browsing - For The Love Of Food. Although it has been in my subscription list since I discovered food blogging in January, it was great to have an excuse to peruse through the archives.

My initial temptation was to make a homemade pizza - something I really don't make enough of... but adore! Specifically the Wing-less Buffalo Pizza with Feta - which is soooo on my to-make list. But I was already making my Berber Pizza for the Pizza Blog Party - and thought that two pizzas in two days may be a little too much (for my waistline if not my appetite!). Another one that was high up on the list was the Tortilla Lasagne - great idea Nicole!

But in the end I opted for the Homemade Buttermilk Biscuits - mainly because I've never made anything like that before (I have been facing my baking fears recently - I think this was my most successful venture!). It was almost aborted - firstly because I couldn't find any buttermilk (not such a common ingredient in the UK, but I finally found some in Sainsburies!) and secondly, when I ran out of flour half way through. But there was enough in my flour shaker to make up the quantities - yay!


See Nicole's recipe here!

This was a great recipe - very easy to follow - and I think it took me about half an hour from starting to getting them out the oven... and about the same length of time for me and two girlfriends to polish them all off! They were flakey and buttery, and gorgeous straight from the oven - I didn't get a chance to try them cold - but I'll let you know next time!

I followed the recipe pretty much as is - except I made the dough in a food processor - pulsing it to get the pea-sized butter lumps, then a couple of times more to mix in the buttermilk. Finally I turned it out onto the floured work surface and continued with the recipe.

Thank you Nicole - I will be making these again!

Wednesday, 23 January 2008

Date and Walnut Loaf

For my Italian cookery course last week I had to take in walnut bread. I looked in various delis, but couldn't find any walnut bread - so decided to take a chance and bake some myself! Now I am not a baker - the only other time I've tried to make bread 'from scratch' resulting in the whole house stinking like a brewery! (although I do use a bread machine from time to time... with ok-ish results)

For these reasons I decided to have a practice go, two nights before my course. I looked up a few recipes, but eventually went for an amalgamation of various things I had read - the key thing I took from the recipes was the ratio of yeast/flour and liquid. I wanted to try using spelt flour - as I think it has an amazing flavour. Due to the fragile gluten structure of spelt, I initially used half spelt with half strong white flour, though in the second attempt I increased the proportion of white flour - you definitely could still taste the spelt!

The second attempt got a second rise too - and definitely was a lot more risen than the first one which I only let rise once.

In both cases, the bread was fairly dense - but very very tasty! In my cookery class I cut it into thin slices and made plum crostini with it. It was utterly gorgeous, and the density worked very well. I will post up the recipe at some time - I have 2 weeks worth of lessons which I haven't even started on yet!

Date and Walnut Loaf


  • 100g walnut pieces
  • 100g dates, destoned and roughly chopped
  • 100g spelt flour
  • 300g plain flour, plus some extra for dusting
  • 200ml warm water
  • 1 rounded teaspoon salt
  • 1 rounded teaspoon quick dried yeast
  • 1 tbsp clear honey
  • 1 tsn roasted sesame oil
Start off preparing the dry mix and the wet mix separately: mix together the flours, yeast and salt in a mixing bowl; whisk the honey and the sesame oil into the warm water.

Pour the liquid into the flour and mix to form a soft dough. You can add more water or white flour as required if it is too stiff or sticky!

Turn the dough out on to a lightly floured work surface and knead for 5 minutes – until the dough becomes smooth and more springy. Try not to overwork the dough - spelt flour has a fragile gluten structure, and will turn too heavy if over-kneaded.

Using your hands, spread the dough out until it is about 2cm thick. Sprinkle with the dates and walnut pieces, then roll up the dough into a 'swiss roll'. Knead for a minute or so to ensure it is all mixed in, evenly distributed, and the the dates and walnuts are all covered in the dough!

Lightly oil the bottom of a mixing bowl, roll the dough into a ball, then turn the dough into it. Cover with a lightly oiled bit of clingfilm and leave to rise for an hour or so - until it has doubled in size.

I read somewhere that dough shouldn't be punched down - that we want to encourage more gas to be produced - not to knock out all the gas we have already managed to get into it. So for the second loaf I made, I turned it out and folded it into an oblong before leaving it for a second proof - it did rise quite a bit better, though that could have been due to the extra white flour in that one... (Make sure you cover with oiled clingfilm for the second rise - about 30 minutes this time)

The picture below was taken just before the second rise.


Meanwhile, preheat the over to about 180°C (350°F).

Once the second proof is over, put it in the pre-heated oven and bake for about 30 minutes. Once ready, the loaf will sounds hollow when tapped on the bottom.

Cool on a wire rack before tasting!