
Thursday, 20 March 2008

Berber Pizza! And a Mini Travelogue...

Three years ago I went for a two week trip to Morocco with a friend of mine. After a few days in Marrakech, Fes, Casablanca, we went on a road trip, driving over the Atlas mountains to the Sahara.

As you can imagine, food played a big part of my trip - and was one of the things I had been most excited about. But I had been somewhat disappointed by the choice in the cities - the ubiquitous cous cous with 7 vegetables along with chicken or lamb tagines seemed to form the bulk of many menus. We did manage to eat well - but it wasn't quite as easy as I had hoped!

Where was the the spice, the variety and the depth of flavours that I had been looking forward to?
As we drove over the mountains, I found it... Berber food!

Our guide took us into the Sahara, where we rode camels through the moonlight to reach our camp. The fire was already roaring when we got there, with some people playing music whilst others cooked dish after dish of stunning Berber fare. It was all vegetarian, and no two dishes were even approaching similar. As different from 7 veg cous cous as you could imagine!

Me and A. We called our camels Dave and Ian. They had really long eyelashes!

That night we slept in hessian Berber tents (you could see the stars through the tent material), snuggled under about six blankets (it got REALLY cold!!). And at about 5am we were woken to watch the sunrise over the sand dunes. Neither words, nor my photograph can describe how beautiful that was.

Sunrise over the Sahara

So we then trekked back through the desert before meeting our guide. We then had a long drive back, stopping to buy carpets (about a third of the price of those in Fes!), visit a film studio and look round a 6th century mud built town.

Like our Berber headware??

So, by the time we got to a silverware workshop we were almost faint with hunger. After a prolonged haggling session and 3 gorgeous purchases later, I had the most welcome invitation of my holiday... our guide informed us that the silversmith and his wife would like to invite us to stay for lunch!

As we sat down I asked what we were having, to which our guide responded... Berber pizza!

I was bemused - there was nothing that I had seen in Moroccan restaurants or cookbooks that even remotely resembled pizza. Then it arrived - a large round calzone type affair. When he cut into it, the juice from the meat poured out - it was one of the best things I ate all holiday!

The original Berber Pizza!

So when I found out that this month's blog party over at Dispensing Happiness was a Pizza Party, and started trying to decide what to make, the idea of Berber pizza popped into my head... and refused to go. Despite the fact I couldn't find a recipe anywhere! Then, after a few hours of detective work, I finally found this recipe. It is called medfouna - which means 'buried', and is basically stuffed bread! I seem to remember being told that they used to cook this by burning a fire in the sand, putting it out, then burying the medfouna in the hot sand to cook. I haven't been able to find a source to back this up though! I have made a few changes, but only to make it more like the original one I had! I also used half fillet/ half rump steak to cut the cost down.

As for a drink to go with it - Morocco is all but dry, so no alcoholic beverages for me. So instead I think I'll serve this with a glass of freshly squeezed orange juice - the Djemaa el Fna was full of vendors selling the best OJ you've EVER tasted... all for about 25p a glass!


Medfouna - or Berber Pizza!


  • 2 tsp active dried yeast
  • 1/2 tsp sugar
  • 175ml lukewarm water
  • 250g plain flour, plus extra for dusting
  • 1/2 tsp salt
  • 1 tsp caraway seeds
  • 1 onion, finely chopped
  • 1/2 large stick celery, finely chopped
  • 1 red chilli finely chopped
  • 1 handful flatleaf parsley, chopped
  • 1 small handful cilantro, chopped
  • 1 tsp ground coriander
  • 1 tsp ground cumin
  • 200g fillet steak
  • 200g rump steak
  • salt and pepper
  • 1 beaten egg, for brushing
  • sea salt flakes
  • cumin seeds

Start by activating the yeast for the dough - add the yeast and sugar to the warm water and mix to dissolve. Leave for about 10 minutes until the foam starts to form on the top of the yeasty water.

I made the dough in a mixer with the dough blade attached - but you could do it by hand if you like! Place the flour, salt and caraway seeds into the mixer and pulse a couple of times to mix. Add the yeasty water and mix for a couple of minutes - until the dough forms one big ball and the sides of the mixer are clean. Turn the dough out onto a floured work surface, and knead for five or six minutes.


I accidentally forgot to divide the dough at this point - it still worked ok, but it was harder to get a uniform shape! So, divide the dough into two equal pieces and place in bowls. Cover the bowls and leave to rise in a warm place for 30 minutes, or until the dough has doubled in size.

While the dough is rising, prepare the filling. In a pan, fry the onion, celery and chilli for a few minutes until they start to soften (I didn't fancy leaving the onion raw!). Using my mixer I pulsed the meat a few times - I wanted it still to have some texture.

Mix the onion mixture with the parsley, cilantro, coriander, ground cumin and meat into a bowl. Season with salt and freshly ground black pepper and mix well.

To build the medfouna, roll out both risen portions of dough into large rounds about the size of a dinner plate. Place one of the dough rounds onto an oiled baking tray. Place the filling on top and spread evenly, leaving a 2cm edge. Brush the edge with a little egg wash. Place the second dough round on top and press the edges gently together to seal the bread.

Brush the top with the egg wash and sprinkle lightly with sea salt and cumin seeds.

Bake in a preheated oven for about 20 minutes at 180c (350f), or until golden-brown.

Serve in slices and enjoy your Berber pizza!

Monday, 17 March 2008

Moroccan Marinated Chicken with Tabbouleh

I'm a bit late in actually publishing this one - considering I started it at the same time I wrote up my Tabbouleh recipe! And it is barely even a recipe - more just a bringing together of components!

This was my effort for last week's girlie night in - a taste of summer despite the rain that poured down for most of the week...

Moroccan Marinated Chicken with Tabbouleh


  • Chicken breasts - one per person
  • chermoula - one tbsn per person
  • a little olive oil for frying
  • tabbouleh - as much as you want!
  • optional extras - lightly toasted pita bread, hummus, wedge of lemon
Place the chicken breast between 2 sheets of clingfilm and use a rolling pin/ jam jar/ bottle of wine/ shoe to flatten it out to about 2 cm thick. (Though don't really use a shoe...)

Spread the chermoula onto the chicken breasts and massage in. (Garlic and chilli alert: wash your hands straight away! Or try this tip - massage a little olive oil into your hands and nails before you handle the sauce - this will stop the chilli/garlic oil being absorbed into your skin)

Cover and place in the fridge for at least a couple of hours - I left mine overnight.

Heat a little olive oil over a medium heat and fry the chicken for 2/3 minutes each side. Make sure there is no pink left - but be careful not to overcook or it will go tough and stringy!

Serve the chicken on top of the tabbouleh, with a wedge of lemon and some hummus and pita bread.

Friday, 14 March 2008

Yummy Scrummy AND healthy! Mmmm... Tabbouleh

Tabbouleh - the first time I tried it, I found it so-so. Nice idea, nice ingredients... but in the end, wasn't it just a bit.... bland? Some years later I visited a local Lebanese restaurant - where Tabbouleh formed part of an amazing mixed starter plate. I was shocked with it arrived. Instead of a pile of bulgar wheat, it was full of herbs, beautifully soft parsley - with just a hint of cilantro. Mmmm... I can still remember even bypassing my beloved hummus to eat it. it was that good.

So when I was deciding what to do with the rest of my chermoula, I decided to stick with the North African theme and even though the weather was cold outside, go for this beautiful salad.

It isn't entirely authentic - I do add a touch of garlic - just because I like it! And I wasn't too happy with how it turned out - there was too much tomato (and it was chopped too big), the parsley wasn't chopped quite finely enough, and my local greengrocer was out of cilantro. But after 2 hours resting in the fridge it still ended up tasting lovely!

Tabbouleh

Serves 4
  • 1 cups bulgar wheat (I used the medium grade)
  • 1 large bunch parsley, thoroughly washed
  • 3 large tomatoes (I used 5 - too much!)
  • 1 small clove of garlic (optional)
  • 1 red onion
  • Extra virgin olive oil
  • Juice of one lemon
  • Salt and pepper
Cover the bulgar wheat with cold water, and leave for 20/30 minutes. If you have a thicker grade bulgar wheat you may have to leave it longer!

Blanch and remove the skins from the tomatos. Quarter them and discard seeds before dicing finely.
Finely chop the garlic and red onion.
Using a knive, finely chop the parsley - including the stocks. I think I left about 2 inches of stock left from my bunch - you don't want the really tough bits.

Mix the herbs, tomatoes, onion and garlic with the bulgar wheat, add the lemon juice and a couple of glugs of extra virgin olive oil. Add a pinch of salt and a few grinds of black pepper.

Cover and put in the fridge for a couple of hours to let the flavours mingle. After this time, give it a good mix, taste and adjust seasoning if required.

Serve with Moroccan chicken like I did, or with hummus and pita bread for a light lunch or supper!

Wednesday, 12 March 2008

Spicy Moroccan Chermoula

Chermoula is a North African marinade, commonly used to flavour fish in Morocco, Algeria and Tunisia. There seems to be loads of regional variants - I didn't find two recipes the same when I was looking for ideas! The main basis always seemed to be lemon juice, cilantro and garlic - then I took my favourites from the other to make my own Brighton variation... hot, spicy and very garlicky! Feel free to adjust quantities to taste. I also did this using both my mortar and pestle (for the dry) and mini-blender (for the wet) - but it could be done by hand or in a blender - whatever you would usually use to make pesto I guess!

It can be used as a marinade for fish, veg or meat. I also used it as a basis for a sauce (recipe to follow!), and heard the some people use it as a seasoning! If you follow my quantities, be careful though - there is a fair whack of garlic there, and if it isn't cooked out you'll keep more than the vampires away...


Spicy Moroccan Chermoula


  • 1 large bunch cilantro
  • 5 cloves garlic
  • 2 red chillies
  • 1 lemon
  • a couple of glugs of olive oil
  • 1 tsp coriander seeds
  • 1 tsp cumin seeds
  • 1/2 tsp red chilli flakes
  • 1/2 tsp coarse sea salt
  • 1 pinch saffron
  • 1 tsp paprika
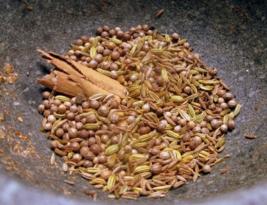
In a pan, fry off the coriander and cumin seeds until you can smell the aromas being released. Transfer to the mortar and pestle along with the salt, and grind to a fine powder.

A couple of the recipes I saw suggested picking the leaves from the cilantro, and discarding the stalks, but the Scot in me baulked at this waste - they have so much taste! Instead, I picked most of the leaves from the bunch, then blitzed the stalks to a fine purée in my mini-blender (Add a few drops of olive oil to loosen if required.)

Transfer the blitzed stalks to a small mixing bowl, along with the spices.

Now, pulse the chillies and garlic to a fairly fine purée and add to the mix. I left the seeds in because I wanted it HOT. But feel free to take them out and save your palette!

Grate the zest from the lemon, and add that, along with the juice from the lemon to the bowl.

I then finely chopped the cilantro leaves by hand. I wanted to keep some roughness to the marinade - and it only took a minute - but feel free to do this in the blender to save time :)

Now mix all the ingredients together, adding olive oil until you get the consistency you want. Again - this seems to change depending on recipe - but I decided to make mine to pesto consistency.

Very carefully, taste and adjust seasoning as required.

I read that this should keep for 3 days in the fridge - but that it is also freezable. If I'd had enough left after 2 days I would have tried to freeze it in ice-cube trays for easy defrost!